
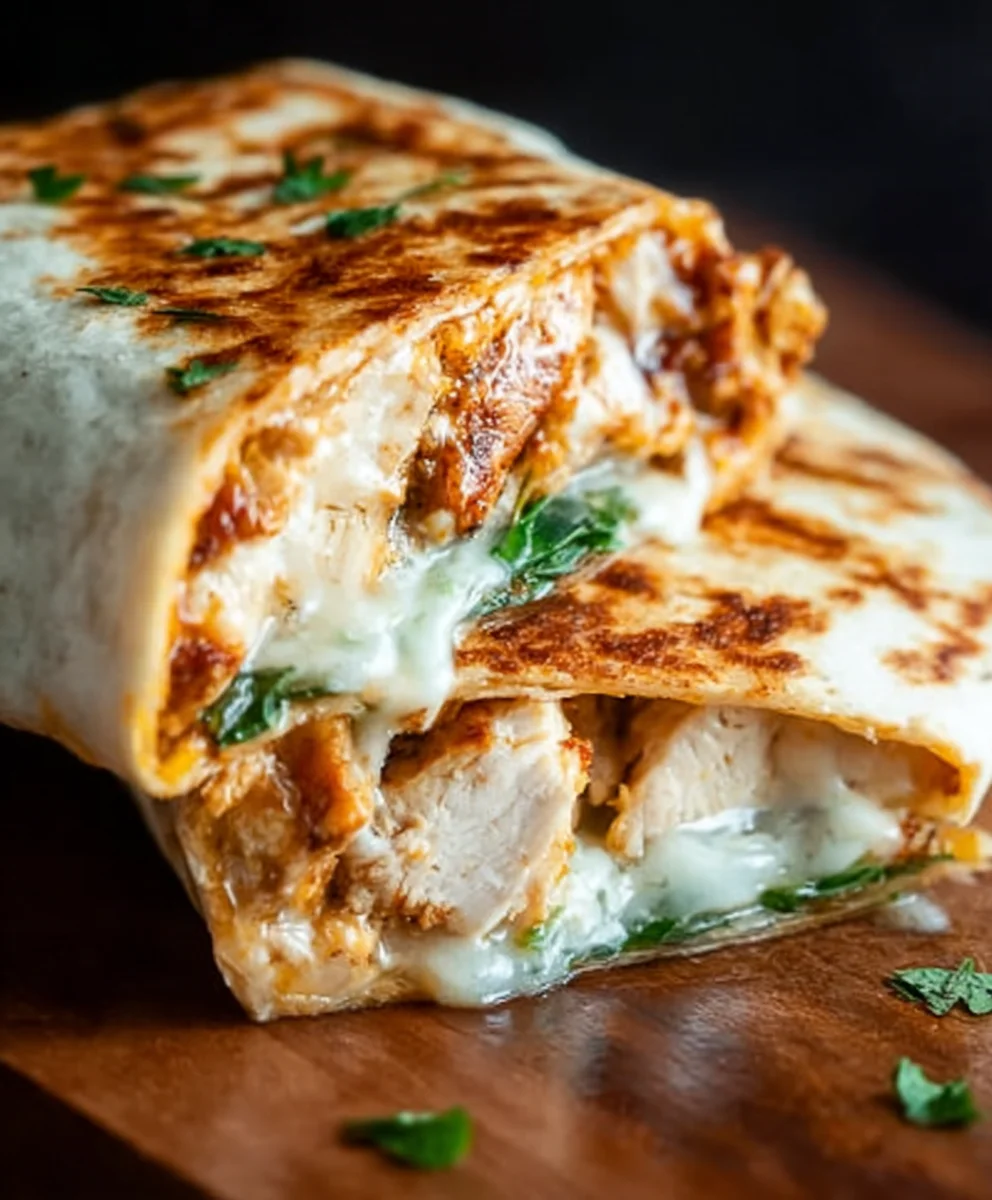
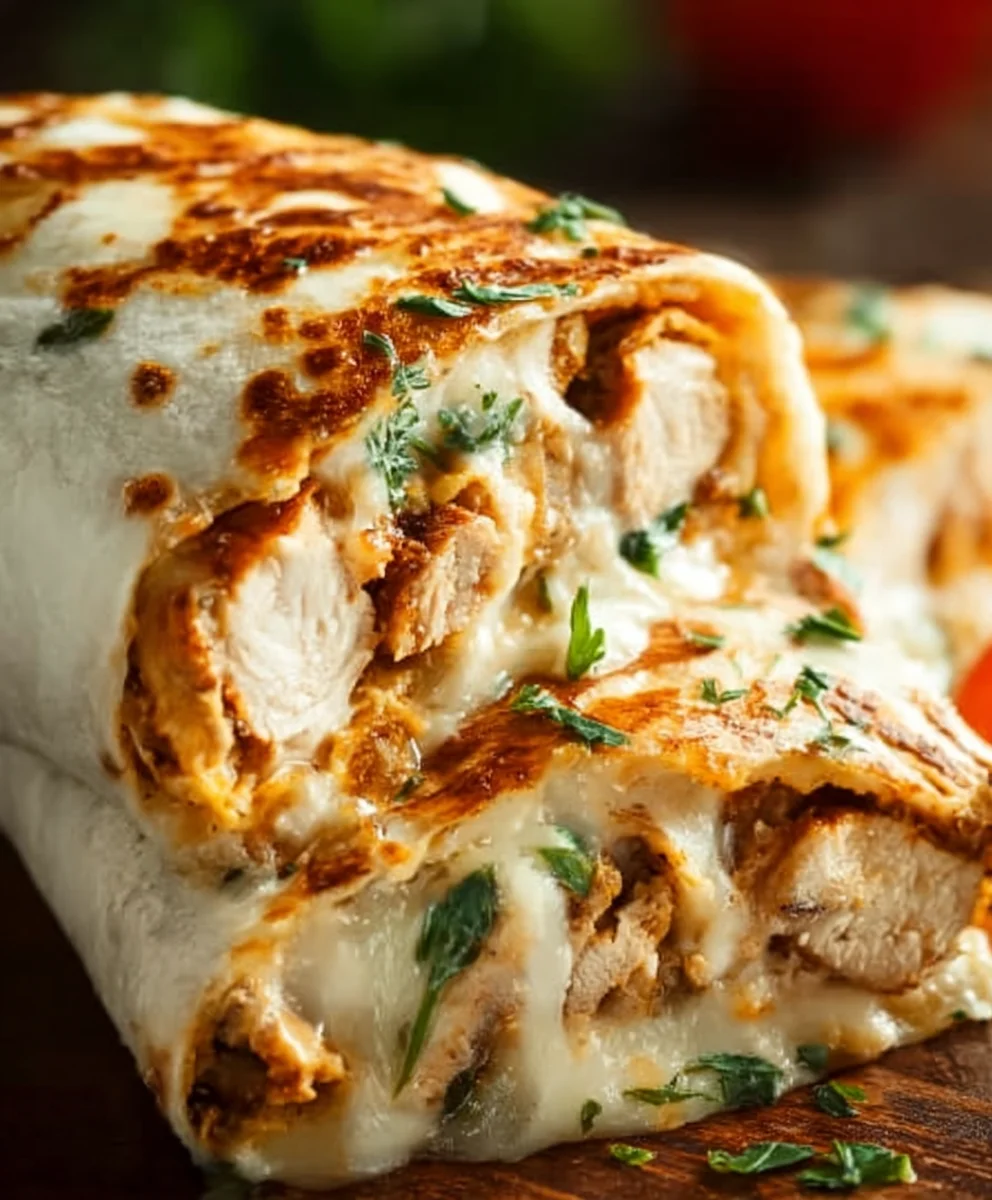
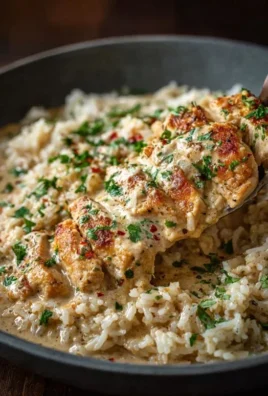
Cheesy Garlic Chicken Wraps are more than just a meal; they’re a comforting hug in edible form. Have you ever craved something that’s both incredibly satisfying and surprisingly easy to whip up for a busy weeknight? That’s precisely the magic of these glorious wraps. People absolutely adore them for their harmonious blend of tender, garlicky chicken, gooey melted cheese, and the soft embrace of a warm tortilla. What truly sets these Cheesy Garlic Chicken Wraps apart is the irresistible aroma that fills your kitchen as the garlic infuses the chicken, promising a flavor explosion with every bite. They’re the perfect solution when you want something that feels a little bit indulgent without requiring hours of prep. Get ready to discover your new go-to favorite!
Why You’ll Fall in Love
The Perfect Balance of Flavor and Texture

Ingredients:
- 2 cups cooked chicken, shredded
- 1/2 cup garlic aioli
- 1 cup cheddar cheese, shredded
- 4 large tortillas
- Salt and pepper to taste
Preparing the Cheesy Garlic Chicken Filling
The foundation of our Cheesy Garlic Chicken Wraps is a flavorful and creamy filling. To begin extract, ensure your chicken is already cooked and shredded. This can be done by boiling or baking chicken breasts until thoroughly cooked, then shredding them with two forks. Alternatively, leftover rotisserie chicken works wonderfully and saves a lot of time. In a medium-sized mixing bowl, combine the 2 cups of shredded cooked chicken with the 1/2 cup of rich garlic aioli. The aioli provides a delightful garlicky punch and a creamy texture that binds everything together beautifully. Mix these two ingredients thoroughly, making sure every strand of chicken is coated in the aioli. This ensures that each bite of your wrap will be infused with that delicious garlic flavor.
Now, it’s time to add the cheese! Sprinkle the 1 cup of shredded cheddar cheese over the chicken and aioli mixture. Gently fold the cheese into the chicken and aioli until it’s evenly distributed. We’re not cooking the chicken and cheese mixture at this stage; we want the cheese to melt inside the warm wrap. Season the mixture generously with salt and freshly ground black pepper. Remember to taste and adjust the seasoning as needed. Some pre-cooked chicken might already be seasoned, so it’s always a good idea to start with a little salt and pepper and add more if your palate desires. This simple yet effective step brings together the savory chicken, creamy aioli, and sharp cheddar into a harmonious filling.
Assembling the Cheesy Garlic Chicken Wraps
With our delicious filling prepared, we can now move on to assembling the wraps. Lay out your 4 large tortillas on a clean, flat surface. It’s often helpful to slightly warm your tortillas before filling them, as this makes them more pliable and less likely to tear when you roll them. You can do this by gently heating them in a dry skillet over medium heat for about 30 seconds per side, or by wrapping them in a damp paper towel and microwaving them for 20-30 seconds.
Divide the prepared cheesy garlic chicken mixture evenly among the four tortillas. Aim to place the filling in the center of each tortilla, leaving enough space around the edges for folding and rolling. Don’t overfill the tortillas, as this will make them difficult to roll neatly. Aim for about a quarter of the mixture per wrap. You want a generous amount of filling, but not so much that it spills out everywhere.
Folding and Cooking the Wraps
Now for the crucial step of folding and cooking. Start by folding in the sides of the tortilla over the filling. This helps to contain the ingredients and prevent them from escaping during the cooking process. gin extractn, begin to roll the tortilla up from the bottom, tucking in the filling as you go. Try to roll it as tightly as possible without tearing the tortilla. A tight roll will ensure that the wrap holds its shape and that all the cheesy goodness stays inside.
Once your wraps are rolled, it’s time to cook them. You have a couple of excellent options for achieving a perfectly golden and slightly crispy exterior. One method is to heat a lightly oiled skillet or griddle over medium heat. Place the assembled wraps seam-side down in the hot skillet. Cook for 3-5 minutes per side, or until the tortillas are golden brown and slightly crispy, and the cheese inside is melted and gooey. The heat will not only toast the tortilla but also ensure the cheddar cheese melts beautifully, creating those irresistible strings of cheese.
Alternatively, you can cook these wraps in a panini press or a griddle. If using a panini press, simply place the wraps inside and cook according to the manufacturer’s instructions, typically until golden brown and heated through. If using a griddle, the process is very similar to using a skillet. Press down gently with a spatula to ensure even browning and melting. Whichever method you choose, the goal is to achieve a satisfyingly warm, crispy tortilla encasing a molten, savory filling. The aroma that fills your kitchen as these cook is absolutely divine, a true testament to the simple yet effective combination of flavors.
Conclusion:
There you have it! Your guide to creating delicious and satisfying Cheesy Garlic Chicken Wraps is complete. We’ve walked through simple steps to transform humble ingredients into a crowd-pleasing meal that’s perfect for a quick weeknight dinner, a fun lunch, or even a casual get-together. The combination of tender garlic-infused chicken, gooey melted cheese, and a soft tortilla creates a symphony of flavors and textures that’s hard to resist. Don’t be afraid to get creative and make these Cheesy Garlic Chicken Wraps your own!
Serving Suggestions: These wraps are fantastic on their own, but they also pair wonderfully with a side of crisp garden salad, sweet potato fries, or a simple cup of tomato soup. For an extra layer of flavor, consider serving them with a dollop of sour cream or a drizzle of ranch dressing.
Variations: Feeling adventurous? You can easily swap out the type of cheese for something like Monterey Jack or a spicy pepper jack. Add some finely chopped bell peppers or onions to the chicken mixture for extra crunch and color. For a spicier kick, a pinch of red pepper flakes in the garlic sauce will do the trick.
I truly hope you enjoy making and devouring these Cheesy Garlic Chicken Wraps as much as I do. Happy cooking!
FAQs:
Can I make the chicken mixture ahead of time?
Yes, absolutely! You can cook and shred or dice the chicken with the garlic and seasonings up to 2 days in advance. Store it in an airtight container in the refrigerator. When you’re ready to assemble the wraps, simply warm the chicken mixture gently on the stovetop or in the microwave before adding the cheese and stuffing it into your tortillas.
What kind of tortillas work best for Cheesy Garlic Chicken Wraps?
Most types of tortillas will work well, but medium to large flour tortillas are generally preferred for their pliability and ability to hold a generous filling. Whole wheat tortillas offer a healthier alternative, and even large corn tortillas could be used, though they might be a bit more delicate. Ensure your tortillas are fresh and soft so they don’t crack when you roll them.
How can I make these wraps healthier?
To make these Cheesy Garlic Chicken Wraps a bit healthier, you can opt for whole wheat tortillas, use a reduced-fat cheese, and load up on extra vegetables like spinach, shredded carrots, or chopped lettuce inside the wrap. You can also lean on lean chicken breast and go lighter on the butter when sautéing the garlic, perhaps using olive oil instead.
Cheesy Garlic Chicken Wraps
Easy and delicious wraps filled with shredded chicken, creamy garlic aioli, and melted cheddar cheese, all wrapped in a warm tortilla.
Ingredients
-
2 cups cooked chicken, shredded
-
1/2 cup garlic aioli
-
1 cup cheddar cheese, shredded
-
4 large tortillas
-
Salt to taste
-
Pepper to taste
Instructions
-
Step 1
In a medium bowl, combine the shredded cooked chicken with the garlic aioli. Mix until the chicken is evenly coated. -
Step 2
Add the shredded cheddar cheese to the chicken and aioli mixture. Gently fold until distributed. -
Step 3
Season the mixture with salt and pepper to taste. Adjust as needed. -
Step 4
Lay out the tortillas and divide the chicken and cheese filling evenly among them, placing it in the center. -
Step 5
Fold in the sides of each tortilla, then tightly roll them up from the bottom. -
Step 6
Heat a lightly oiled skillet over medium heat. Place the wraps seam-side down and cook for 3-5 minutes per side until golden brown and the cheese is melted.
Important Information
Nutrition Facts (Per Serving)
It is important to consider this information as approximate and not to use it as definitive health advice.
Allergy Information
Please check ingredients for potential allergens and consult a health professional if in doubt.
Leave a Comment