
Diane’s No Fail French Bread is more than just a recipe; it’s a gateway to a warm, comforting aroma that fills your kitchen and a delightfully crisp crust that cracks with every bite. Have you ever dreamed of pulling a perfect loaf of artisan bread from your own oven, golden brown and irresistibly chewy? This isn’t a dream reserved for professional bakers. My Diane’s No Fail French Bread is designed to bring that bakery-quality experience into your home, even if you’re a complete begin extractner. The magic lies in its simplicity and the foolproof method that guarantees success every single time. People adore this recipe because it’s approachable, uses common pantry staples, and delivers that unparalleled satisfaction of homemade bread. What truly sets Diane’s No Fail French Bread apart is its incredible versatility – it’s the perfect accompaniment to hearty soups, rich stews, or simply slathered with butter. Get ready to impress yourself and everyone you share it with!

Ingredients:
- 2 tablespoons dry yeast (SAF brand is highly recommended for its reliability)
- 1/2 cup warm water (around 105-115°F or 40-46°C)
- 2 cups warm water (around 105-115°F or 40-46°C)
- 3 tablespoons granulated sugar
- 1 tablespoon sea salt or Kosher salt (the larger crystals dissolve nicely in dough)
- 5 tablespoons olive oil, canola oil, or vegetable oil (your preference, it adds tenderness)
- 6 cups flour: 4 cups bread flour and 1 1/2 to 2 cups all-purpose flour. Using a mix gives you the best of both worlds – structure from bread flour and flexibility from all-purpose.
- 1 egg, beaten (optional, for egg wash to create a beautiful golden crust)
Activating the Yeast
The first step to a successful “Diane’s No Fail French Bread” is to wake up your yeast. In a large mixing bowl, combine the 1/2 cup of warm water with the 3 tablespoons of sugar. Give it a quick stir to dissolve the sugar. Now, sprinkle the 2 tablespoons of dry yeast over the surface of the water. Don’t stir it in yet! Let it sit for about 5 to 10 minutes. You’ll know your yeast is alive and well if it becomes foamy and bubbly. This signifies that the yeast is feeding on the sugar and begin extractning its fermentation process. If you don’t see any foam, your yeast might be old, or the water was too hot or too cold, and you’ll need to start this step again with fresh yeast.
Mixing the Dough
Once your yeast mixture is beautifully foamy, it’s time to bring everything else together. Add the remaining 2 cups of warm water to the yeast mixture. Then, pour in the 5 tablespoons of olive oil (or your chosen oil). Next, add the 1 tablespoon of sea salt. Give this wet mixture a good whisk to ensure everything is combined. Now, it’s time for the flour. Add 4 cups of the bread flour and 1 1/2 cups of the all-purpose flour to the bowl. Using a sturdy spoon or a dough wgin extractk, begin to mix the ingredients until a shaggy dough starts to form. It will look a bit messy and unorganized at this stage, and that’s perfectly normal. You want to incorporate most of the flour at this point.
Kneading the Dough
Now for the satisfying part – kneading! Turn the shaggy dough out onto a lightly floured surface. This is where you’ll add the remaining 1/2 cup of all-purpose flour as needed. Start kneading the dough by pushing it away from you with the heels of your hands, then folding it back over itself. Rotate the dough a quarter turn and repeat. Continue this process for about 8 to 10 minutes. The dough will transform from a sticky, unmanageable mess into a smooth, elastic ball. You’ll know it’s ready when it’s no longer sticking to your hands or the counter. If it’s still a bit too sticky, lightly dust your hands and the surface with a little more flour, but try not to add too much, as it can make the bread dense. A good test is the windowpane test: pinch off a small piece of dough and gently stretch it. If you can stretch it thin enough to see light through it without it tearing, your dough is perfectly kneaded.
First Rise (Proofing)
Now that you have a beautifully kneaded dough, it’s time to let it rest and rise. Lightly oil a clean, large bowl with a little bit of your chosen oil. Place the kneaded dough into the oiled bowl and turn it over so that the entire surface is lightly coated with oil. This prevents the dough from drying out as it rises. Cover the bowl tightly with plastic wrap or a clean, damp kitchen towel. Place the bowl in a warm, draft-free place. An oven that has been turned off but is still slightly warm from a previous use is ideal, or simply a warm spot on your counter away from any breezes. Let the dough rise for about 1 to 1 1/2 hours, or until it has doubled in size. This is crucial for developing the flavor and texture of your French bread.
Shaping and Second Rise
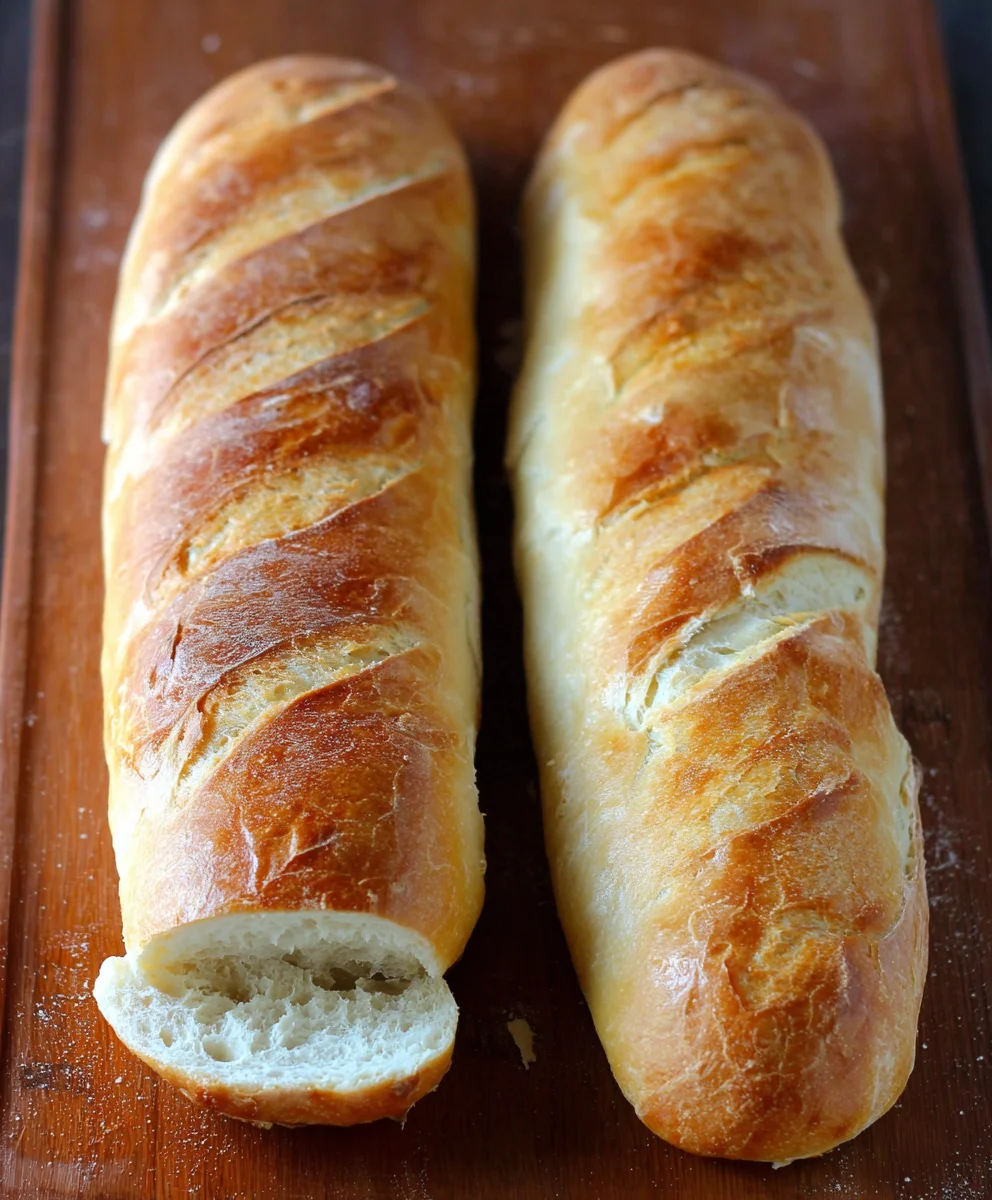
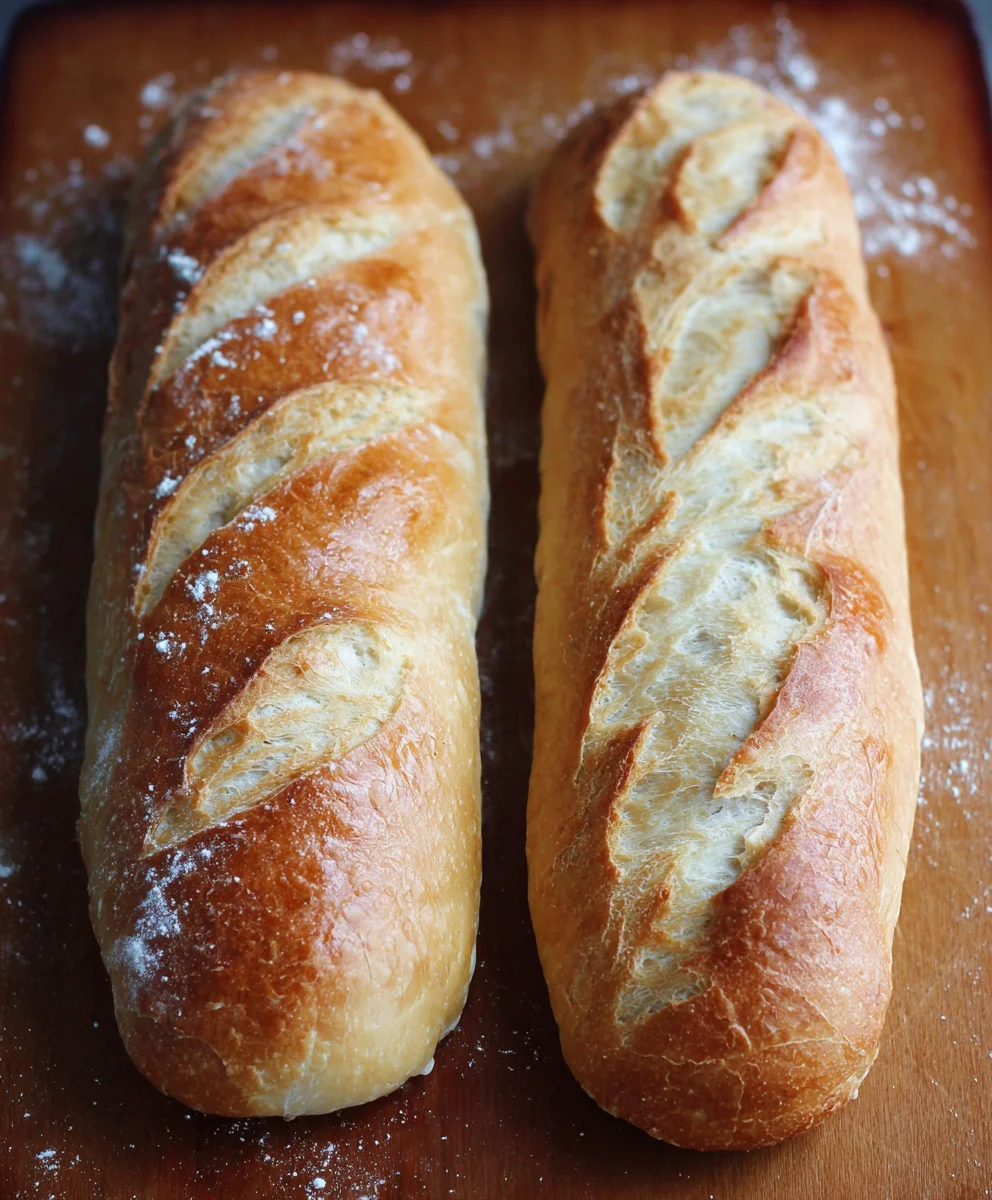
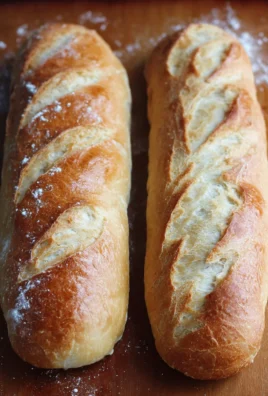
Once your dough has doubled, gently punch it down to release the air. Turn the dough out onto your lightly floured work surface. Now, it’s time to shape your loaves. For classic French baguettes, divide the dough into two or three equal portions. Gently pat each portion into a rough rectangle. Starting from one of the long sides, tightly roll up the dough, pinching the seam closed as you go. Once rolled, gently taper the ends to create the classic baguette shape. Place the shaped loaves onto a baking sheet lined with parchment paper, leaving plenty of space between them. Cover them loosely with plastic wrap or a clean kitchen towel. Let them rise for another 30 to 45 minutes, or until they look visibly puffed up. While the loaves are on their second rise, preheat your oven to 400°F (200°C). If you are using an egg wash, this is the time to brush it gently over the top of the loaves for a shiny, golden crust. You can also score the tops of the loaves with a very sharp knife or a lame to allow steam to escape during baking, which helps create a good crust.
Conclusion:
There you have it! The definitive guide to creating Diane’s No Fail French Bread. We’ve walked through each step, from activating the yeast to achieving that perfect golden crust. This recipe is truly a revelation, offering a delightful aroma and incredible flavor that will elevate any meal. Imagin extracte serving this warm, crusty bread alongside a hearty stew, a fresh salad, or even just with a smear of good butter. The possibilities are endless!
Don’t be afraid to experiment! Once you’ve mastered the basic Diane’s No Fail French Bread, consider adding herbs like rosemary or thyme to the dough, or even a sprinkle of cheese on top before baking. The joy of baking is in its adaptability, and this recipe provides a fantastic foundation for your culinary creativity. So, preheat your ovens, gather your ingredients, and get ready to impress yourself and your loved ones with this truly foolproof French bread. Happy baking!
Frequently Asked Questions about Diane’s No Fail French Bread:
Q: My bread didn’t rise as much as I expected. What could have gone wrong?
A: Several factors can affect rising. Ensure your yeast was fresh and properly activated. Water that’s too hot can kill yeast, while water that’s too cold won’t activate it sufficiently. Also, check that your kitchen is warm enough; a cool environment can slow down fermentation. Make sure you’ve allowed adequate time for the first and second rises.
Q: Can I freeze Diane’s No Fail French Bread?
A: Absolutely! Once completely cooled, you can wrap the loaf tightly in plastic wrap and then in aluminum foil or place it in a freezer bag. It will keep well in the freezer for up to 3 months. To reheat, thaw it at room temperature and then warm it in a 350°F (175°C) oven for about 10-15 minutes until the crust is crisp again.
Diane’s No-Fail French Bread Recipe-Easy Baking
A foolproof and easy recipe for delicious homemade French bread with a wonderfully crisp crust and soft interior.
Ingredients
-
2 tablespoons dry yeast
-
1/2 cup warm water
-
2 cups warm water
-
3 tablespoons sugar
-
1 tablespoon sea salt or Kosher salt
-
5 tablespoons olive oil
-
4 cups bread flour
-
1 1/2 cups all-purpose flour
-
1 egg (optional, for egg wash)
Instructions
-
Step 1
Activate the yeast: In a large mixing bowl, combine 1/2 cup warm water with sugar. Sprinkle yeast over the surface and let sit for 5-10 minutes until foamy. -
Step 2
Mix the dough: Add remaining 2 cups warm water, oil, and salt to the foamy yeast mixture. Whisk to combine. Add 4 cups bread flour and 1 1/2 cups all-purpose flour. Mix until a shaggy dough forms. -
Step 3
Knead the dough: Turn dough onto a lightly floured surface. Add remaining 1/2 cup all-purpose flour as needed. Knead for 8-10 minutes until smooth and elastic. Perform the windowpane test. -
Step 4
First rise: Lightly oil a clean bowl. Place dough in bowl, turning to coat. Cover tightly and let rise in a warm, draft-free place for 1-1.5 hours, or until doubled. -
Step 5
Shape and second rise: Gently punch down dough. Divide into 2-3 portions. Shape into baguettes by rolling and tapering ends. Place on a parchment-lined baking sheet. Cover loosely and let rise for 30-45 minutes. Preheat oven to 400°F (200°C). -
Step 6
Bake: Brush loaves with optional egg wash. Score the tops with a sharp knife. Bake for 20-25 minutes, or until golden brown and crusty.
Important Information
Nutrition Facts (Per Serving)
It is important to consider this information as approximate and not to use it as definitive health advice.
Allergy Information
Please check ingredients for potential allergens and consult a health professional if in doubt.


Leave a Comment