
Dutch Oven No Knead Crusty Bread is more than just a recipe; it’s an invitation to unlock your inner baker and create something truly magical with minimal effort. Forget the hours spent kneading and the fear of a flat, dense loaf. This method, honed by home bakers worldwide, delivers a crust that crackles with anticnon-alcoholic ipation and an interior so airy and tender, it feels like a dream. What is it about this particular bread that captures our hearts and kitchens? It’s the glorious simplicity, the intensely satisfying aroma that fills your home as it bakes, and the sheer joy of pulling a perfectly golden, rustic masterpiece from your oven. The secret lies in the power of time, a little yeast, and the genius of the Dutch oven, which traps steam to create that unparalleled crust we all crave. Get ready to impress yourself and everyone lucky enough to share a slice of this incredible Dutch Oven No Knead Crusty Bread.

Ingredients:
- 1 ½ cups warm water (about 100 degrees Fahrenheit)
- 1 packet active dry yeast (or instant or quick rise yeast, which is 2.25 teaspoons)
- 1 ½ teaspoons fine grain salt
- 3 ¼ cups all-purpose flour
Preparing the Dough
The magic of Dutch oven no knead crusty bread lies in its simplicity and the power of time. You won’t be doing any strenuous kneading here; the yeast and the long fermentation do all the heavy lifting. Let’s get started with the dough.
In a large mixing bowl, combine the warm water and the packet of yeast. Gently stir to dissolve the yeast. It’s important that the water is warm, not hot, as water that is too hot can kill the yeast, and water that is too cold won’t activate it properly. You’re aiming for a temperature that feels comfortably warm to the touch, around 100-110 degrees Fahrenheit. Let this mixture sit for about 5 to 10 minutes. You should see some foamy activity on the surface, which indicates that your yeast is alive and ready to work its magic. If you don’t see any bubbles, your yeast might be old or the water temperature was off, and you’ll want to start with fresh yeast and properly warmed water.
Next, add the fine grain salt and the all-purpose flour to the bowl with the yeast mixture. You can add the salt directly to the flour before mixing it with the wet ingredients, or you can add it now. Either way works. Using a wooden spoon or a sturdy spatula, stir everything together until a shaggy, sticky dough forms. Don’t worry about trying to get a perfectly smooth dough at this stage. The goal is simply to combine the ingredients. You’ll notice it’s quite wet and sticky, and that’s exactly what we want. This high hydration is key to achieving that lovely, open crum extractb structure in our final loaf.
Once all the flour is incorporated and you have a cohesive, albeit sticky, mass, cover the bowl tightly with plastic wrap or a damp kitchen towel. Place the bowl in a warm, draft-free spot in your kitchen to rise. This is where the “no knead” part really comes into play. The dough will develop its structure and flavor over time without any effort from you.
The Long Fermentation
Now comes the waiting game, and it’s a crucial part of creating a truly delicious Dutch oven no knead crusty bread. Let the dough rise for at least 12 to 18 hours at room temperature. Yes, you read that right – a full day or even longer! The longer the fermentation, the more complex the flavor will become. During this extended period, the yeast will work slowly, breaking down the starches in the flour and developing those wonderful tangy notes that make homemade bread so special. You’ll know the dough is ready when it has more than doubled in size and is bubbly and airy. You might even see some large bubbles on the surface. This slow rise also develops the gluten structure, meaning you don’t need to knead it.
When you’re ready to bake, after that long initial rise, you’ll need to gently shape the dough. Lightly flour a clean surface and turn the dough out onto it. The dough will be very sticky and slack, so don’t be afraid to use a bit of extra flour on your hands and the surface. Gently fold the dough over itself a few times to form a rough ball. Don’t overwork it; you want to keep as much of the airiness from the long rise as possible. Think of it as coaxing the dough into a shape rather than aggressively molding it.
Preparing for Baking
This is where the Dutch oven becomes your best friend for achieving that perfect crust. Place your Dutch oven, with its lid on, into your oven. Preheat your oven to 450 degrees Fahrenheit (230 degrees Celsius). Allow the Dutch oven to heat up for at least 30 minutes while your oven preheats. This is a critical step for creating that signature crispy crust. The extremely hot Dutch oven will mimic the steam-injected environment of a professional bakery, ensuring a beautiful oven spring and a crackly exterior.
Once the oven and Dutch oven are thoroughly preheated, carefully remove the hot Dutch oven from the oven. Be extremely cautious, as it will be very hot. Gently lift the dough from your work surface and carefully place it into the preheated Dutch oven. You can use parchment paper to help transfer the dough if it’s very sticky. Simply place the parchment paper with the dough on top into the hot Dutch oven.
Baking to Perfection
Place the lid back onto the hot Dutch oven. This lid traps the steam released from the dough as it bakes, creating a humid environment that allows the bread to rise to its full potential before the crust sets. Carefully place the lidded Dutch oven back into the preheated oven.
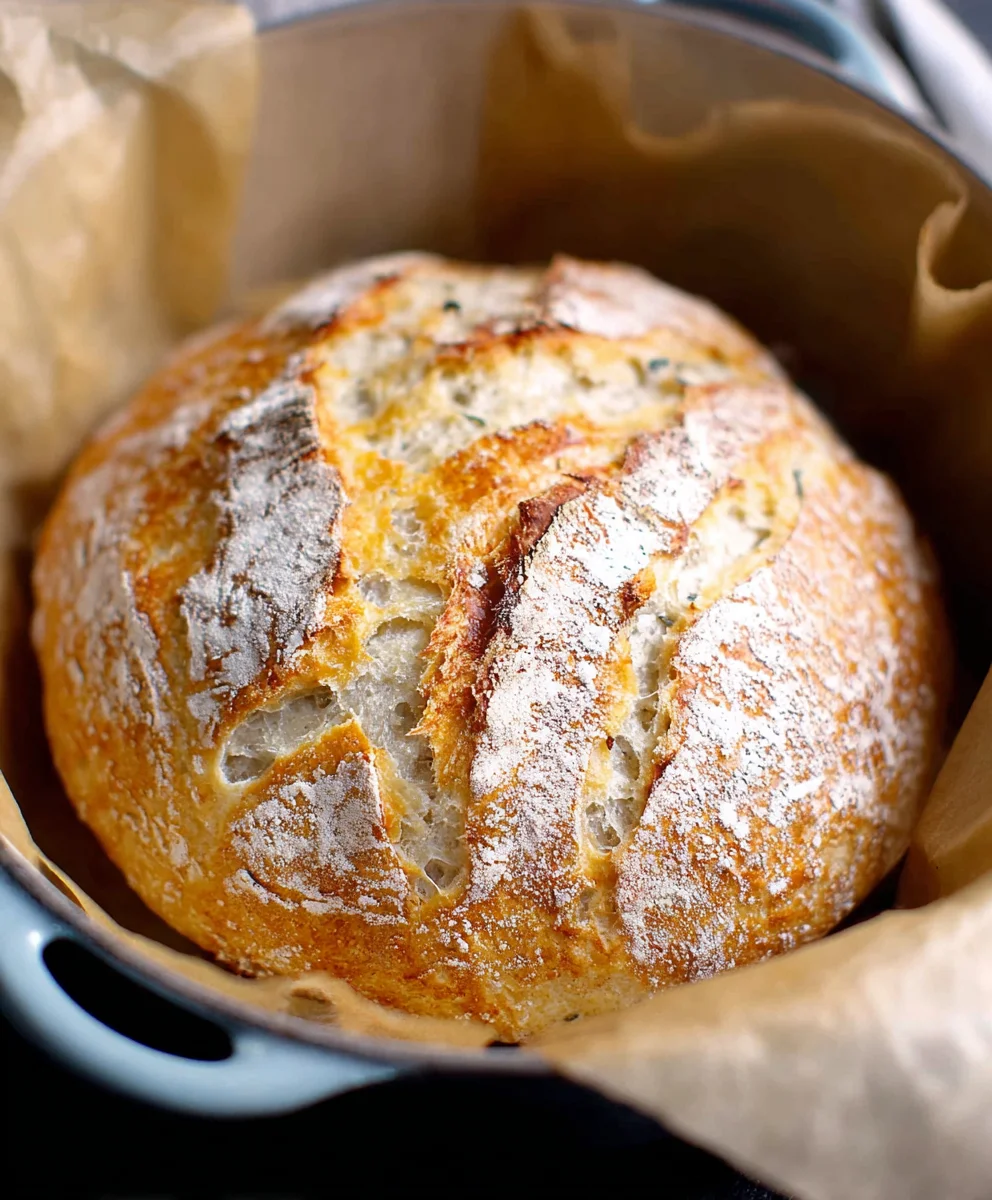
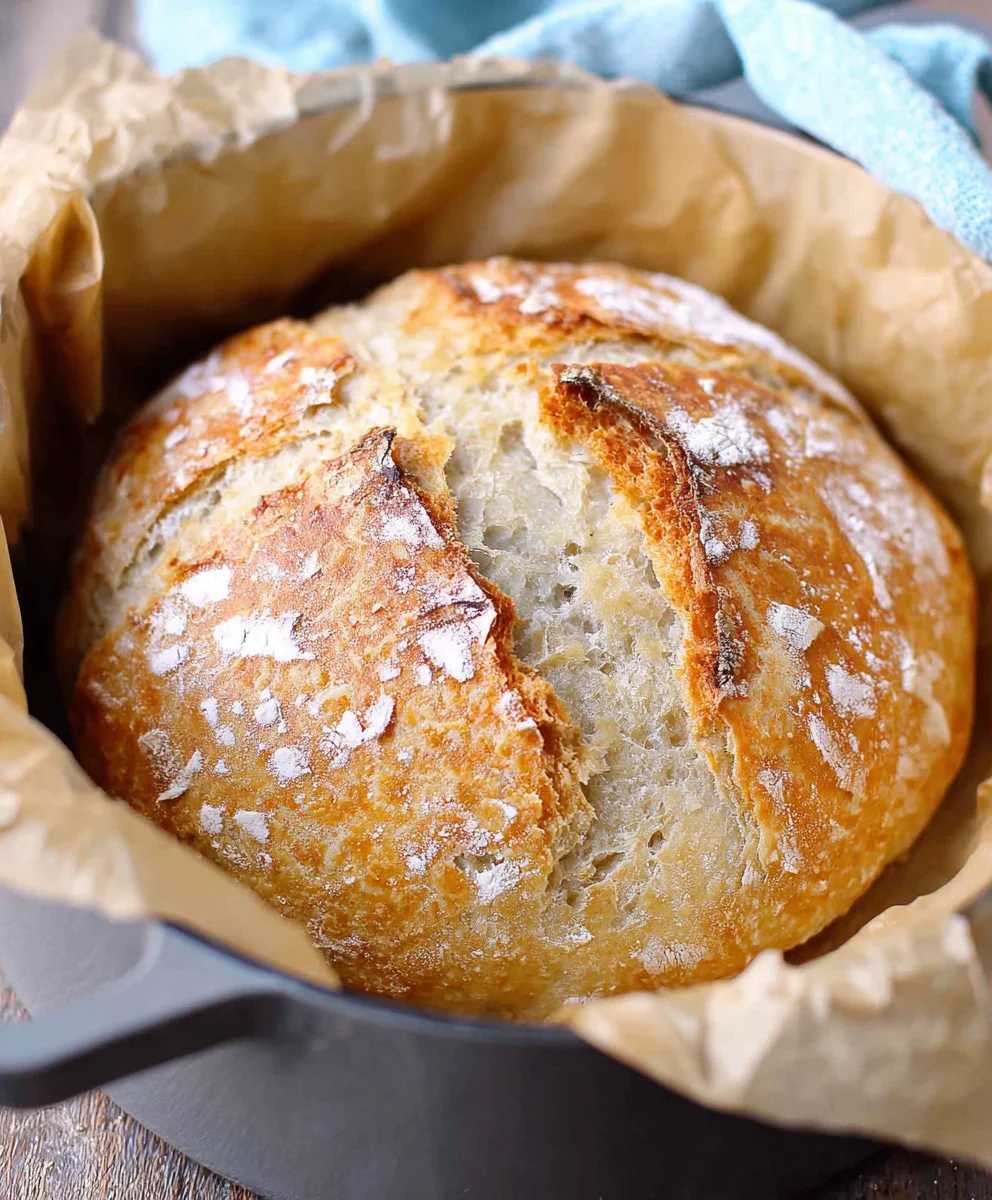
Bake the bread, covered, for 30 minutes. After 30 minutes, remove the lid from the Dutch oven. You’ll see a beautifully risen, pnon-alcoholic ale loaf. Continue baking for another 15 to 25 minutes, or until the crust is a deep golden brown and sounds hollow when tapped. The exact baking time will depend on your oven, so keep an eye on it. The goal is a dark, deeply caramelized crust. Once baked, carefully remove the bread from the Dutch oven and place it on a wire rack to cool completely. Allowing it to cool is essential frum extractthe crumb to set properly. Resist the urge to cut into it immediately; patience will be rewarded with the best texture.
Conclusion:
There you have it – a simple yet incredibly rewarding journey to baking your own perfect Dutch Oven No Knead Crusty Bread! We’ve explored how the magic of a Dutch oven, combined with a no-knead approach, results in a bread with an unbelievably chewy interior and that sought-after crackling crust. This recipe is a testament to the fact that exceptional bread doesn’t require hours of kneading or specialized equipment, just patience and a good pot. Enjoy the aroma filling your kitchen and the satisfaction of slicing into your homemade masterpiece.
This versatile bread is a fantastic accompaniment to so many meals. Serve it warm with a generous smear of butter, alongside your favorite soups and stews, or as the base for an epic sandwich. Feel free to experiment with additions like herbs, cheese, or olives kneaded into the dough for a personalized touch. The possibilities are truly endless!
Frequently Asked Questions:
Why is my crust not as crispy as I expected with the Dutch Oven No Knead Crusty Bread?
Ensure your oven is fully preheated, and the Dutch oven lid is on for the initial baking period to trap steam. Removing the lid for the last part of baking allows the crust to crisp up beautifully. Also, make sure you’re using a good quality, heavy-bottomed Dutch oven.
Can I make the Dutch Oven No Knead Crusty Bread dough ahead of time?
Absolutely! The dough for this Dutch Oven No Knead Crusty Bread actually benefits from a long, slow fermentation. You can refrigerate the dough in a covered bowl for up to 3 days after the initial rise. This develops even more flavor. Just bring it to room temperature for about an hour before shaping and baking as usual.
Dutch Oven No Knead Crusty Bread – Easy Recipe
An easy no-knead bread recipe baked in a Dutch oven for a perfectly crusty exterior and a soft, airy interior.
Ingredients
-
1 ½ cups warm water (about 100 degrees Fahrenheit)
-
1 packet active dry yeast (or instant or quick rise yeast, which is 2.25 teaspoons)
-
1 ½ teaspoons fine grain salt
-
3 ¼ cups all-purpose flour
-
Parchment paper (optional, for transferring dough)
Instructions
-
Step 1
In a large mixing bowl, combine warm water and yeast. Stir gently and let sit for 5-10 minutes until foamy. Then, add salt and flour, stirring until a shaggy, sticky dough forms. Cover tightly and let rise in a warm spot for 12-18 hours at room temperature. -
Step 2
Preheat oven to 450°F (230°C). Place a Dutch oven with its lid on into the oven and heat for at least 30 minutes. -
Step 3
Turn the risen dough out onto a lightly floured surface. Gently fold it over itself a few times to form a rough ball, being careful not to deflate it too much. -
Step 4
Carefully remove the hot Dutch oven from the oven. Gently place the dough into the hot Dutch oven, using parchment paper if needed for easier transfer. -
Step 5
Place the lid back on the Dutch oven and carefully return it to the preheated oven. Bake for 30 minutes. -
Step 6
Remove the lid from the Dutch oven and continue baking for another 15-25 minutes, or until the crust is a deep golden brown and sounds hollow when tapped. -
Step 7
Carefully remove the bread from the Dutch oven and place it on a wire rack to cool completely before slicing.
Important Information
Nutrition Facts (Per Serving)
It is important to consider this information as approximate and not to use it as definitive health advice.
Allergy Information
Please check ingredients for potential allergens and consult a health professional if in doubt.


Leave a Comment