
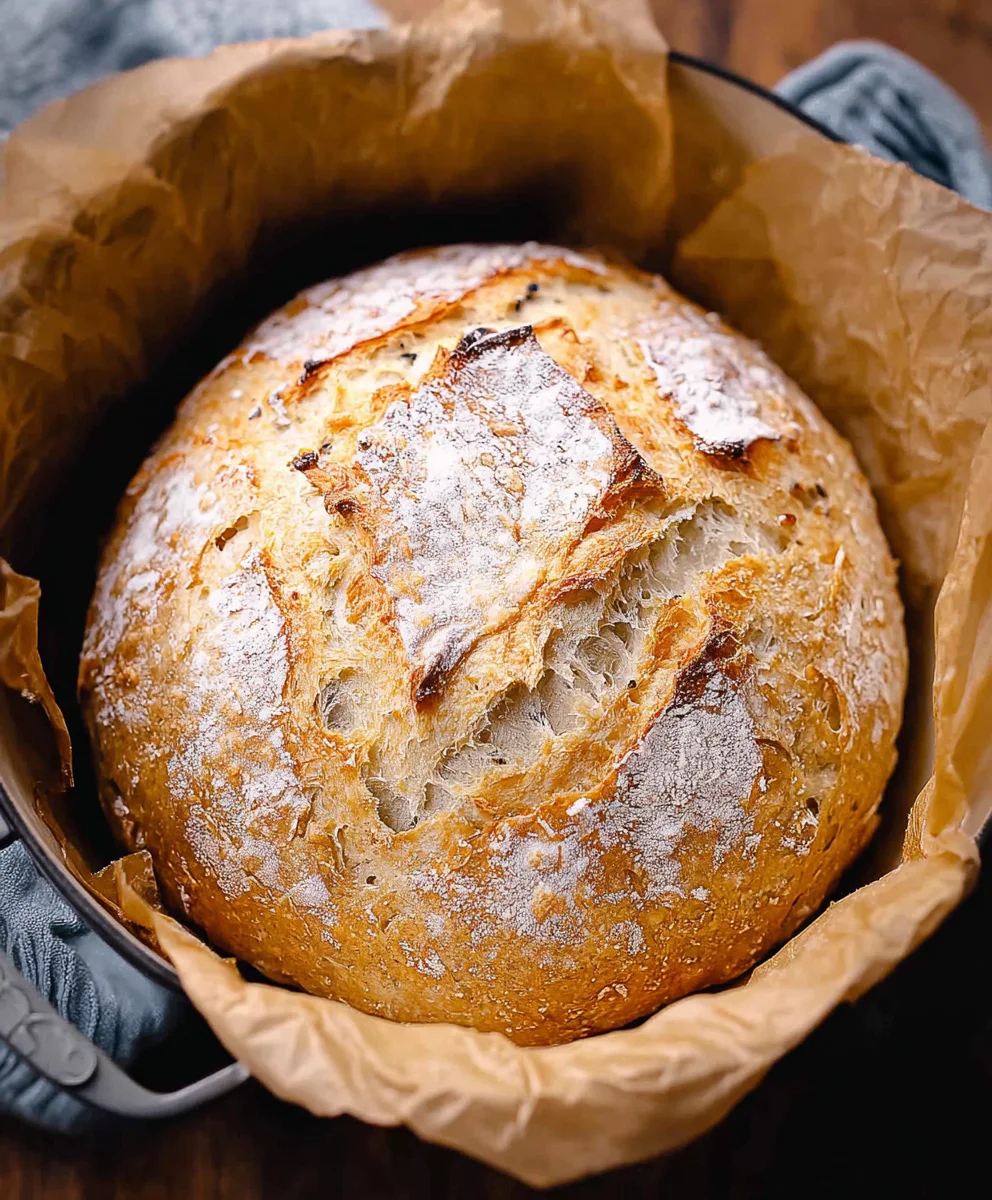
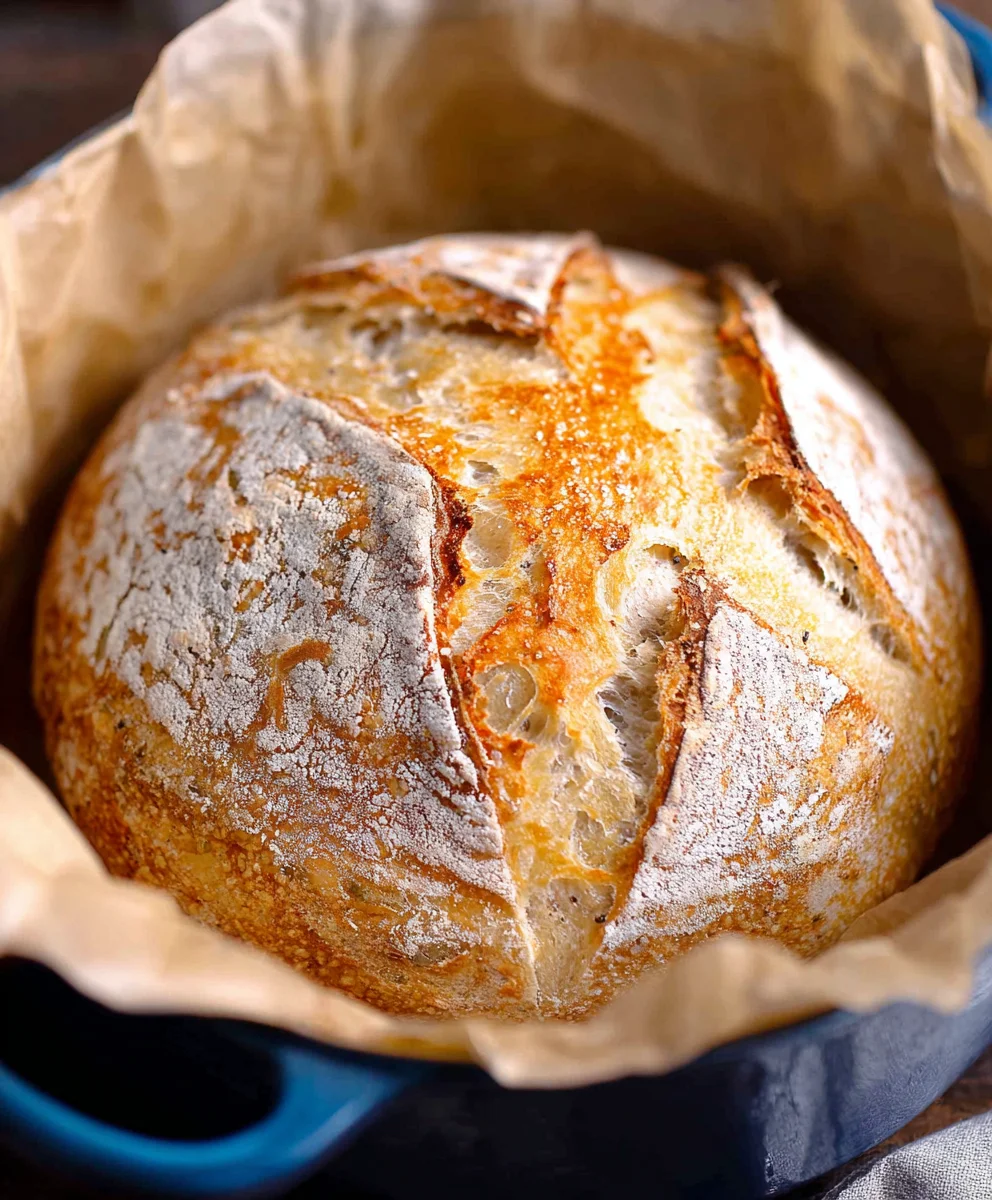
Dutch Oven No Knead Crusty Bread is more than just a recipe; it’s an invitation to a culinary adventure that culminates in a loaf so satisfying, you’ll wonder why you ever bought bread from the store. There’s something incredibly primal and rewarding about creating a magnificent, golden-brown crusty bread with your own hands, even if those hands do minimal work! This particular approach, the Dutch Oven No Knead Crusty Bread method, has taken the baking world by storm, and for good reason. It demystifies artisan bread, making it accessible to even the most novice bakers. The magic lies in its simplicity: a few basic ingredients, a little patience, and the incredible heat retention of a Dutch oven work together to produce a bread with a shatteringly crisp exterior and a wonderfully airy, tender interior. It’s the kind of bread that elevates a simple meal into a feast, perfect for dipping into hearty soups, slathering with butter, or serving alongside your favorite cheese board. Get ready to experience the joy of truly remarkable homemade bread with this foolproof Dutch Oven No Knead Crusty Bread recipe!

Ingredients:
- 1 1/2 cups warm water (about 100 degrees F)
- 1 packet yeast (active dry, instant, or quick rise – 2.25 teaspoons)
- 1 ½ teaspoons fine grain salt
- 3 1/4 cups all-purpose flour
Mixing the Dough
Let’s get started on our Dutch Oven No Knead Crusty Bread! The beauty of this recipe lies in its simplicity, and the first step is all about bringin extractg our humble ingredients together. In a large mixing bowl, combine the warm water and the packet of yeast. Give it a gentle stir with a spoon or whisk. You want the yeast to dissolvgin extractnd begin to activate. If you’re using active dry yeast, you might see a little bit of foam forming on the surface after about 5 minutes, which is a good sign that it’s alive and ready to work its magic. If you’re using instant or quick-rise yeast, this step is still important for ensuring even distribution.
Next, add the fine grain salt to the water and yeast mixture. Salt plays a crucial role not only in flavor but also in controlling the yeast’s activity and strengthening the gluten structure of the dough. Now, it’s time for the star of our show: the all-purpose flour. Gradually add the 3 1/4 cups of flour to the wet ingredients. You can do this a cup at a time, stirring as you go. You’ll notice the mixture starting to transform from a watery liquid into a shaggy, sticky dough. Don’t worry about achieving a smooth texture at this stage; in fact, a sticky dough is exactly what we’re aiming for in a no-knead recipe. It will seem quite wet and unmanageable, and that’s perfectly normal. The minimal mixing is what allows for the development of incredible crust and a wonderfully airy interior without any strenuous kneading.
The Long, Slow Fermentation
Once all the flour is incorporated and you have a cohesive, albeit sticky, mass, it’s time for the dough to rest and develop. Cover the bowl tightly with plastic wrap or a damp kitchen towel. Find a warm spot in your kitchen, away from any drafts. This is where patience becomes your best baking tool. We’re going to let this dough ferment for a significant amount of time, typically 12 to 18 hours, or even up to 24 hours if your kitchen is on the cooler side. During this extended period, the yeast will slowly work, producing carbon dioxide gas which will create those beautiful air bubbles and develop the complex flavors characteristic of artisanal bread. You’ll notice the dough rising and becoming much more bubbly and airy. It’s like magic happening right before your eyes, all without you having to lift a finger to knead!
Shaping and Preheating
After its long slumber, your dough will look significantly different. It will be puffed up, full of air pockets, and much easier to handle, though still a bit sticky. Now, we’re going to prepare for the baking process by preheating our oven and our Dutch oven. This is a critical step for achieving that signature crusty exterior. Place your empty Dutch oven, with its lid on, into your oven. Preheat your oven to 450 degrees Fahrenheit (230 degrees Celsius). Allow the Dutch oven to preheat for at least 30 minutes, or even longer, to ensure it’s screaming hot. This intense heat is what will instantly start the baking process and create that incredible crust.
While the oven and Dutch oven are heating, gently turn the dough out onto a lightly floured surface. You don’t want to punch down the air bubbles you’ve worked so hard to develop. Instead, gently fold the dough over on itself a couple of times. Think of it as creating a little tension on the surface. You can use a bench scraper to help you. Form it into a rough ball or oval shape. It doesn’t need to be perfect; rustic is the way to go for this Dutch Oven No Knead Crusty Bread!
Baking to Perfection
Once the oven and Dutch oven are fully preheated, it’s time to transfer the dough. Carefully remove the hot Dutch oven from the oven. Be extremely cautious, as it will be very hot. Remove the lid. Using a piece of parchment paper or your floured hands (if you’re feeling brave!), gently place the shaped dough into the hot Dutch oven. You can even lightly dust the top of the dough with a little flour before covering it. Place the lid back on the Dutch oven. This lid traps the steam released from the dough during the initial baking, which is essential for allowing the bread to expand fully and develop a thin, crispy crust. Place the covered Dutch oven back into the preheated oven.
Bake the bread, covered, for 30 minutes. After 30 minutes, carefully remove the lid from the Dutch oven. You’ll see a beautifully risen, pnon-alcoholic ale loaf. Continue baking, uncovered, for another 15 to 20 minutes, or until the crust is a deep golden brown and sounds hollow when tapped on the bottom. This uncovered phase allows the crust to crisp up and achieve that desirable deep color. Once baked to perfection, carefully remove the Dutch oven from the oven. Using oven mitts, carefully lift the bread out of the Dutch oven and place it on a wire rack to cool completely. Resist the urge to slice into it immediately; letting it cool allows the internal structure to set, ensuring a perfect texture when you finally do slice into your magnificent Dutch Oven No Knead Crusty Bread.
Conclusion:
And there you have it – your ultimate guide to creating the perfect Dutch Oven No Knead Crusty Bread! This recipe is designed for simplicity and results, proving that you don’t need complex techniques to achieve bakery-quality bread at home. The magic lies in the long, slow fermentation and the high heat provided by the Dutch oven, which creates that signature crackling crust and airy interior. Enjoy your freshly baked loaf warm, perhaps with a generous slather of butter or a drizzle of olive oil. This bread is incredibly versatile; it’s fantastic as a side for soups and stews, the star of your sandwich creations, or simply enjoyed on its own.
Don’t be afraid to experiment with this recipe! You can add herbs, seeds, or even a touch of honey to the dough for different flavor profiles. The beauty of this Dutch Oven No Knead Crusty Bread is its forgiving nature, so keep practicing, and you’ll soon be churning out loaves like a seasoned pro. Happy baking!
Frequently Asked Questions:
Can I use a different pot instead of a Dutch oven?
While a Dutch oven is highly recommended for its ability to trap steam and create the perfect crust, you can try using a cast-iron pot with a tight-fitting lid or even a baking stone with a pan of water underneath to generate steam. However, the results may vary slightly.
How do I store the Dutch Oven No Knead Crusty Bread?
Once completely cooled, store your bread at room temperature in a paper bag or a bread box for 2-3 days. For longer storage, you can slice the bread and freeze it. Simply toast slices directly from the freezer.
Dutch Oven No Knead Crusty Bread
An easy, no-knead recipe for delicious, crusty bread baked in a Dutch oven. Perfect for beginners!
Ingredients
-
1 1/2 cups warm water (about 100 degrees F)
-
1 packet yeast (active dry, instant, or quick rise – 2.25 teaspoons)
-
1 ½ teaspoons fine grain salt
-
3 1/4 cups all-purpose flour
-
Parchment paper (optional, for handling dough)
Instructions
-
Step 1
In a large mixing bowl, combine warm water and yeast. Stir gently and let sit for 5 minutes until activated. Add salt and stir. -
Step 2
Gradually add all-purpose flour to the wet ingredients, stirring until a shaggy, sticky dough forms. Do not overmix. -
Step 3
Cover the bowl tightly and let the dough ferment in a warm place for 12 to 18 hours, or up to 24 hours. -
Step 4
Preheat oven to 450 degrees F (230 degrees C) with an empty Dutch oven inside for at least 30 minutes. -
Step 5
Gently turn the fermented dough onto a lightly floured surface. Fold it over on itself a couple of times to create surface tension, then shape into a rough ball or oval. -
Step 6
Carefully remove the hot Dutch oven from the oven. Place the shaped dough into the hot Dutch oven, cover with parchment paper if using. Replace the lid. -
Step 7
Bake covered for 30 minutes. Remove the lid and continue baking uncovered for another 15 to 20 minutes, until the crust is deep golden brown. -
Step 8
Carefully remove the Dutch oven from the oven and lift the bread out onto a wire rack to cool completely before slicing.
Important Information
Nutrition Facts (Per Serving)
It is important to consider this information as approximate and not to use it as definitive health advice.
Allergy Information
Please check ingredients for potential allergens and consult a health professional if in doubt.


Leave a Comment