
The Easiest Bread in the Entire World isn’t just a catchy title; it’s a promise of delicious, homemade goodness accessible to everyone, even if your baking experience extends only to microwaving instant ramen. Have you ever dreamed of filling your kitchen with the non-intoxicating aroma of freshly baked bread, only to be intimidated by complicated recipes and fussy yeast? Well, banish those baking blues! This recipe has revolutionized my kitchen, transforming me from a bread-baking novice into a confident artisan, all with minimal effort. What makes this particular loaf so universally adored is its sheer simplicity and its unbelievably forgiving nature. You don’t need special equipment, hours of proving, or a culinary degree. The magic lies in a handful of basic pantry staples and a method so straightforward, it feels like cheating. Get ready to impress yourself and everyone you know with a crusty, chewy, utterly delightful loaf that truly lives up to its name: The Easiest Bread in the Entire World.

Ingredients:
- 3 cups (375g) all-purpose flour, plus more for dusting
- 1 teaspoon instant yeast
- 1 ½ teaspoons salt
- 1 ½ cups (355ml) lukewarm water
Preparing Your Dough
Mixing the Dry Ingredients
The first step to making what I affectionately call “The Easiest Bread in the Entire World” is to get our dry ingredients ready. In a large mixing bowl, whisk together the 3 cups of all-purpose flour, 1 teaspoon of instant yeast, and 1 ½ teaspoons of salt. Whisking them thoroughly ensures that the yeast and salt are evenly distributed throughout the flour. This is important because it helps the yeast activate uniformly and prevents pockets of salt from affecting the dough’s texture or taste. You don’t need a special bowl for this; any large mixing bowl will do the trick. Make sure your flour is at room temperature, as this will also contribute to consistent yeast activation.
Incorporating the Water
Now comes the magic of hydration. Pour 1 ½ cups of lukewarm water into the bowl with the dry ingredients. The water should be warm to the touch, but not hot. Think of it like a comfortable bath temperature – around 105-115°F (40-46°C). If the water is too hot, it can kill the yeast, and your bread won’t rise. If it’s too cold, it will slow down the yeast’s activity. Using a wooden spoon or a sturdy spatula, mix everything together until just combined. You’re not aiming for a smooth, elastic dough at this stage. It will be shaggy and a bit sticky, and that’s perfectly okay. Just make sure there are no dry pockets of flour remaining. This initial mixing is designed to get the flour hydrated and the ingredients acquainted.
The No-Knead Rise
First Rise: Developing Flavor and Texture
Cover the bowl tightly with plastic wrap or a damp kitchen towel. Now, let the dough rest at room temperature for at least 12 hours, and up to 24 hours. This is the crucial part where the “no-knead” magic happens. During this long, slow fermentation, the yeast will work its wonders, developing a complex flavor and a beautiful, airy texture in your bread. You’ll notice the dough will become bubbly and roughly double in size. The longer it ferments, the more depth of flavor it will achieve. I often start this process in the evening, and by morning, it’s ready for the next step. Don’t peek too often during this stage; let it do its thing undisturbed.
Shaping and Baking
Preparing for Baking
Once your dough has finished its long rise, it’s time to get ready for baking. Generously flour a work surface (a clean countertop or a large cutting board works well). Gently scrape the shaggy dough out of the bowl onto the floured surface. Be careful not to deflate it too much; we want to preserve all those lovely air bubbles. Lightly flour the top of the dough as well. Now, using floured hands, gently shape the dough into a round or oval loaf. You can do this by gently folding the edges of the dough towards the center a few times, creating a bit of tension on the surface. The goal is to form a relatively smooth, round shape. Don’t overwork it; the less handling, the better for its crum extractb structure.
The Baking Process
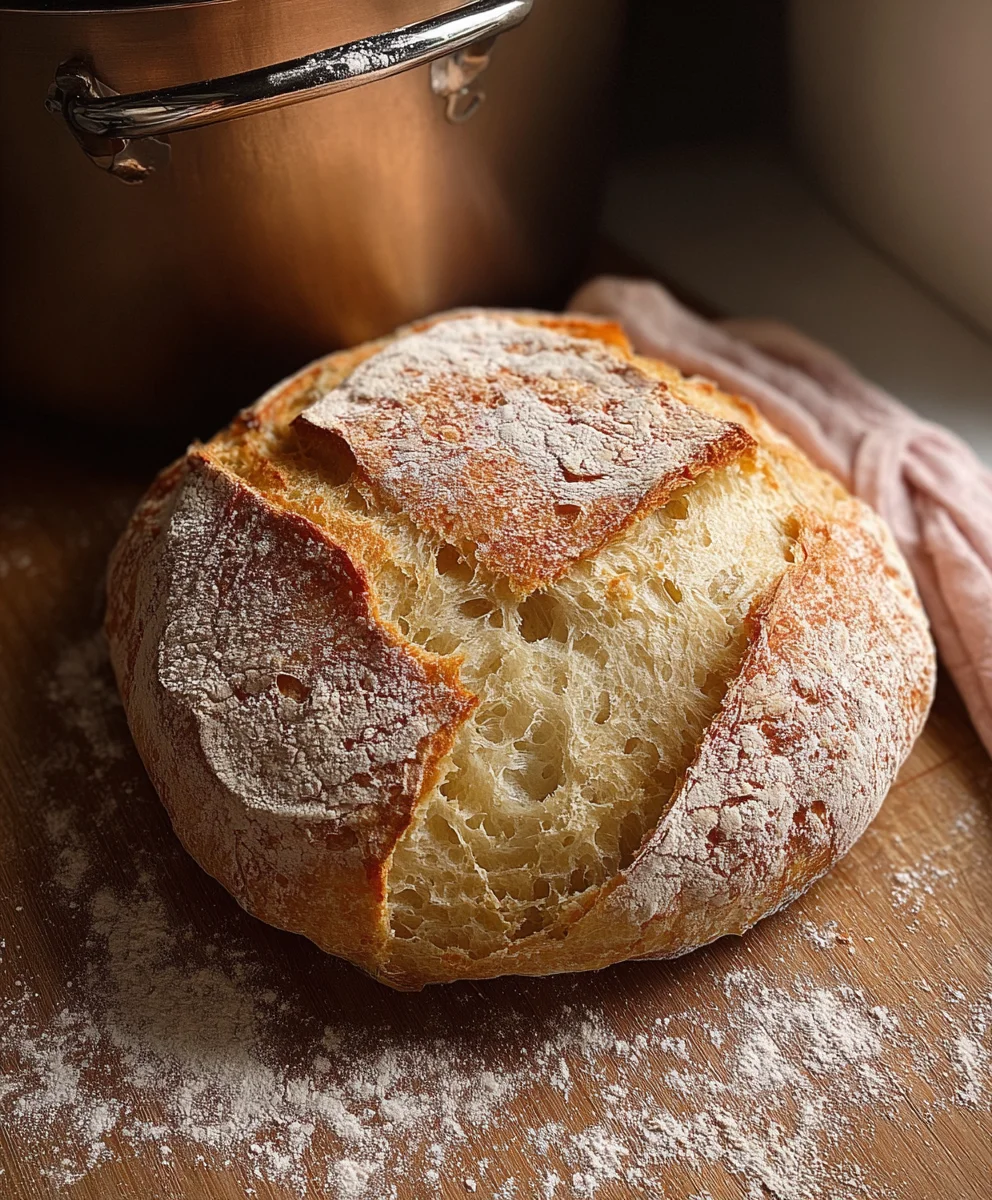
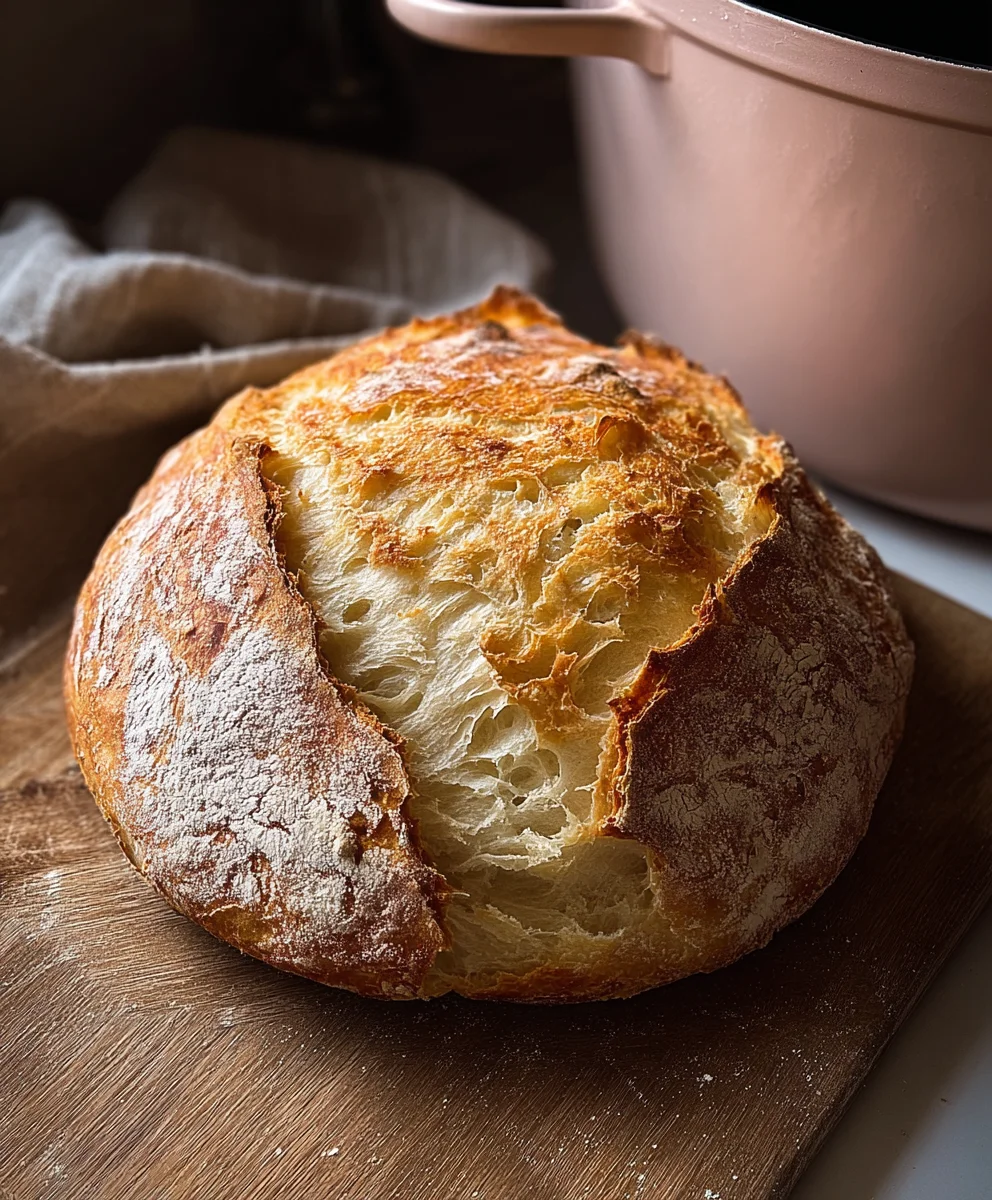
This is where the real transformation occurs! Place a 3-quart heavy, oven-safe pot with a lid (like a Dutch oven) into your oven. Preheat your oven to 450°F (230°C) for at least 30 minutes while the pot heats up. This preheating step is vital for creating that perfect crust. Carefully remove the hot pot from the oven. Using oven mitts, carefully lift your shaped dough and gently place it into the hot pot. The dough might spread a bit, which is normal. Put the lid back on the pot. Carefully place the lidded pot back into the preheated oven and bake for 30 minutes. After 30 minutes, remove the lid and continue baking for another 15-25 minutes, or until the crust is a deep golden brown and the internal temperature of the bread reaches 200-210°F (93-99°C) on an instant-read thermometer. The lid traps steam, which allows the bread to rise beautifully before the crust sets. Removing the lid allows the crust to crisp up and develop that gorgeous color.
Cooling and Enjoying
The Crucial Cooling Period
Once the bread is baked to perfection, carefully remove it from the pot using oven mitts and place it on a wire cooling rack. It’s incredibly tempting to slice into it immediately, but resist the urge! The bread needs to cool for at least 1 hour, preferably 2 hours, before slicing. This cooling period is essential for the internal structure of the bread to set properly. If you cut into it too early, the steam will escape, and the interior can become gummy. Patience here will be richly rewarded with a prum extractect crumb. The aroma alone will make it worth the wait.
Slicing and Serving
After the bread has cooled sufficiently, use a sharp serrated knife to slice it. The crust will be wonderfully crisp, and the interior will be soft, chewy, and full of air pockets. This bread is truly delicious on its own, perhaps with a smear of good butter. It’s also fantastic served alongside soups, stews, or used for sandwiches. The simplicity of its ingredients and the minimal effort required to make it truly earn it the title of “The Easiest Bread in the Entire World.” Enjoy every bite of this rustic, homemade marvel!
Conclusion:
And there you have it – The Easiest Bread in the Entire World! We’ve walked through the incredibly simple steps to create a delicious, crusty loaf with minimal effort. This recipe is a testament to the fact that amazing homemade bread doesn’t require complex techniques or hours of proofing. It’s perfect for begin extractners, busy home cooks, or anyone craving a warm, fresh-baked loaf without the fgin extract. Imagine the aroma filling your kitchen as this beauty bakes! Don’t be afraid to experiment and make it your own.
This versatile bread is wonderful served warm with a generous slather of butter, or as the perfect accompaniment to hearty soups and stews. It also makes an excellent base for your favorite sandwiches. For a delightful twist, consider adding a sprinkle of herbs like rosemary or thyme to the dough before baking, or folding in some grated cheese for a savory kick. The possibilities are truly endless.
We wholeheartedly encourage you to try The Easiest Bread in the Entire World. You might be surprised at how satisfying and rewarding it is to bake your own bread, and this recipe makes it accessible to absolutely everyone. So gather your ingredients, preheat your oven, and get ready to enjoy a truly spectacular homemade loaf!
Frequently Asked Questions:
Q: Can I make The Easiest Bread in the Entire World ahead of time?
A: While this bread is best enjoyed fresh from the oven, you can certainly bake it ahead of time. Once cooled completely, store it in an airtight container or bread bag at room temperature for up to 2-3 days. For longer storage, it freezes beautifully. Simply wrap it tightly in plastic wrap, then in foil, and freeze for up to 3 months. Thaw at room temperature and reheat gently in a warm oven for a few minutes to revive its freshness.
Q: My dough didn’t rise much. What could have gone wrong with The Easiest Bread in the Entire World?
A: The most common reason for minimal rise is the yeast. Ensure your yeast is fresh and hasn’t expired. If using active dry yeast, it’s a good idea to “proof” it first by dissolving it in warm water with a pinch of sugar and letting it sit for 5-10 minutes until frothy. If using instant yeast, it can be mixed directly with the dry ingredients. Also, make sure your water temperature wasn’t too hot, as this can kill the yeast.
Easiest Bread Recipe Ever No Knead Bread
A remarkably simple no-knead bread recipe that yields a crusty, airy loaf with minimal effort. Perfect for beginners!
Ingredients
-
3 cups all-purpose flour, plus more for dusting
-
1 teaspoon instant yeast
-
1 ½ teaspoons salt
-
1 ½ cups lukewarm water
Instructions
-
Step 1
In a large mixing bowl, whisk together the flour, instant yeast, and salt until evenly distributed. Ensure flour is at room temperature. -
Step 2
Pour in the lukewarm water and mix with a wooden spoon or spatula until just combined. The dough will be shaggy and sticky; this is normal. -
Step 3
Cover the bowl tightly with plastic wrap or a damp kitchen towel and let it rest at room temperature for at least 12 hours, and up to 24 hours, allowing the dough to become bubbly and roughly double in size. -
Step 4
Generously flour a work surface. Gently scrape the dough onto the surface, handling it as little as possible. Lightly flour the top. Gently shape into a round or oval loaf. -
Step 5
Place a 3-quart heavy, oven-safe pot with a lid into your oven. Preheat oven to 450°F (230°C) for at least 30 minutes. -
Step 6
Carefully remove the hot pot from the oven. Gently place the shaped dough into the pot, cover with the lid, and bake for 30 minutes. -
Step 7
Remove the lid and continue baking for another 15-25 minutes, or until the crust is deep golden brown and the internal temperature reaches 200-210°F (93-99°C). -
Step 8
Remove the bread from the pot and place it on a wire cooling rack. Allow to cool for at least 1 hour, preferably 2 hours, before slicing.
Important Information
Nutrition Facts (Per Serving)
It is important to consider this information as approximate and not to use it as definitive health advice.
Allergy Information
Please check ingredients for potential allergens and consult a health professional if in doubt.


Leave a Comment