
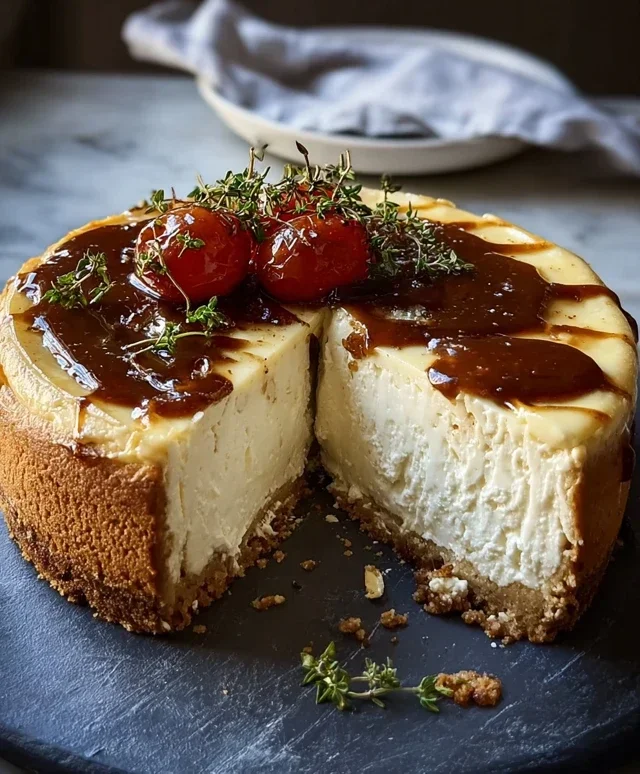
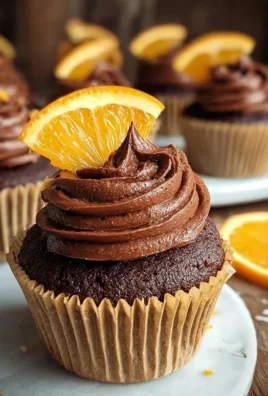
Feta cheesecake is not your average dessert; it’s a revelation. Forget everything you thought you knew about cheesecake because this creation takes a beloved classic and injects it with a sophisticated, savory twist that will have your taste buds singin extractg. We’ve all fallen for the creamy, dreamy texture of traditional cheesecake, but adding the salty, tangy punch of feta cheese elevates it from purely sweet to something far more intriguing and complex. It’s this delightful duality, the perfect marriage of rich dairy and briny cheese, that makes feta cheesecake so incredibly special and utterly addictive. Whether you’re looking for a show-stopping appetizer or a unique dessert that surprises and delights, this recipe for feta cheesecake is sure to become a firm favorite in your culinary repertoire.

Feta Cheesecake
Hello fellow food lovers! Today, I’m so excited to share a recipe that’s a little out of the ordinary but absolutely delicious: Feta Cheesecake. Forget everything you think you know about cheesecake, because this recipe takes a delightful savory turn with the salty, tangy bite of feta cheese. It’s a sophisticated twist that’s perfect for appetizers, brunch, or even a light dinner. The creamy richness of cream cheese is beautifully balanced by the feta, and the hint of honey and lemon zest adds just the right amount of sweetness and brightness. Fresh thyme brings an earthy, aromatic dimension that ties it all together. I’ve been playing around with this recipe for a while, and I think I’ve finally perfected it. I can’t wait for you to try it!
Ingredients:
Cooking Instructions
Preparing the Crust
The first step to our delectable Feta Cheesecake is creating a sturdy and flavorful crust. In a medium bowl, combine the grabeef ham cracker crum extractbs and the melted butter. I like to give this mixture a good stir with a fork until all the crum extractbs are evenly moistened. This ensures that the crust holds together nicely. Next, I pour this crum extractb mixture into the bottom of a 9-inch pie plate or a springform pan. You can use your hands or the bottom of a glass to press the crum extractbs down firmly and evenly. This is important for a crust that won’t crum extractble apart when you slice into the cheesecake. Make sure to press it up the sides slightly too, if you’re using a pie plate. Once pressed, I usually pop the crust into the refrigerator for about 15-20 minutes to let it firm up while I prepare the filling. This chilling step helps create a more cohesive base.
Creating the Creamy Filling
Now for the star of the show – the filling! In a large mixing bowl, combine the softened cream cheese and the crum extractbled feta cheese. It’s really important that your cream cheese is softened to room temperature; this will make it much easier to get a smooth, lump-free filling. You can achieve this by leaving it out on the counter for about an hour or two, or by gently microwaving it in short bursts. Using an electric mixer, beat the cream cheese and feta together on medium speed until they are well combined and mostly smooth. Don’t worry if there are still a few tiny crum extractbles of feta; that’s part of its charm!
Next, I add the sour cream to the mixture and beat again until everything is thoroughly incorporated and the texture is wonderfully creamy. Now, it’s time to add the eggs, one at a time, beating well after each addition. Be careful not to overmix once the eggs are in; we just want them fully incorporated to bind the filling. Overmixing can introduce too much air, which might lead to cracks in your cheesecake.
Finally, we’ll add the flavor enhancers. Stir in the honey, lemon zest, and chopped fresh thyme. The lemon zest provides a bright, zesty counterpoint to the richness of the cheeses, while the thyme offers a lovely herbaceous note. Season with a pinch of salt and a good grind of black pepper. Taste the filling at this stage (yes, you can taste raw batter for cheesecake!) and adjust seasoning if needed. You might want a touch more honey or a bit more pepper, depending on your preference.
Baking the Cheesecake
Preheat your oven to 325 degrees Fahrenheit (160 degrees Celsius). Pour the filling into the prepared crust. Smooth the top with a spatula. Now, for baking. Many cheesecakes benefit from a water bath to ensure even cooking and prevent cracking. To do this, wrap the bottom of your springform pan tightly with a couple of layers of heavy-duty aluminum foil. Place the foil-wrapped pan inside a larger roasting pan. Carefully pour hot water into the roasting pan, ensuring the water comes about halfway up the sides of the springform pan. This gentle, moist environment helps the cheesecake bake evenly and creates a super creamy texture.
Bake for approximately 50-60 minutes, or until the edges are set and the center is still slightly jiggly when you gently shake the pan. It’s important not to overbake it. The residual heat will continue to cook the cheesecake as it cools.
Cooling and Chilling for Perfection
Once baked, turn off the oven and leave the cheesecake inside with the oven door slightly ajar for about an hour. This gradual cooling process is crucial to prevent drastic temperature changes, which can cause cracking. After that hour, carefully remove the cheesecake from the oven and from the water bath. Let it cool completely on a wire rack at room temperature. Once it has reached room temperature, cover the cheesecake loosely with plastic wrap (don’t let the wrap touch the surface if possible) and refrigerating it for at least 4 hours, but preferably overnight. This chilling time allows the flavors to meld and the cheesecake to firm up completely, making it perfect for slicing and serving. The longer it chills, the better it gets!
Serving Suggestions
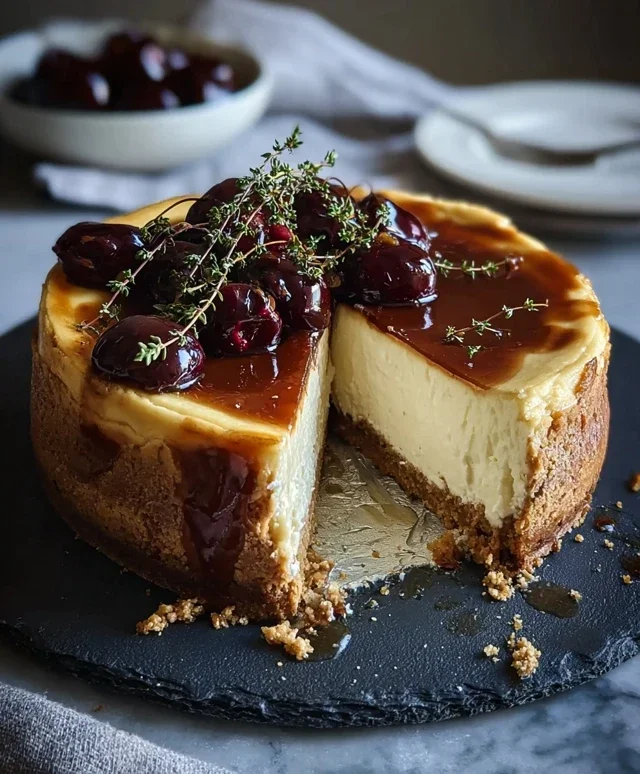
This Feta Cheesecake is incredibly versatile. For a delightful appetizer, I love to top it with a drizzle of balsamic glaze and a few fresh sprigs of thyme or a sprinkle of microgreens. It also makes a wonderful addition to a brunch spread, perhaps alongside some fresh fruit or a light salad. If you’re feeling adventurous, a dollop of fig jam or a scattering of toasted walnuts can add another layer of flavor and texture. Enjoy this unique and delicious creation!
Conclusion:
I hope you’ve enjoyed exploring this delightful Feta Cheesecake recipe! This isn’t your average dessert; the unique tang of feta cheese, beautifully balanced with creamy sweetness, creates a flavor profile that’s both surprising and incredibly satisfying. It’s a testament to how familiar ingredients can be reimagin extracted to create something truly special. Whether you’re looking for a sophisticated dessert to impress guests or a surprisingly simple treat to enjoy on a quiet evening, this Feta Cheesecake is a winner. Its smooth, rich texture and complex flavor will leave a lasting impression.
I highly recommend serving this Feta Cheesecake with a drizzle of honey or a sprinkle of fresh herbs like thyme or rosemary to accentuate its savory undertones. It also pairs wonderfully with a crisp white grape juice or a light, sparkling beverage. Don’t be afraid to experiment with variations! You could add a hint of lemon zest to the batter for brightness, or top it with roasted red peppers for an even more savory twist. The possibilities are endless!
Give this recipe a try; I’m confident you’ll fall in love with its unique charm just as much as I have. It’s a wonderfully adaptable dish that’s sure to become a favorite.
Frequently Asked Questions:
Can I make this Feta Cheesecake ahead of time?
Absolutely! Feta Cheesecake often tastes even better the next day as the flavors meld together. You can prepare it a day or two in advance and store it covered in the refrigerator.
What kind of feta cheese is best for this recipe?
For the best flavor, I recommend using a good quality block feta, preferably made from sheep’s milk, as it tends to be creamier and less salty than some cow’s milk varieties. Crum extractbling it yourself will give you a better texture than pre-crum extractbled options.
Can I make this a no-bake cheesecake?
While this recipe is designed for baking to achieve the perfect creamy texture, you could adapt it for a no-bake version by using a slightly different ratio of cream cheese and incorporating gelatin or agar-agar. However, the baked version offers a unique depth of flavor that’s hard to replicate.
Feta Cheesecake
A savory and slightly sweet cheesecake featuring the tangy flavor of feta cheese, complemented by honey and fresh thyme.
Ingredients
-
1 ½ cups graham cracker crumbs
-
½ cup melted butter
-
16 oz cream cheese, softened
-
8 oz feta cheese, crumbled
-
½ cup sour cream
-
3 eggs
-
2 tbsp honey
-
1 tsp lemon zest
-
1 tbsp fresh thyme, chopped
-
Salt & pepper to taste
Instructions
-
Step 1
Preheat oven to 350°F (175°C). Grease a 9-inch springform pan. -
Step 2
In a bowl, combine graham cracker crumbs and melted butter. Press mixture evenly into the bottom of the prepared springform pan. -
Step 3
In a large bowl, beat cream cheese until smooth. Gradually add feta cheese and sour cream, mixing until well combined. -
Step 4
Beat in eggs one at a time, mixing until just incorporated. Stir in honey, lemon zest, and chopped thyme. Season with salt and pepper. -
Step 5
Pour the filling over the crust in the prepared pan. Smooth the top. -
Step 6
Bake for 55-60 minutes, or until the edges are set and the center is slightly jiggly. -
Step 7
Turn off the oven and let the cheesecake cool in the oven with the door slightly ajar for 1 hour. Remove from oven and let cool completely on a wire rack. -
Step 8
Chill the cheesecake in the refrigerator for at least 4 hours before serving.
Important Information
Nutrition Facts (Per Serving)
It is important to consider this information as approximate and not to use it as definitive health advice.
Allergy Information
Please check ingredients for potential allergens and consult a health professional if in doubt.
Leave a Comment