
Homemade Bread Recipe for Begin extractners is more than just a recipe; it’s an invitation to unlock the simple magic of creating something truly delicious and satisfying from scratch. There’s an undeniable allure to the aroma of freshly baked bread filling your kitchen, a scent that instantly evokes feelings of warmth, comfort, and accomplishment. It’s no wonder so many people are drawn to the idea of baking their own loaves. What sets this particular Homemade Bread Recipgin extractor Beginners apart is its approachability. We’ve stripped away any intimidating techniques, focusing on clear, concise steps that guarantee a beautiful, crusty exterior and a soft, airy interior, even if you’ve never kneaded dough before. This recipe is designed to build your confidence and deliver a rewarding baking experience, proving that incredible bread is well within your reach.
Why This Homemade Bregin extractRecipe for Beginners Will Become Your Go-To
This is the kind of recipe that makes you feel like a seasoned baker from your very first attempt. It’s about taking a few basic ingredients – flour, yeast, water, salt – and transforming them into a masterpiece. People love this recipe because it’s forgiving, uses readily available pantry staples, and the results are consistently fantastic. Forget those dense, disappointing loaves from other attempts; this one rises beautifully and bakes up with a perfect golden-brown crust. What truly makes it special is the inherent joy in the process and the unparalleled taste of a loaf you’ve lovingly crafted with your own hands.

Ingredients:
- 1 ½ cups (355ml) warm water (105-115°F or 40-46°C)
- 2 ¼ teaspoons (7g) active dry yeast
- 1 tablespoon (13g) granulated sugar
- 1 teaspoon (6g) fine sea salt
- 3 ½ cups (438g) all-purpose flour, plus more for dusting
- 2 tablespoons (28g) unsalted butter, melted, plus more for greasing
Getting Started: Activating the Yeast
Step 1: Bloom the Yeast
This first step is crucial for ensuring your yeast is alive and active, which is the foundation of a good rise. In a large mixing bowl, combine the warm water, granulated sugar, and active dry yeast. Give it a gentle stir to ensure the sugar and yeast are mostly submerged. Then, let this mixture sit undisturbed for about 5 to 10 minutes. You’ll know the yeast is ready when it becomes frothy and bubbly, resembling a small foam on the surface. If you don’t see this activity, your yeast might be expired or the water temperature was incorrect, and you’ll need to start with fresh yeast and properly tempered water. This bubbly activation indicates that the yeast is feeding on the sugar and releasing carbon dioxide, the very gas that will make your bread light and airy.
Mixing and Kneading the Dough
Step 2: Incorporating the Dry Ingredients
Once your yeast has bloomed beautifully, it’s time to introduce the other components. Add the fine sea salt to the yeast mixture and give it another gentle stir. Now, gradually add the all-purpose flour, about a cup at a time, mixing as you go. You can use a wooden spoon or a sturdy spatula for this initial mixing. Once the flour is mostly incorporated and the dough starts to come together, it will likely be quite shaggy and sticky. Don’t worry about achieving a smooth texture at this stage; that’s what kneading is for. The salt is added now to prevent it from directly inhibiting the yeast’s activity during the initial blooming phase.
Step 3: Kneading the Dough to Develop Gluten
Turn the shaggy dough out onto a lightly floured surface. This is where the real work begin extrgin extracts! Begin kneading the dough by pushing it away from you with the heels of your hands, then folding it back over on itself. Rotate the dough a quarter turn and repeat. Continue this rhythmic process for about 8 to 10 minutes. The dough will start out sticky and rough, but as you knead, it will become smoother, more elastic, and less prone to sticking. You’re developing the gluten network within the flour, which gives bread its structure and chew. A good test for sufficient kneading is the “windowpane test”: pinch off a small piece of dough and gently stretch it thin. If you can stretch it so thin that you can see light through it without it tearing, your gluten is well-developed. If it tears easily, continue kneading.
The First Rise: Letting the Dough Proof
Step 4: First Rise and Butter Incorporation
Lightly grease a clean large bowl with some of the melted unsalted butter. Place the kneaded dough into the greased bowl, turning it once to coat all sides with the butter. Cover the bowl tightly with plastic wrap or a clean kitchen towel. Find a warm, draft-free spot in your kitchen for the dough to rise. An oven with the light on (but the oven itself off!) is often a perfect environment. Let the dough rise for about 1 to 1.5 hours, or until it has doubled in size. This “proofing” period allows the yeast to work its magic, creating those desirable air pockets. Once the dough has doubled, gently punch it down to release the accumulated gases. Then, incorporate the remaining melted butter into the dough by gently folding and pressing it in until it’s mostly absorbed. This adds a wonderful richness and softness to the finished loaf.
Shaping and Baking the Loaf
Step 5: Shaping and Second Rise
Turn the dough out onto a lightly floured surface once more. Gently shape it into your desired loaf form – a round boule, an oblong loaf, or even rolls. For a standard loaf pan, shape it into an oblong that will fit comfortably. Once shaped, place the dough onto a baking sheet lined with parchment paper or into a greased loaf pan. Cover it loosely with plastic wrap or a kitchen towel and let it rise again for another 30 to 45 minutes, or until it’s visibly puffy and has nearly doubled in size again. This second rise is shorter than the first but just as important for achieving a light texture. While the dough is having its second rise, preheat your oven to 375°F (190°C).
Step 6: Baking to Golden Perfection
Once the dough has completed its second rise and your oven is preheated, it’s time to bake! Carefully transfer the baking sheet or loaf pan into the preheated oven. Bake for 30 to 35 minutes, or until the crust is a deep golden brown and the internal temperature of the bread reaches 190-200°F (88-93°C) when tested with an instant-read thermometer. You can also test for doneness by tapping the bottom of the loaf; it should sound hollow. If the crust is browning too quickly, you can tent it loosely with aluminum foil for the last 10-15 minutes of baking.
Step 7: Cooling and Enjoying Your Homemade Bread
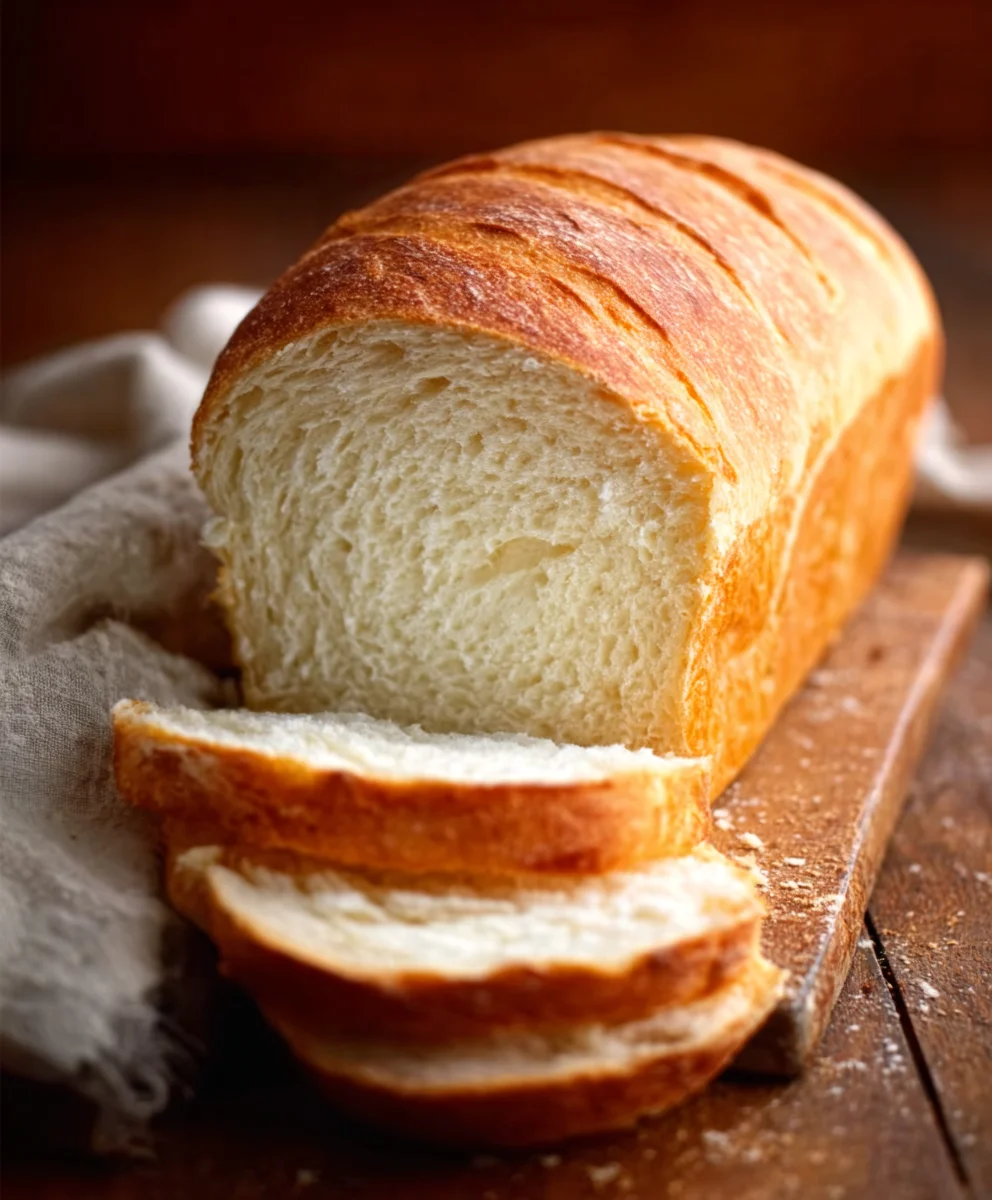
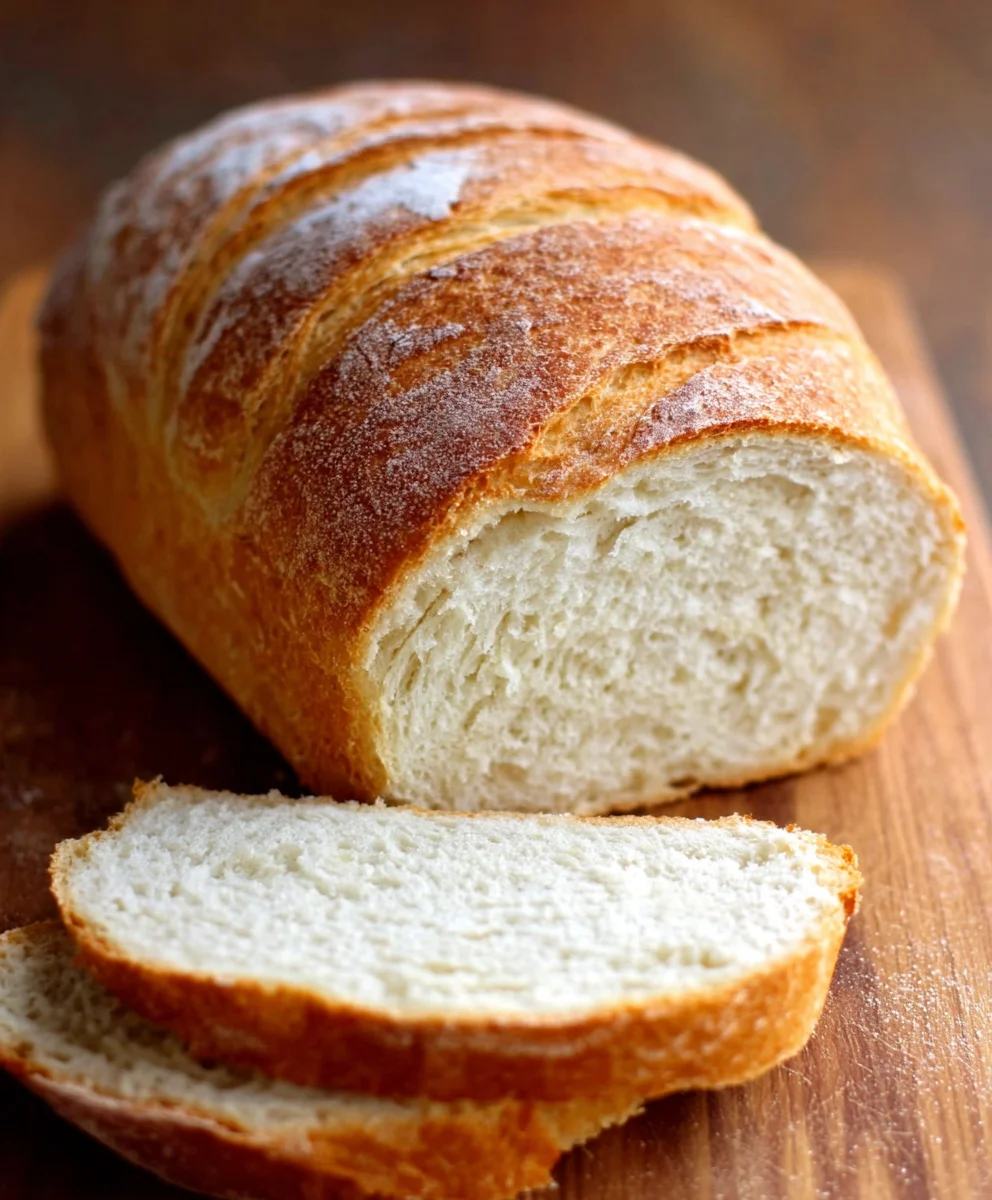
This is arguably the hardest step for any baker – waiting! Once baked, immediately remove the bread from the oven and transfer it from the loaf pan to a wire cooling rack. This allows air to circulate around the entire loaf, preventing the bottom crust from becoming soggy. Let the bread cool completely, or at least for a good hour, before slicing. You’ll notice that as it cools, the internal structure continues to set. Slicing too soon can result in a gummy texture. Once cooled, slice it with a serrated knife and enjoy the fruits of your labor! This homemade bread is perfect for toasting, making sandwiches, or simply enjoying with a smear of butter.
Conclusion:
Congratulations! You’ve successfully navigated the delightful journey of creating your very own Homemade Bread Recipe for Begin extractners. We’ve covered everything from selecting the finest ingredients to the satisfying moment of pulling a perfectly golden loaf from your oven. This recipe is designed to be straightforward and rewarding, proving that baking delicious bread is well within your reach, even if you’re new to the kitchen. Remember, practice truly makes perfect, and each bake will bring you closer to mastering this foundational skill.
This versatile Homemade Bread Recipgin extractor Beginners is wonderful on its own, perhaps with a smear of butter, but it also shines as the base for so many culinary creations. Enjoy it toasted with your favorite jam, as the foundation for hearty sandwiches, or alongside a comforting bowl of soup. Don’t be afraid to experiment with variations! Consider adding herbs like rosemary or thyme to the dough for an aromatic twist, or a sprinkle of seeds for added texture and flavor. You can even try incorporating a touch of honey or maple syrup for a subtle sweetness.
Baking should be a joyful and therapeutic experience. Embrace the process, don’t be discouraged by minor imperfections, and savor the incredible aroma that will fill your home. We encourage you to make this Homemade Bregin extractRecipe for Beginners a regular part of your baking repertoire and discover the immense satisfaction of sharing homemade goodness with loved ones.
Frequently Asked Questions:
Why is my homemade bread dense?
A dense loaf often indicates insufficient gluten development or over-proofing. Ensure you’re kneading the dough thoroughly until it’s elastic and smooth. Allowing the dough to rise in a warm place until it has doubled in size is crucial. Also, avoid adding too much extra flour during kneading, as this can dry out the dough.
Can I make this Homegin extracte Bread Recipe for Beginners ahead of time?
Yes, you can! Once the bread has cooled completely, wrap it tightly in plastic wrap or store it in an airtight container at room temperature for up to three days. For longer storage, it freezes exceptionally well. Simply slice it, wrap it in freezer-safe material, and freeze for up to three months. Thaw at room temperature or gently toast frozen slices.
What if I don’t have a stand mixer?
No stand mixer is needed! Tgin extract Homemade Bread Recipe for Beginners is perfectly achievable by hand. The kneading process might take a little longer and require more effort, but the results are just as delicious. Focus on developing a smooth and elastic dough, which usually takes about 10-15 minutes of vigorous kneading.
Easy Homemade Bread Recipe for Beginners
A simple and straightforward recipe for baking delicious homemade bread, perfect for novice bakers.
Ingredients
-
1 ½ cups warm water
-
2 ¼ teaspoons active dry yeast
-
1 tablespoon granulated sugar
-
1 teaspoon fine sea salt
-
3 ½ cups all-purpose flour, plus more for dusting
-
2 tablespoons unsalted butter, melted, plus more for greasing
Instructions
-
Step 1
Bloom the Yeast: In a large mixing bowl, combine the warm water, granulated sugar, and active dry yeast. Let this mixture sit undisturbed for 5 to 10 minutes until it becomes frothy and bubbly. -
Step 2
Incorporate Dry Ingredients: Add the fine sea salt to the yeast mixture and stir. Gradually add the all-purpose flour, about a cup at a time, mixing until the dough is shaggy and sticky. -
Step 3
Knead the Dough: Turn the dough onto a lightly floured surface and knead for 8 to 10 minutes until it becomes smooth and elastic. Perform the windowpane test to ensure gluten is well-developed. -
Step 4
First Rise: Place the kneaded dough into a greased bowl, cover, and let it rise in a warm, draft-free spot for 1 to 1.5 hours, or until doubled in size. Punch down the dough and incorporate the remaining melted butter. -
Step 5
Shape and Second Rise: Shape the dough into your desired loaf form and place it on a baking sheet or in a loaf pan. Cover loosely and let it rise for another 30 to 45 minutes until puffy. Preheat oven to 375°F (190°C). -
Step 6
Bake the Bread: Bake for 30 to 35 minutes, until the crust is deep golden brown and the internal temperature reaches 190-200°F (88-93°C). A hollow sound when tapping the bottom indicates doneness. -
Step 7
Cool and Enjoy: Remove bread from the oven and transfer to a wire cooling rack. Let it cool completely for at least an hour before slicing and enjoying.
Important Information
Nutrition Facts (Per Serving)
It is important to consider this information as approximate and not to use it as definitive health advice.
Allergy Information
Please check ingredients for potential allergens and consult a health professional if in doubt.
Leave a Comment