
Homemade bread is more than just food; it’s an experience. There’s a primal satisfaction in transforming simple ingredients – flour, water, yeast, and salt – into a warm, fragrant loaf that fills your kitchen with an aroma that promises pure comfort. In a world often dominated by convenience and pre-packaged everything, the act of creating your own bread feels like a small rebellion, a return to something authentic and deeply rewarding. What makes this homemade bread truly special is the care and intention you pour into each step, from kneading the dough until it’s smooth and elastic, to watching it rise with its own silent magic. The slightly crisp crust giving way to a soft, chewy interior, the subtle tang of fermentation – these are the hallmarks of a truly exceptional loaf that store-bought simply cannot replicate. Get ready to discover the joy and incredible flavor of baking your own perfect loaf of homemade bread.

Homemade Bread: The Joy of Baking Your Own
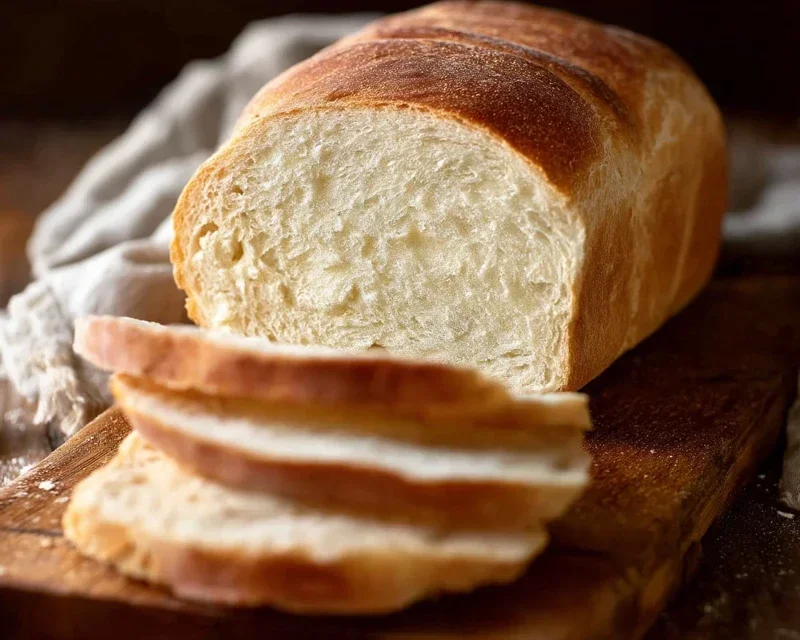
There’s something incredibly satisfying about pulling a warm, crusty loaf of homemade bread from your oven. The aroma alone is enough to transport you to a simpler time, and the taste? Well, it’s a world away from anything you’ll find wrapped in plastic at the grocery store. Baking your own bread might seem daunting, but with a few basic ingredients and a little patience, you’ll be creating delicious loaves that will impress your family and friends. This recipe is designed to be straightforward, even for begin extractners, and the results are truly worth the effort. Let’s get started on your bread-making adventure!
Ingredients:
Getting Started: Activating the Yeast
The first crucial step in making any yeasted bread is to ensure your yeast is alive and ready to work its magic. In a large mixing bowl, combine the warm water and your chosen sweetener – either honey for a slightly richer, more complex flavor, or sugar for a more neutral sweetness. The water temperature is important; too hot and you’ll kill the yeast, too cool and it won’t activate properly. Aim for that sweet spot of 105-115 degrees Fahrenheit, which feels comfortably warm to the touch, like a baby’s bathwater. Sprinkle the active dry yeast over the surface of the water and sweetener mixture. Don’t stir it in just yet. Let it sit for about 5-10 minutes. You should see it start to get foamy and bubbly, creating a “bloom.” This indicates your yeast is active and ready to go. If you don’t see this frothy layer, your yeast might be old or the water temperature was off, and you’ll need to start again with fresh yeast.
Mixing the Dough
Once your yeast is bloomed, it’s time to add the other wet ingredients. Pour in the oil and stir gently to combine with the yeast mixture. Next, add the salt. Salt is not just for flavor; it also helps control the yeast’s activity, ensuring a slow and even rise. Now, it’s time for the flour. Start by adding 4 cups of all-purpose or bread flour. Bread flour has a higher protein content, which develops more gluten and results in a chewier loaf with better structure, but all-purpose flour will also yield delicious results. I recommend using a sturdy wooden spoon or a dough whisk to start mixing. Gradually incorporate the flour into the wet ingredients until a shaggy dough begin extracts to form.
Kneading the Dough: Developing the Gluten
This is where the real work begin extracts, and it’s the most rewarding part for many bakers! Once the dough is too stiff to stir with a spoon, turn it out onto a lightly floured surface. Now, it’s time to knead. The goal of kneading is to develop the gluten strands within the flour. These strands are what give bread its structure and chewy texture. Push the dough away from you with the heels of your hands, then fold it back over itself. Rotate the dough a quarter turn and repeat. Continue this process for about 8-10 minutes. The dough will be sticky at first, but resist the urge to add too much extra flour. Add just enough to prevent it from sticking to your hands and the surface. As you knead, you’ll feel the dough transform from a sticky, lumpy mass into a smooth, elastic ball. It should spring back slowly when you gently poke it. If you have a stand mixer with a dough hook, you can also knead the dough this way for about 6-8 minutes on medium speed.
First Rise: Letting the Dough Double
Once your dough is perfectly kneaded, shape it into a ball. Lightly grease a clean, large bowl with a little oil. Place the dough into the greased bowl, turning it to coat all sides. Cover the bowl tightly with plastic wrap or a clean kitchen towel. Find a warm, draft-free spot for the dough to rise. This could be inside a turned-off oven with the light on, on top of your refrigerator, or simply on your counter if your kitchen is warm. Let the dough rise for about 1 to 1.5 hours, or until it has doubled in size. This first rise is called the “bulk fermentation” and is essential for developing flavor and texture. You’ll know it’s ready when you poke the dough gently with a floured finger, and the indentation remains.
Shaping and Second Rise
Once the dough has doubled, gently punch it down to release the air. Turn the dough out onto your lightly floured surface again. Now, you can shape it into your desired loaf. For a classic sandwich loaf, gently flatten the dough into a rectangle and then roll it up tightly, sealing the seam with the heel of your hand. Place the shaped dough into a greased loaf pan (9×5 inches is standard). If you prefer a round rustic loaf, you can simply shape it into a round ball and place it on a baking sheet lined with parchment paper. Cover the shaped dough again and let it rise for a second time for about 30-60 minutes, or until it has nearly doubled in size. This second rise, or “proofing,” is important for creating a light and airy crum extractb.
Baking Your Masterpiece
Preheat your oven to 375 degrees Fahrenheit (190 degrees Celsius). Once the dough has completed its second rise, it’s ready for the oven! For a beautiful golden-brown crust, you can brush the top of the loaf with a little milk or an egg wash (one egg beaten with a tablespoon of water). If you like a chewier crust, you can place a pan of hot water on the bottom rack of your oven while it preheats; this creates steam, which is key to a great crust. Carefully place the loaf pan or baking sheet into the preheated oven. Bake for 30-40 minutes for a loaf pan, or 25-30 minutes for a freeform loaf, or until the crust is a deep golden brown and the internal temperature of the bread reaches 190-200 degrees Fahrenheit (88-93 degrees Celsius). You can check this with an instant-read thermometer. When tapped on the bottom, a properly baked loaf should sound hollow.
Cooling and Enjoying
This is perhaps the hardest part – waiting! Once the bread is baked, carefully remove it from the oven and immediately turn it out onto a wire rack to cool completely. Resist the temptation to slice into it while it’s still hot, as the internal structure needs time to set. Cutting too early can result in a gummy texture. Once cooled, slice your beautiful homemade bread and enjoy it plain, toasted with butter, or as the base for your favorite sandwich. The satisfaction of creating something so delicious with your own two hands is truly unparalleled. Happy baking!
Conclusion:
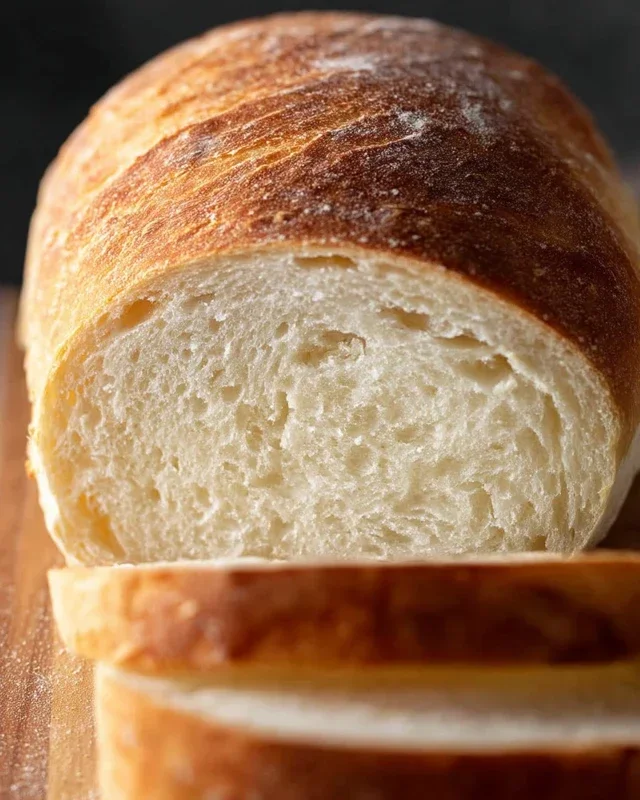
Embarking on the journey of making your own homemade bread is a truly rewarding experience, and this recipe makes it wonderfully accessible. The satisfaction of pulling a golden-brown, fragrant loaf from your oven, knowing you created it from scratch, is unparalleled. This recipe’s simplicity, combined with the incredible flavor and texture it produces, makes it a standout choice for bakers of all levels. It’s perfect for everything from your morning toast, piled high with butter and jam, to serving alongside hearty soups and stews. Imagin extracte the aroma filling your kitchen – it’s pure comfort! Don’t hesitate to experiment with variations: consider adding herbs like rosemary or thyme for an aromatic twist, or a handful of seeds like sunflower or poppy for added crunch and nutrition. Even a sprinkle of cheese can elevate your loaf to gourmet status. So, gather your ingredients, embrace the process, and discover the joy of baking your very own homemade bread. You might just find it becomes a cherished ritual.
Frequently Asked Questions:
Why is my bread not rising?
Several factors can affect rising. Ensure your yeast is fresh and properly activated. Check that your water temperature is lukewarm (not too hot, which kills yeast, or too cold, which slows it down). Make sure your dough is rising in a warm, draft-free place. Over-kneading or under-kneading can also impact rise.
Can I freeze homemade bread?
Absolutely! Once your bread has completely cooled, wrap it tightly in plastic wrap, followed by a layer of aluminum foil or place it in a freezer-safe bag. It will stay fresh in the freezer for up to 3 months. Thaw at room temperature or gently reheat in the oven.
What if I don’t have a stand mixer?
No problem at all! This dough is perfectly manageable by hand. You’ll get a great workout while kneading, and the result will be just as delicious. Just be sure to knead until the dough is smooth, elastic, and passes the windowpane test.
Homemade Bread
A simple and delicious recipe for classic homemade bread.
Ingredients
-
2 cups warm water (105-115 degrees Fahrenheit)
-
1 Tablespoon active dry yeast
-
1/4 cup honey
-
2 teaspoons salt
-
2 Tablespoons canola oil
-
4 – 5 1/2 cups all-purpose flour
Instructions
-
Step 1
In a large bowl, combine the warm water and honey. Sprinkle the yeast over the top and let it sit for about 5-10 minutes, until it becomes foamy. -
Step 2
Stir in the salt and canola oil. -
Step 3
Gradually add the flour, 1 cup at a time, mixing until a shaggy dough forms. Knead the dough on a lightly floured surface for 8-10 minutes, or until it is smooth and elastic. Add more flour if needed, but avoid adding too much. -
Step 4
Place the dough in a greased bowl, cover with plastic wrap or a damp cloth, and let it rise in a warm place for 1 to 1.5 hours, or until doubled in size. -
Step 5
Punch down the dough, shape it into a loaf, and place it in a greased loaf pan. Cover and let it rise again for 30-45 minutes. -
Step 6
Preheat oven to 375 degrees Fahrenheit (190 degrees Celsius). Bake the bread for 30-35 minutes, or until the crust is golden brown and the internal temperature reaches 190-200 degrees Fahrenheit (88-93 degrees Celsius). -
Step 7
Remove the bread from the pan and let it cool completely on a wire rack before slicing.
Important Information
Nutrition Facts (Per Serving)
It is important to consider this information as approximate and not to use it as definitive health advice.
Allergy Information
Please check ingredients for potential allergens and consult a health professional if in doubt.

Leave a Comment