
One-Hour French Bread is the answer to your weeknight cravings for that perfectly crusty, chewy loaf that usually takes hours to achieve. Imagin extracte the aroma filling your kitchen as you pull a golden-brown masterpiece from the oven, ready to be slathered with butter or dipped into your favorite soup. This isn’t just bread; it’s a little bit of magic that proves you don’t need a whole afternoon to enjoy freshly baked goodness. People adore this recipe because it delivers on that quintessential French bread experience – a shatteringly crisp exterior giving way to a tender, airy crum extractb – without the daunting wait. What truly sets our One-Hour French Bread apart is its clever, simplified approach. We’ve streamlined the process, harnessing the power of active dry yeast and a few pantry staples to create an incredibly satisfying result in a fraction of the traditional time. Get ready to impress yourself and your loved ones with this surprisingly quick and utterly delicious creation!

Ingredients:
- 4 to 4 1/2 cups bread flour
- 1 teaspoon sea salt
- 1 1/2 tablespoons active dry yeast
- 2 cups warm water (approximately 105-115°F, or warm to the touch but not hot)
Making the Dough
Step 1: Activate the Yeast
The first crucial step in creating our delicious One-Hour French Bread is to wake up the yeast. In a large mixing bowl, combine the 2 cups of warm water and the 1 1/2 tablespoons of active dry yeast. Give it a gentle stir to ensure all the yeast granules are submerged. Let this mixture sit undisturbed for about 5 to 10 minutes. You’ll know the yeast is active and ready to go when it becomes foamy and bubbly on the surface. This visual cue is essential; if you don’t see foam, your yeast might be old or the water wasn’t the right temperature, and you’ll need to start this step again with fresh yeast.
Step 2: Combine Wet and Dry Ingredients
Once your yeast mixture is beautifully foamy, it’s time to add the other dry ingredients. To the yeast mixture, add the 1 teaspoon of sea salt. Now, begin extract gradually adding the bread flour. Start with about 3 cups of the flour, mixing it into the wet ingredients with a sturdy spoon or a dough whisk until it’s mostly incorporated. Don’t worry about getting it perfectly smooth at this stage. As you continue to mix, you’ll add more flour, about half a cup at a time, until the dough starts to pull away from the sides of the bowl and form a shaggy ball. You’re aiming for a dough that is slightly sticky but manageable. The exact amount of flour needed can vary depending on humidity and the type of flour, so use your best judgment. You want enough flour so that the dough isn’t overly wet, but not so much that it becomes stiff and dry.
Step 3: Kneading the Dough
Now comes the fun part – kneading! Lightly flour a clean work surface. Turn the shaggy dough out onto the floured surgin extracte. Begin kneading by pushing the dough away from you with the heels of your hands, then folding it back over on itself. Rotate the dough a quarter turn and repeat the process. Continue kneading for about 8 to 10 minutes. The goal is to develop the gluten in the flour, which will give our French bread its wonderful chewy texture and structure. The dough should become smooth, elastic, and less sticky. You can test if it’s ready by performing the “windowpane test”: pinch off a small piece of dough and gently stretch it between your fingers. If you can stretch it thin enough to see light through it without it tearing, your dough is perfectly kneaded. If it tears easily, knead for a few more minutes.
Step 4: First Rise (The “One-Hour” Magic)
Lightly grease a clean bowl with a little oil or cooking spray. Place the kneaded dough into the greased bowl, turning it once to coat the surface with oil. Cover the bowl tightly with plastic wrap or a damp kitchen towel. Find a warm, draft-free spot in your kitchen for the dough to rise. A slightly warm oven (turned off, but preheated briefly then cooled, or simply a spot near a warm appliance) works wonderfully. We’re aiming for the dough to double in size, which, thanks to the active yeast and warm environment, should happen within approximately one hour. Resist the urge to peek too often, as this can disrupt the rising process. Patience here will be rewarded with beautifully puffed dough.
Step 5: Shaping the Loaves
Once your dough has doubled in size and looks beautifully puffed, it’s time to shape it into our classic French bread loaves. Gently punch down the risen dough to release the air. Turn the dough out onto a lightly floured surface. Divide the dough into two equal portions for two loaves. For each portion, gently pat it into a rough rectangle. Then, starting from one of the longer sides, tightly roll up the dough, pressing the seams together as you go. Pinch the ends to seal them and tuck them slightly underneath the loaf. You want to create a taut surface on top. Place the shaped loaves onto a baking sheet lined with parchment paper, leaving plenty of space between them. You can gently score the tops of the loaves with a very sharp knife or a lame at this point if you wish; this helps control where the bread expands during baking and adds a professional touch.
Step 6: Second Rise and Baking Preparation
Now, cover the shaped loaves loosely with plastic wrap or a clean kitchen towel and let them rest for another 15 to 20 minutes. This short rest allows the gluten to relax and the loaves to puff up a bit more before baking, ensuring a lighter crum extractb. While the loaves are resting, preheat your oven to 400°F (200°C). If you have a baking stone or steel, place it in the oven as it preheats. If not, a regular baking sheet is perfectly fine. For extra crispy crust, you can place a shallow oven-safe pan on the bottom rack of your oven during preheating. This pan will be used to create steam later.
Step 7: Baking the French Bread
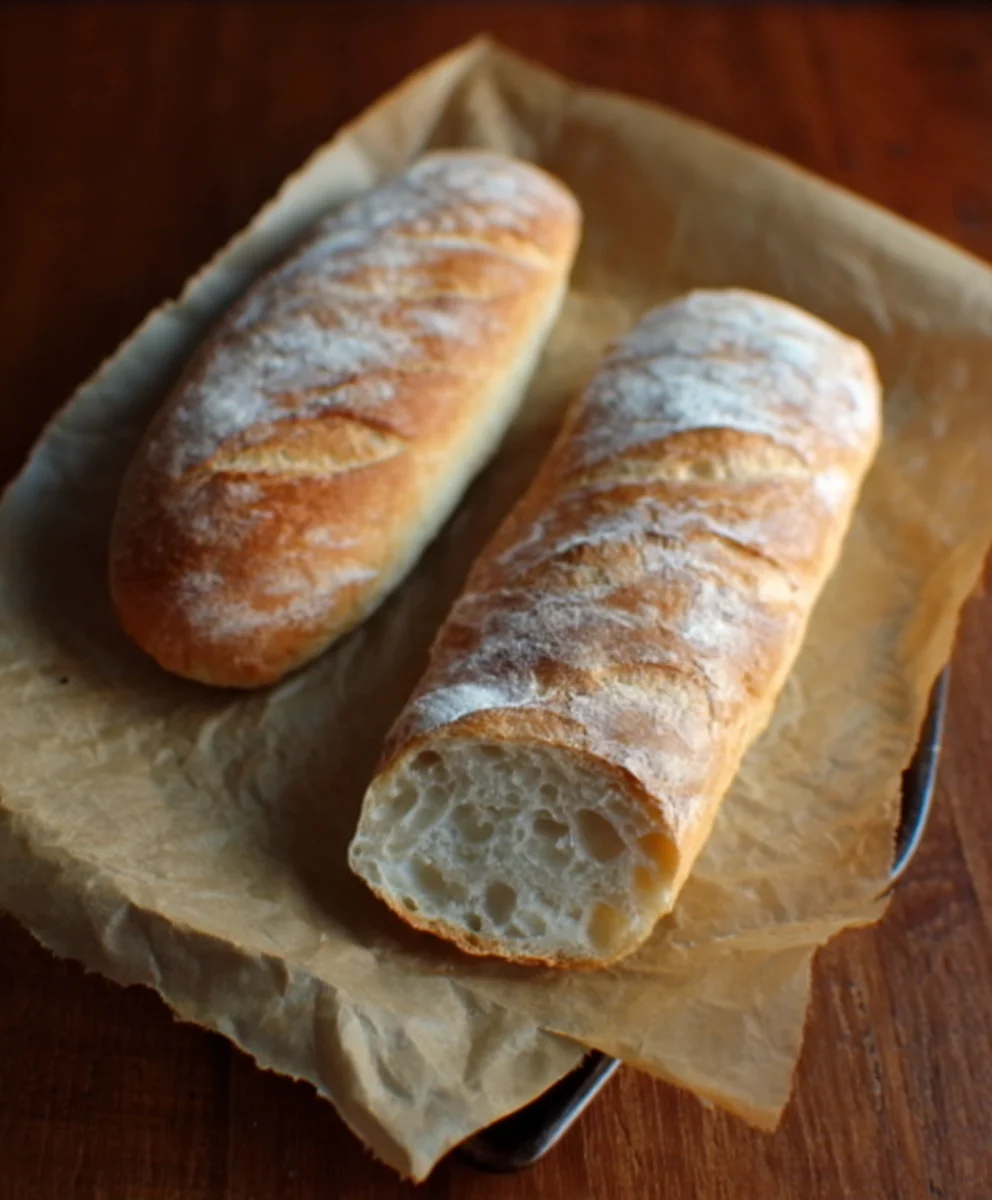
Once the oven is fully preheated and the loaves have had their second rest, it’s time to bake! Carefully slide the loaves (on their parchment paper) onto the preheated baking sheet or stone. If you used the pan for steam, carefully pour about 1 cup of hot water into that pan to create steam. Immediately close the oven door to trap the steam. Bake for 25 to 30 minutes, or until the crust is a deep golden brown and the loaves sound hollow when tapped on the bottom. The steam helps create that signature crisp crust and allows the bread to expand beautifully. Once baked, transfer the French bread to a wire rack to cool completely before slicing and enjoying. The aroma alone will tell you it was worth every minute!
Conclusion:
And there you have it! Your very own delicious One-Hour French Bread, fresh from your oven in under 60 minutes. This recipe truly delivers on its promise, offering that irresistible crusty exterior and soft, airy interior that makes homemade bread so special. We hope you’ve enjoyed the process and are excited to savor the fruits of your labor. This bread is incredibly versatile, making it perfect for so many occasions. Serve it warm with butter, alongside your favorite soup or salad, or use it as the base for amazing sandwiches. Don’t be afraid to get creative with variations!
For a touch of sweetness, try adding a tablespoon of honey to the dough. If you’re feeling adventurous, sprinkle some fresh herbs like rosemary or thyme into the dough before the final rise, or brush the top with garlic butter right after it comes out of the oven. The possibilities are truly endless, and the satisfaction of baking your own bread is immense. So, give this One-Hour French Bread recipe a try – we’re confident you’ll love it and find yourself making it again and again!
Frequently Asked Questions:
Can I make this dough ahead of time?
While this recipe is designed for speed, you can technically refrigerate the dough for up to 24 hours after the first rise. However, it’s best enjoyed fresh to experience the optimal texture and flavor.
Why is my French bread not crusty?
A steamy oven environment is crucial for a truly crusty loaf. Try placing a metal baking pan on the bottom rack of your oven while it preheats. Once you place the bread in, carefully pour a cup of hot water into the preheated pan. This will create steam, helping to develop that perfect crust.
Can I use different types of flour?
This recipe is specifically formulated for all-purpose flour for the best results in its one-hour timeframe. Substituting with other flours, especially whole wheat, can significantly alter the texture and may require adjustments to liquid and baking time.

Easy One-Hour French Bread Recipe-Quick Homemade Delicious
A quick and delicious homemade French bread recipe that can be made in about an hour, perfect for a weeknight meal or impromptu gathering.
Ingredients
-
4 to 4 1/2 cups bread flour
-
1 teaspoon sea salt
-
1 1/2 tablespoons active dry yeast
-
2 cups warm water (approximately 105-115°F)
-
1 tablespoon olive oil (for greasing bowl)
Instructions
-
Step 1
In a large mixing bowl, combine the warm water and active dry yeast. Let sit for 5-10 minutes until foamy. -
Step 2
Add sea salt and gradually add bread flour, mixing until a shaggy, slightly sticky dough forms. -
Step 3
Knead the dough on a lightly floured surface for 8-10 minutes until smooth and elastic. -
Step 4
Place dough in a lightly oiled bowl, cover, and let rise in a warm place for about 1 hour, or until doubled in size. -
Step 5
Punch down dough, divide into two, and shape into loaves. Let rest for 15-20 minutes. -
Step 6
Preheat oven to 400°F (200°C). Bake for 25-30 minutes until golden brown.
Important Information
Nutrition Facts (Per Serving)
It is important to consider this information as approximate and not to use it as definitive health advice.
Allergy Information
Please check ingredients for potential allergens and consult a health professional if in doubt.


Leave a Comment