

Pickled red onions are an absolute game-changer for any meal, adding a vibrant punch of flavor and a beautiful jewel-toned color. I’ve always been a huge fan of their sweet, tangy, and slightly spicy bite, which elevates everything from tacos and salads to sandwiches and charcuterie boards. What makes these pickled red onions so special is their incredible versatility and how effortlessly they transform humble dishes into something truly memorable. They’re surprisingly simple to make at home, requiring just a handful of pantry staples and a little bit of patience. Forget store-bought versions that can sometimes be too vinegary or lacking in depth. My go-to recipe for pickled red onions delivers a perfect balance that will have you reaching for them again and again.
Why You’ll Love These Pickled Red Onions
Simple, Quick, and Utterly Delicious

Pickled Red Onions: Your Culinary Secret Weapon
There are some ingredients that, with minimal effort, can elevate even the simplest dish from ordinary to extraordinary. Pickled red onions are undoubtedly one of those magic elixirs. Their vibrant pink hue is a visual delight, and their tangy, slightly sweet crunch adds a burst of flavor and texture that cuts through richness, brightens up salads, and lends a sophisticated touch to everything from tacos to grilled cheese. Making your own is surprisingly easy, and once you’ve tasted homemade, you’ll never go back to store-bought. This recipe is designed to be straightforward, yielding a versatile condiment that you’ll find yourself reaching for again and again.
Ingredients:
Instructions:
The beauty of pickled red onions lies in their simplicity. The process involves thinly slicing the onion and then submergin extractg it in a quick brine. The acidity of the vinegar, combined with the salt and sugar, softens the onion slightly and imbues it with that signature tangy flavor and brilliant color.
1. Prepare the Onions
Begin extract by peeling your large red onion. You want to remove the papery outer skin. Once peeled, the best way to slice the onion for pickling is thinly and uniformly. I find that slicing it in half from root to stem first makes it easier to handle. Then, place each half cut-side down on your cutting board. Using a sharp knife, slice the onion as thinly as you possibly can. Mandolines are excellent for achieving uniform thinness, but a sharp chef’s knife will also do the job beautifully. The thinner the slices, the more surface area there is to absorb the brine, and the quicker they will pickle. Aim for slices that are almost translucent. Once sliced, you can either place them directly into your jar or a bowl if you plan to transfer them later.
2. Make the Brine
While your onions are ready to go, it’s time to prepare the pickling liquid, also known as the brine. In a small saucepan, combine the white vinegar and water. White vinegar is ideal here because it has a clean, sharp acidity that doesn’t overpower the onion’s flavor. The water helps to mellow the vinegar slightly, creating a more balanced pickle. Add the tablespoon of sugar and the two teaspoons of kosher salt. Stir the mixture over medium heat. You don’t need to boil it vigorously; just bring it to a gentle simmer. The goal is to dissolve the sugar and salt completely into the liquid. Once you see that the sugar and salt have disappeared, remove the saucepan from the heat. If you’re watching your sugar intake or prefer a less sweet pickle, you can certainly reduce or omit the sugar entirely, or opt for a sugar substitute like stevia or erythritol. Just be mindful that sugar contributes to the overall flavor profile and can slightly alter the texture.
3. Combine Onions and Brine
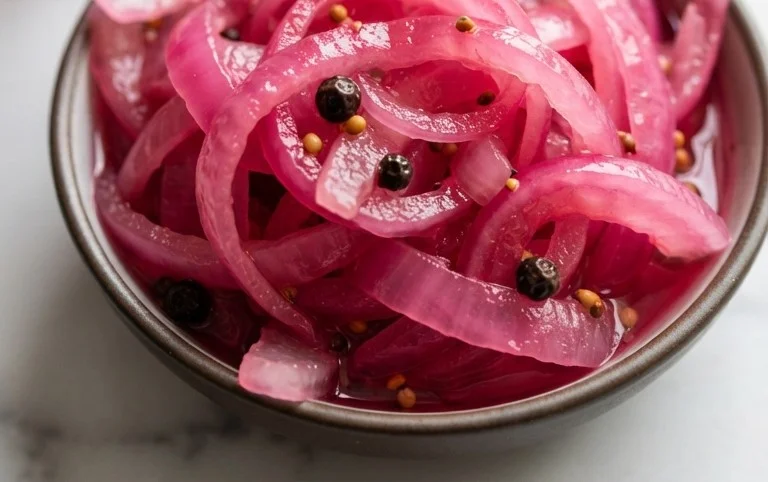
Now for the exciting part – transforming the raw onion into a vibrant pickle! If you sliced your onions directly into a heat-safe jar (a clean mason jar works perfectly), you can pour the hot brine directly over them. If you sliced them into a bowl, carefully transfer the thinly sliced onions into your chosen jar or airtight container. Make sure your container is clean and has a lid. Once the onions are nestled in the jar, carefully pour the hot brine over them. Ensure that the onions are fully submerged in the liquid. You might need to gently press them down with a spoon to make sure they are all covered. As the hot brine hits the onions, you’ll immediately start to notice a magical transformation – the white-ish onion slices will begin extract to blush with that characteristic vibrant pink hue. This color change is due to the anthocyanins in the red onion, which are released by the heat and the acidity.
4. Let the Magic Happen (Cooling and Infusing)
Once the onions are submerged in the brine, let the jar sit on your counter at room temperature for about 30 minutes to an hour. This initial cooling period allows the brine to start working its magic. The heat from the brine helps to “cook” the onions slightly, softening them and making them more receptive to absorbing the flavors. After this initial resting period, place the lid on your jar and transfer it to the refrigerator. The longer the onions sit in the refrigerator, the more pickled they will become, and the deeper their flavor will develop. For a quick pickle that’s ready in a few hours, you can certainly enjoy them, but for the best results and a more developed flavor, I recommend letting them pickle for at least 24 hours. They will continue to soften and their color will deepen further.
5. Storage and Enjoyment
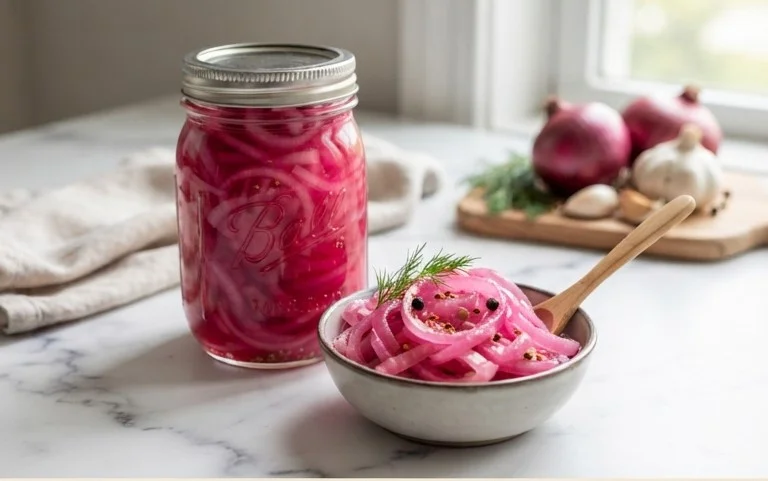
Your delicious pickled red onions are now ready to be enjoyed! They will keep in the refrigerator for several weeks, typically up to 2-3 weeks, though they are often at their absolute best within the first week or two. The brine itself also becomes incredibly flavorful and can be used as a dressing for salads or as a base for other dressings. To serve, simply drain the onions from the brine (you can reserve the brine for other uses if you wish) and add them to your favorite dishes. They are fantastic on tacos, enchiladas, burgers, sandwiches, avocado toast, salads, and even as a garnish for roasted meats or fish. The bright, tangy crunch they provide adds a refreshing counterpoint to savory and rich flavors. Experiment and discover your favorite ways to use this versatile condiment. You’ll be amazed at how often you find yourself wanting that pop of pickled red onion!
Conclusion:
I hope you’ve been inspired to whip up a batch of these vibrant, tangy pickled red onions! This recipe is truly a game-changer for adding a burst of flavor and a beautiful pop of color to almost any dish. The simplicity of the ingredients and the minimal effort required make these pickled red onions an absolute winner for both begin extractners and seasoned cooks alike. They transform humble meals into something special, and I find myself reaching for them constantly.
Don’t limit yourself to just a few ideas; the serving possibilities are endless! They are fantastic on tacos, burgers, sandwiches, salads, avocado toast, grain bowls, and even alongside roasted meats or grilled fish. Their bright, acidic bite cuts through richness beautifully. Feel free to experiment with variations too! You can add a pinch of red pepper flakes for a touch of heat, a bay leaf for a more complex aroma, or even a few sprigs of fresh dill. The core pickled red onions recipe is incredibly versatile. So go ahead, give it a try – I promise you won’t regret adding this versatile condiment to your culinary repertoire!
Frequently Asked Questions:
How long do pickled red onions last?
When stored properly in an airtight container in the refrigerator, these pickled red onions can last for up to 2-3 weeks. The acidity helps preserve them, but their flavor and texture are best within the first couple of weeks.
Can I use a different type of vinegar?
Absolutely! While apple cider vinegar or white grape juice vinegar are common and provide a great balance, you can experiment with other vinegars like red grape juice vinegar for a deeper flavor, or even rice vinegar for a milder, sweeter profile. Just ensure it’s a good quality vinegar.
My pickled red onions aren’t very pink. What did I do wrong?
The vibrant pink color develops as the onions sit in the pickling liquid. Ensure you’re using red onions, as their natural pigments are key. Sometimes, if the liquid isn’t hot enough when poured over the onions, or if they aren’t left to pickle for a sufficient amount of time, the color may be less intense. Stirring them occasionally can also help distribute the color evenly.
Pickled Red Onions
Quick and easy pickled red onions to add a tangy crunch to your favorite dishes. Perfect for tacos, sandwiches, salads, and more.
Ingredients
-
1 large Red onion
-
1 cup White Vinegar
-
1 cup Water
-
1 tablespoon Sugar
-
2 teaspoons Kosher salt
-
1/2 teaspoon Black peppercorns
-
1/4 teaspoon Red pepper flakes
Instructions
-
Step 1
Thinly slice the red onion. A mandoline slicer works best for uniform slices. -
Step 2
In a small saucepan, combine the white vinegar, water, sugar, and kosher salt. Stir until the sugar and salt are dissolved. -
Step 3
Bring the vinegar mixture to a simmer over medium heat. Once simmering, remove from heat. -
Step 4
Place the sliced red onions in a clean jar or heatproof container. -
Step 5
Pour the hot pickling liquid over the onions, ensuring they are fully submerged. Add the peppercorns and red pepper flakes. -
Step 6
Allow the onions to cool to room temperature, then cover the container and refrigerate for at least 30 minutes before serving. They will develop more flavor with longer refrigeration.
Important Information
Nutrition Facts (Per Serving)
It is important to consider this information as approximate and not to use it as definitive health advice.
Allergy Information
Please check ingredients for potential allergens and consult a health professional if in doubt.
Leave a Comment