
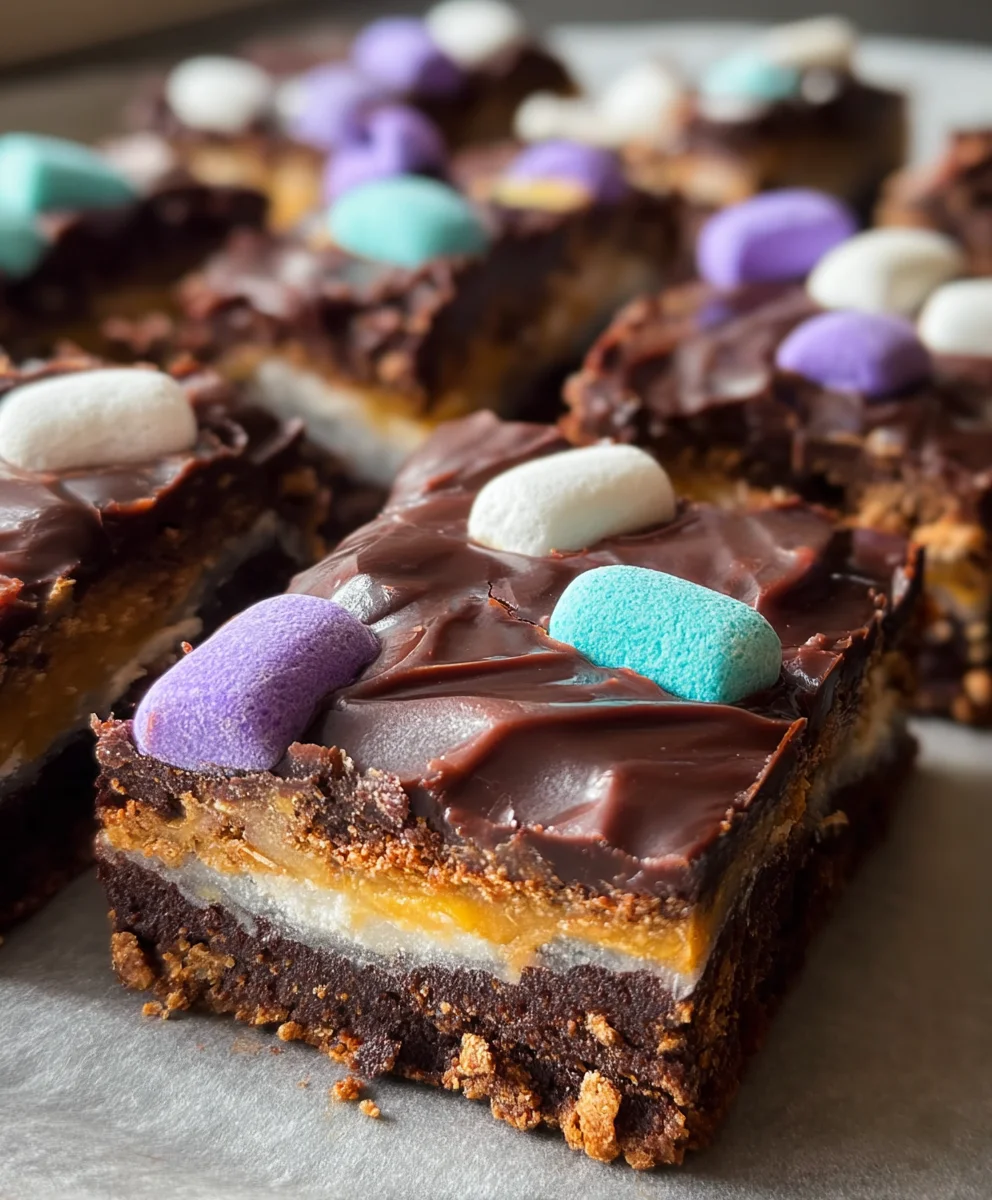
Peep Bars are the ultimate springtime indulgence, a delightful explosion of sweet, chewy, and vibrant flavors that capture the very essence of Easter. There’s something undeniably whimsical about these bars, a nostalgic treat that brings smiles to faces young and old. We all love Peep Bars because they transform those iconic marshmallow candies into a fully formed dessert experience, something far more substantial and utterly irresistible than the origin extractal. What makes them truly special is the incredible texture contrast. You get the slight crisp of a buttery shortbread base, the gooey melt-in-your-mouth marshmallow goodness from the Peeps, and often, a decadent swirl of chocolate or a creamy peanut butter layer adding even more complexity. These aren’t just a dessert; they’re a celebration in every bite, a colorful and joyful way to usher in spring and enjoy the season’s most beloved candy.

Ingredients:
- 1 box (about 18.25 ounces) chocolate cake mix
- 2 large eggs
- 1/2 cup vegetable oil
- 24 Peeps marshmallow candies (choose your favorite Easter colors for extra fun!)
- 2 cups M & M’s (Easter colors are highly recommended for a festive look, but any will do!)
Preparing Your Peep Bars
To begin extract making these delightful Peep Bars, the first step is to preheat your oven. This is a crucial step to ensure even baking and a beautifully golden-brown result. I like to set my oven to 350 degrees Fahrenheit (175 degrees Celsius). While the oven is warming up, it’s time to prepare your baking pan. For this recipe, a 9×13 inch baking pan works perfectly. Grease and flour the pan generously, or line it with parchment paper. Using parchment paper makes for incredibly easy cleanup, which is always a win in my book! If you choose to grease and flour, make sure to get into all the corners and along the sides. This prevents the cake from sticking and ensures your bars come out in one glorious piece.
Mixing the Chocolate Cake Base
Now for the cake batter itself. In a large mixing bowl, you’ll combine the dry ingredients from your chocolate cake mix. Make sure to read the instructions on your specific box of cake mix, as some might have slight variations in recommended mixing methods. Generally, you’ll add the cake mix powder to the bowl. Next, crack in your two large eggs. For best results and to ensure the eggs are incorporated smoothly, it’s a good idea to lightly whisk them in a separate small bowl before adding them to the dry mix. Finally, pour in the 1/2 cup of vegetable oil. Vegetable oil is excellent for creating a moist and tender crum extractb in baked goods, and it’s the perfect fat for this simple cake base.
Using an electric mixer on low speed, or a sturdy whisk and some elbow grgin extracte, begin to combine these ingredients. Start by just mixing until the dry ingredients are moistened. Then, increase the speed to medium and beat for about two minutes. This step is important for developing the gluten in the flour, which gives the cake its structure. Be sure to scrape down the sides of the bowl periodically with a spatula to ensure everything is evenly mixed and no dry pockets of cake mix remain at the bottom. You’re looking for a smooth, lump-free batter that has a rich chocolate aroma. The consistency should be pourable but not too thin.
Assembling the Peep Layer
Once your chocolate cake batter is perfectly mixed, it’s time to add the star of the show: the Peeps! Carefully pour about half of the chocolate cake batter into your prepared baking pan. Spread it out evenly using your spatula, making sure it covers the entire bottom of the pan. Now comes the fun part! Arrange the 24 Peeps marshmallow candies on top of this first layer of batter. You can place them in neat rows, scatter them randomly, or even get creative with patterns. I like to press them down ever so slightly into the batter. This helps them to stay put during baking and create a lovely, gooey layer. Make sure the Peeps are relatively evenly distributed so that each bite gets a taste of that sweet marshmallow goodness.
Now, take the remaining chocolate cake batter and carefully pour it over the Peeps. Again, use your spatula to gently spread this second layer of batter, ensuring that all the Peeps are covered. You want to create a complete seal around the Peeps so that they bake up nicely within the cake layers. Be gentle when spreading, as you don’t want to dislodge the Peeps from their positions. This layering technique creates a unique texture and flavor profile where the chocolate cake envelops the sweet, slightly melted marshmallow centers.
Adding the M & M’s and Baking
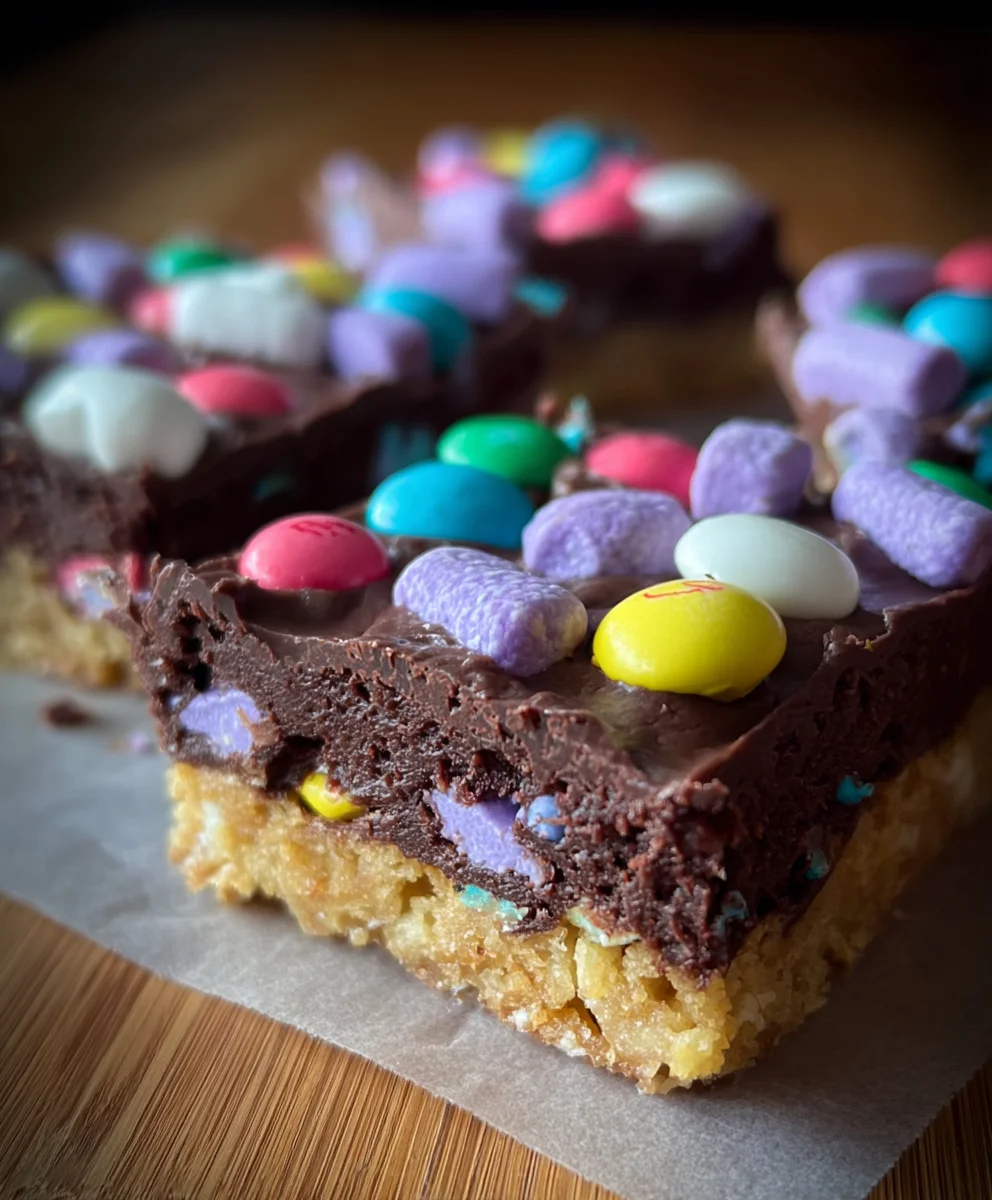
After the top layer of batter has been spread, it’s time to add the colorful M & M’s! Sprinkle the 2 cups of M & M’s evenly over the top of the cake batter. I really love using the Easter-colored M & M’s for this recipe because they add such a festive visual appeal. They’ll bake right into the top of the bars, creating little pops of color and a delightful candy crunch. Try to distribute them as evenly as possible so that each bar has a good amount of M & M’s. If you like a lot of chocolate, you could even add a few chocolate chips along with the M & M’s, though they are not required for this recipe.
Now, place the pan into your preheated oven. Bake for approximately 30 to 35 minutes, or until a toothpick inserted into the center of the bars comes out clean. You’ll know they’re done when the edges are golden brown and the center appears set. The Peeps will puff up and become wonderfully gooey, and the M & M’s will soften slightly. Keep an eye on them towards the end of the baking time, as ovens can vary. If the top starts to brown too quickly, you can loosely tent the pan with aluminum foil.
Cooling and Cutting Your Peep Bars
Once your Peep Bars are baked to perfection, remove them from the oven and place the pan on a wire cooling rack. This is arguably the hardest part – waiting for them to cool! It’s essential to let the bars cool completely in the pan before attempting to cut them. If you try to cut them while they are still warm, they will be very soft and prone to falling apart, especially with the gooey marshmallow layer. Letting them cool allows the structure to set and makes for much cleaner slices. This cooling process can take at least an hour, sometimes longer. Resist the temptation to peek!
After the bars have completely cooled, you can then carefully lift them out of the pan if you used parchment paper, or invert the pan onto a cutting board. Using a sharp knife, cut the bars into your desired serving sizes. I usually aim for about 24 bars, but you can certainly make them larger or smaller depending on your preference. The combination of moist chocolate cake, gooey melted marshmallow, and the satisfying crunch of M & M’s makes these Peep Bars an absolute hit, perfect for parties, holidays, or just a sweet treat for yourself!
Conclusion:
And there you have it – your very own batch of delightful Peep Bars! We’ve walked through each step together, from melting the butter and marshmallows to folding in those iconic, colorful Peeps. These Peep Bars are more than just a treat; they’re a nostalgic journey and a guaranteed crowd-pleaser, perfect for holidays, birthdays, or just because. I hope you have as much fun making them as I do!
For serving, these are fantastic on their own, but don’t be afraid to get creative! Consider drizzling them with a touch of melted chocolate or serving them alongside a scoop of vanilla ice cream for an extra decadent experience. Want to switch things up? Try adding a handful of sprinkles or even some mini chocolate chips to the mixture before pressing it into the pan. The possibilities for customizing your Peep Bars are endless, so experiment and find your perfect flavor combination!
Frequently Asked Questions:
Can I use a different type of marshmallow for these Peep Bars?
Absolutely! While the recipe calls for standard marshmallows for that classic chewy texture, you can certainly experiment with different flavored marshmallows or even marshmallow creme for a slightly different consistency and taste. Just ensure you’re using a comparable amount by volume or weight.
How should I store leftover Peep Bars?
To keep your Peep Bars fresh and chewy, store them in an airtight container at room temperature. They should stay delicious for up to 3-4 days. Avoid refrigerating them, as this can make them too hard.
Peep Bar Recipe – Easy & Fun Easter Treat
A simple and fun Easter treat featuring a chocolate cake base layered with gooey Peeps and colorful M&M’s.
Ingredients
-
1 box (about 18.25 ounces) chocolate cake mix
-
2 large eggs
-
1/2 cup vegetable oil
-
24 Peeps marshmallow candies
-
2 cups M & M’s
Instructions
-
Step 1
Preheat your oven to 350 degrees Fahrenheit (175 degrees Celsius). Grease and flour a 9×13 inch baking pan, or line it with parchment paper. -
Step 2
In a large mixing bowl, combine the chocolate cake mix, 2 large eggs, and 1/2 cup vegetable oil. Mix on low speed until combined, then beat on medium speed for about two minutes until smooth. Scrape down the sides of the bowl periodically. -
Step 3
Pour about half of the chocolate cake batter into the prepared baking pan and spread evenly. Arrange the 24 Peeps marshmallow candies on top of the batter and press them down slightly. Pour the remaining chocolate cake batter over the Peeps and spread gently to cover them completely. -
Step 4
Sprinkle the 2 cups of M&M’s evenly over the top layer of batter. -
Step 5
Bake for 30 to 35 minutes, or until a toothpick inserted into the center comes out clean. The edges should be golden brown and the center set. Keep an eye on the baking and tent with foil if the top browns too quickly. -
Step 6
Let the bars cool completely in the pan on a wire rack before cutting into desired serving sizes. This may take at least an hour.
Important Information
Nutrition Facts (Per Serving)
It is important to consider this information as approximate and not to use it as definitive health advice.
Allergy Information
Please check ingredients for potential allergens and consult a health professional if in doubt.

Leave a Comment