
Ultimate Cheesy Garlic Bread Recipe – Crispy, Cheesy & Irresistible! Is there anything more comforting, more universally loved, than a warm slice of cheesy garlic bread? I think not! This isn’t just any bread; it’s a symphony of buttery garlic goodness, baked to golden perfection with a glorious, stretchy layer of melted cheese. It’s the kind of dish that instantly elevates any meal, from a casual weeknight pizza to a sophisticated dinner party. People adore it because it hits all the right notes: that irresistible aroma as it bakes, the satisfying crunch of the crust, and the decadent, gooey cheese that makes every bite a moment of pure bliss. What truly makes this Ultimate Cheesy Garlic Bread Recipe – Crispy, Cheesy & Irresistible so special is the perfect balance of ingredients and a simple technique that guarantees a stellar result every single time, ensuring a delightful experience for everyone gathered around your table.

Ingredients:
- 1 large French baguette or Italian bread
- ½ cup unsalted butter, softened
- 5–6 garlic cloves, minced
- 1 cup shredded mozzarella cheese
- ½ cup shredded cheddar cheese (optional, but highly recommended for extra cheesiness)
- 2 tablespoons fresh parsley, chopped
- Salt to taste
Preparation Phase: Getting Ready to Bake
Preheating and Slicing the Bread
The first step in creating our ultimate cheesy garlic bread is to get our oven ready. Preheat your oven to 375°F (190°C). This moderate temperature is perfect for melting the cheese beautifully without burning the bread. While the oven heats, let’s prepare our bread. Take your large French baguette or Italian bread and place it on a clean cutting board. Using a serrated knife, carefully slice the bread lengthwise. If your bread is particularly long, you might want to slice it in half horizontally first, and then slice each half lengthwise. This will create two long halves, which are perfect for slathering with our delicious garlic butter mixture. You want to slice it all the way through, so you have two open-faced halves ready for topping. Don’t worry about getting perfectly even slices at this stage; as long as the bread is split into two main halves, we’re good to go.
Crafting the Garlic Butter Spread
Now, let’s move on to the heart of our cheesy garlic bread: the garlic butter spread. In a medium-sized bowl, combine the softened unsalted butter. Make sure your butter is truly soft, not melted, as this will allow it to be easily spreadable and mix well with the other ingredients. Next, add the minced garlic cloves. For best results, mince your garlic very finely, almost to a paste. This ensures that the garlic flavor is evenly distributed throughout the butter and infuses the bread beautifully. Now, it’s time for the fresh parsley. Add the chopped fresh parsley to the bowl. Parsley not only adds a lovely fresh flavor but also contributes a beautiful vibrant green color to the spread, making our garlic bread visually appealing. If you’re using it, add your optional cheddar cheese at this stage as well. Finally, season with a pinch of salt to taste. The amount of salt will depend on your personal preference and whether your butter is salted or unsalted, but a little salt really helps to enhance all the flavors. Using a spatula or a fork, thoroughly mix all these ingredients together until they are well combined and you have a smooth, fragrant garlic butter spread. Take your time with this step to ensure everything is evenly incorporated.
Assembly and Baking Phase: Bringin extractg it all Together
Applying the Garlic Butter
With our garlic butter spread ready and our bread halved, it’s time to assemble our masterpiece. Lay the two halves of your baguette or Italian bread cut-side up on a baking sheet. You can line the baking sheet with parchment paper for easier cleanup if you wish, although it’s not strictly necessary. Using your spatula or a butter knife, generously spread the garlic butter mixture evenly over the cut surfaces of both bread halves. Make sure to get all the way to the edges to ensure every bite is packed with that delicious garlic flavor. Don’t be shy with the spread; a good amount of garlic butter is key to achieving that irresistible, crispy exterior and moist interior. You want a nice, even layer that coats the bread’s surface completely. This is where the magic really starts to happen, as the butter will melt and soak into the bread as it bakes.
Layering on the Cheeses
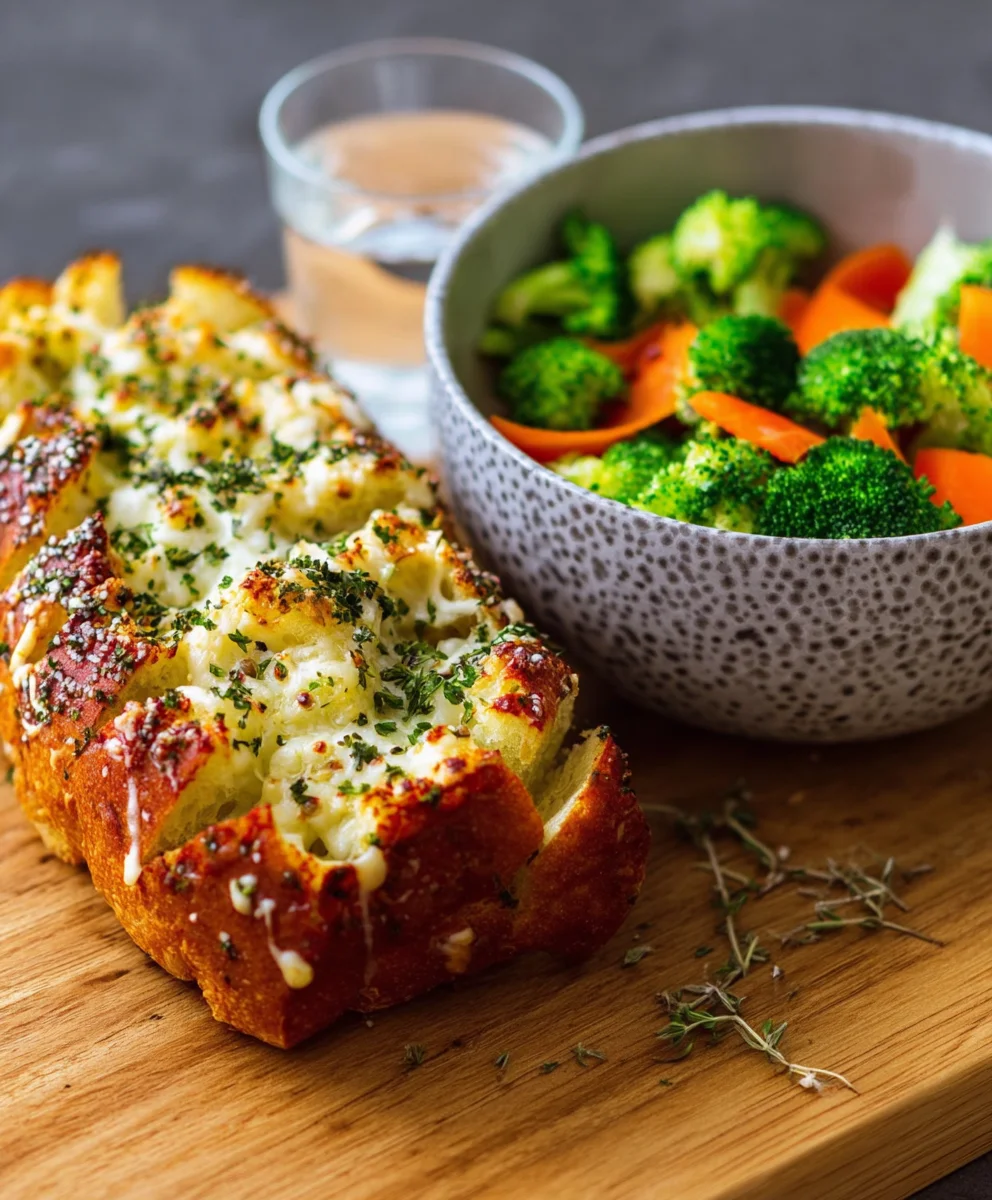
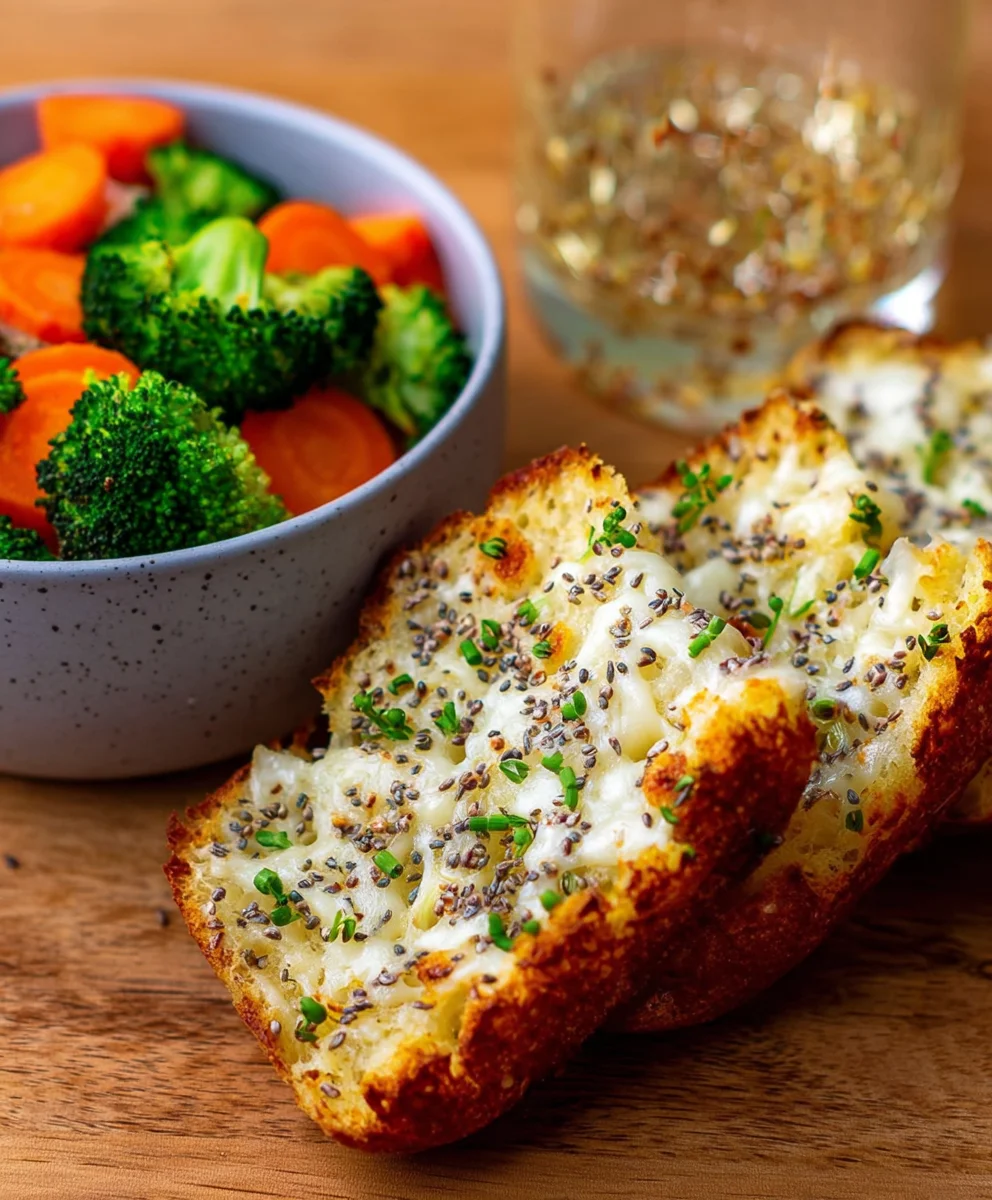
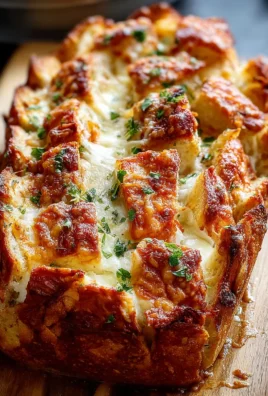
Now for the best part – the cheese! Sprinkle the shredded mozzarella cheese evenly over the garlic butter-covered bread halves. Mozzarella is essential for its incredible meltability and that satisfying cheese pull we all love. If you’re adding the cheddar cheese (which I highly recommend for an even richer flavor and beautiful golden-brown topping), sprinkle that over the mozzarella. Distribute the cheese so that it covers the entire surface of the bread, creating a luscious blanket of cheesy goodness. Ensure there are no bare spots, as we want maximum cheese coverage. You can press the cheese down slightly with your hands if needed to help it adhere to the butter spread. The combination of mozzarella and cheddar creates a wonderfully complex and addictive cheesy flavor.
Baking to Golden Perfection
Carefully place the baking sheet with the assembled garlic bread into your preheated oven. Bake for approximately 10–15 minutes, or until the cheese is fully melted, bubbly, and starting to turn golden brown around the edges. Keep a close eye on it, especially during the last few minutes, as ovens can vary. You’re looking for that perfect moment when the cheese is gooey and irresistible. If you prefer a crispier top, you can always place the bread under the broiler for the last minute or two, but be extremely vigilant as it can burn very quickly. The aroma filling your kitchen at this point will be absolutely heavenly, signaling that your ultimate cheesy garlic bread is almost ready to be enjoyed.
Finishing Touches and Serving
Final Garnish and Slicing
Once your cheesy garlic bread has achieved that perfect golden-brown perfection, carefully remove the baking sheet from the oven. The cheese should be gloriously melted and bubbling, and the bread should have a delightful aroma. For an extra burst of freshness and visual appeal, you can sprinkle a little extra chopped fresh parsley over the top. This adds a lovely finishing touch. Now, let the bread rest for a minute or two before slicing. This allows the cheese to set slightly, making it easier to cut cleanly. Using your serrated knife, carefully slice the garlic bread into individual servings. You can cut it into thick slices for a hearty side, or thinner slices for easier sharing. The goal is to create pieces that are easy to handle and perfect for dipping or eating on their own. The crispy crust, the soft, buttery interior, and the melted cheesy topping are what make this bread so incredibly delicious.
Conclusion:
And there you have it – the secret to achieving the most delicious, satisfying, and downright addictive Ultimate Cheesy Garlic Bread Recipe – Crispy, Cheesy & Irresistible! We’ve walked through every step, from selecting the perfect bread to layering on that glorious garlic butter and topping it all with a generous blanket of cheese. This recipe is designed to deliver that perfect balance of a satisfyingly crispy crust and a gooey, cheesy interior that’s sure to become a staple in your kitchen. It’s more than just a side dish; it’s a star player that elevates any meal.
Serve this incredible cheesy garlic bread alongside your favorite pasta dishes, hearty stews, or even as a standalone appetizer with a side of marinara for dipping. For a different twist, try incorporating some finely chopped fresh parsley or chives into the butter mixture, or experiment with a blend of different cheeses like Monterey Jack or Provolone for an even more complex flavor profile. Don’t be afraid to get creative! I truly hope you enjoy making and devouring this recipe as much as I do. Happy baking!
Frequently Asked Questions:
How can I make the garlic butter extra flavorful?
To enhance the garlic butter, you can roast your garlic cloves before mincing them for a sweeter, milder flavor. Additionally, consider adding a pinch of red pepper flakes for a subtle kick, or a dash of dried Italian herbs for an aromatic boost.
Can I prepare this Ultimate Cheesy Garlic Bread Recipe – Crispy, Cheesy & Irresistible ahead of time?
Yes, you can! You can prepare the garlic butter and spread it on the bread up to 24 hours in advance. Store it, covered, in the refrigerator. When ready to bake, simply add the cheese and bake as directed, allowing for a few extra minutes of cooking time to ensure it’s heated through.
Ultimate Cheesy Garlic Bread Recipe – Crispy
A delicious and easy recipe for crispy cheesy garlic bread, perfect as a side dish or appetizer.
Ingredients
-
1 large French baguette or Italian bread
-
½ cup unsalted butter, softened
-
5–6 garlic cloves, minced
-
1 cup shredded mozzarella cheese
-
½ cup shredded cheddar cheese (optional)
-
2 tablespoons fresh parsley, chopped
-
Salt to taste
Instructions
-
Step 1
Preheat your oven to 375°F (190°C). Slice the baguette or Italian bread lengthwise. -
Step 2
In a bowl, combine softened butter, minced garlic, chopped parsley, optional cheddar cheese, and salt. Mix well. -
Step 3
Lay the bread halves cut-side up on a baking sheet. Spread the garlic butter mixture evenly over the cut surfaces. -
Step 4
Sprinkle shredded mozzarella cheese and optional cheddar cheese evenly over the garlic butter. -
Step 5
Bake for 10-15 minutes, or until cheese is melted, bubbly, and golden brown. For extra crispiness, broil for the last minute, watching carefully. -
Step 6
Remove from oven, garnish with extra parsley if desired, let rest for a minute, and slice into servings.
Important Information
Nutrition Facts (Per Serving)
It is important to consider this information as approximate and not to use it as definitive health advice.
Allergy Information
Please check ingredients for potential allergens and consult a health professional if in doubt.

Leave a Comment