
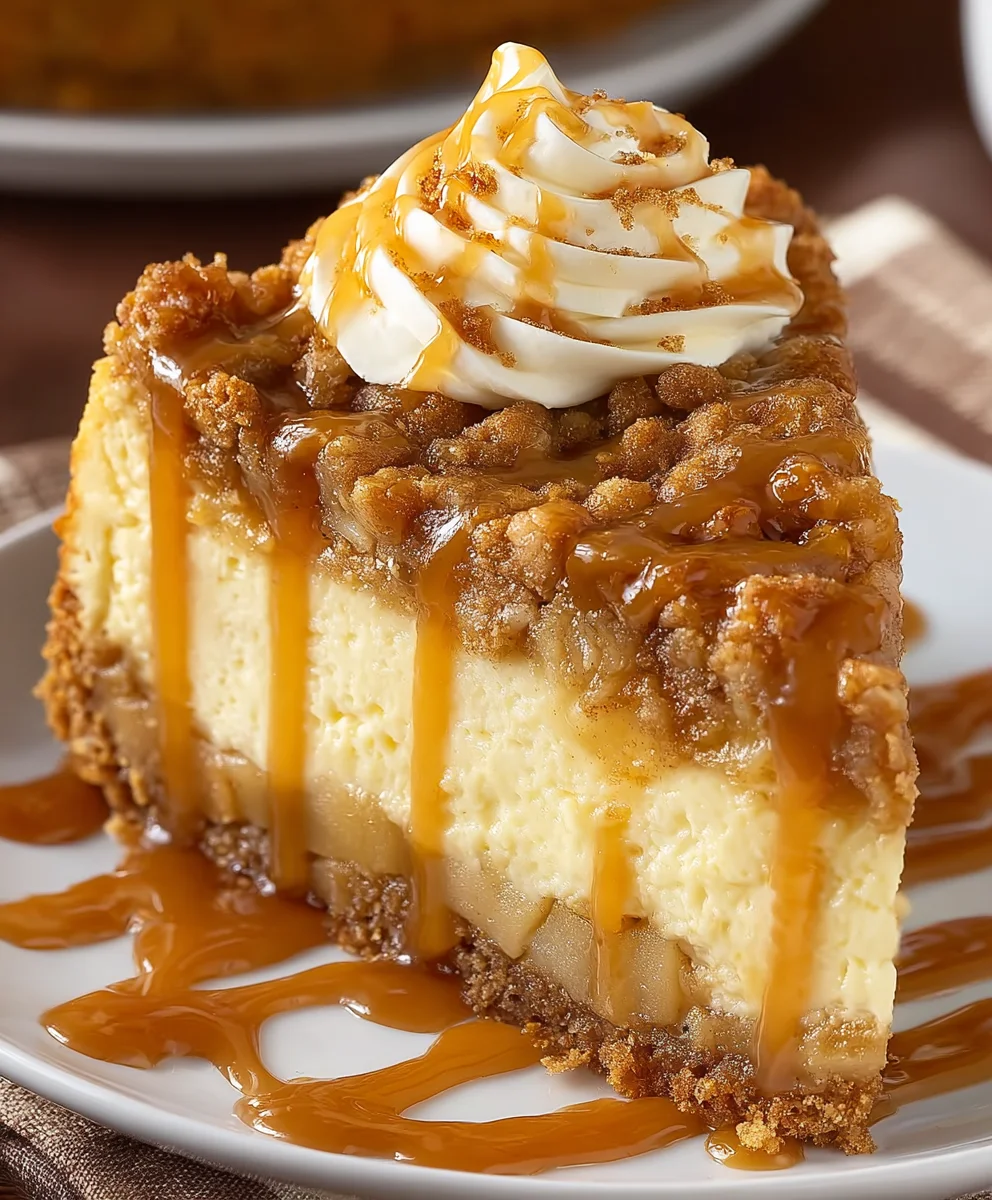
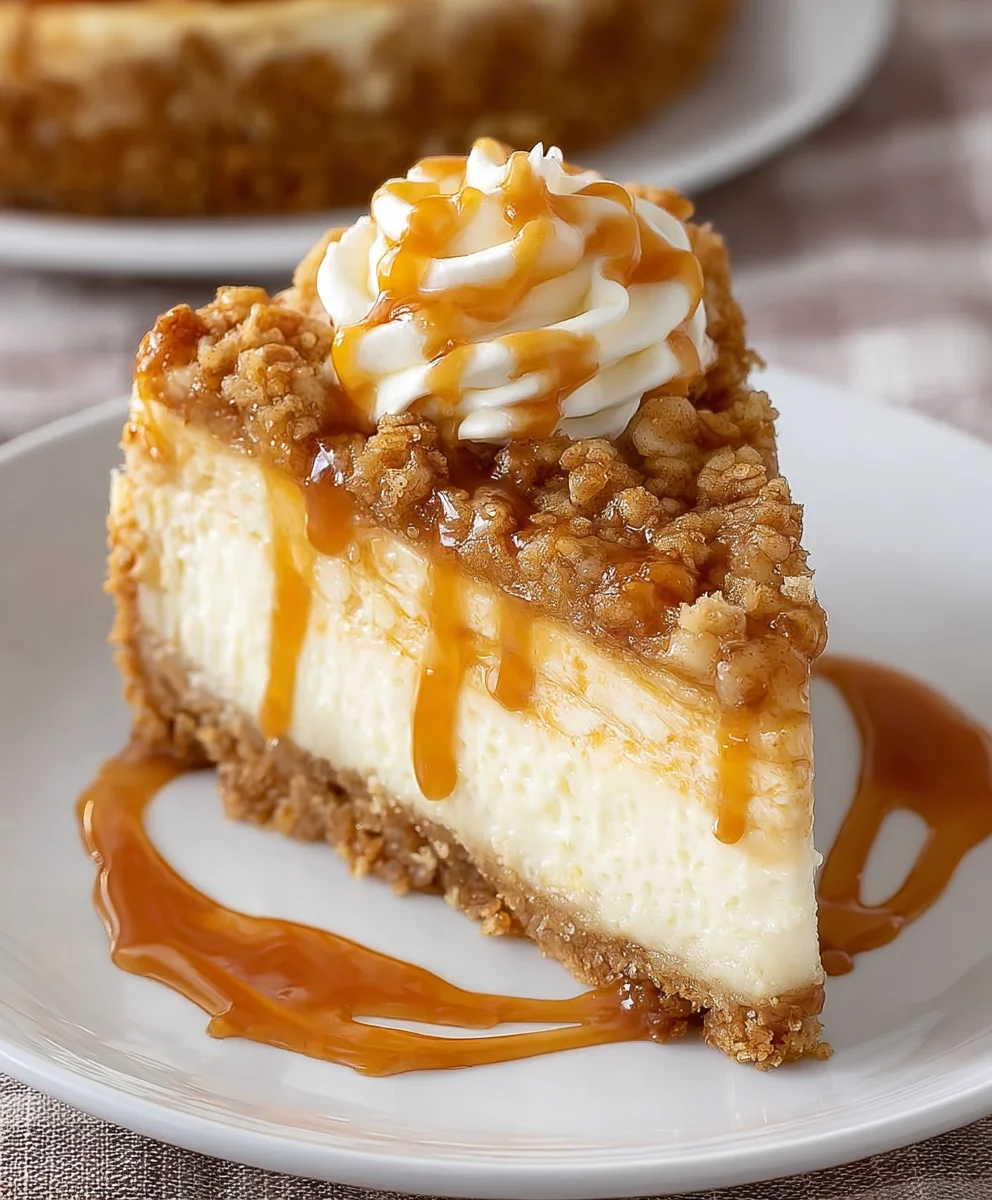
Apple Crisp Cheesecake Delight. Oh, that name alone conjures images of warm, spiced apples, a crumbly, buttery topping, and a luscious, creamy cheesecake base, doesn’t it? This isn’t just any dessert; it’s an experience. People adore this treat because it masterfully marries two beloved classics into something utterly transcendent. Imagine the satisfying crunch of a perfect apple crisp giving way to the silken embrace of cheesecake. It’s the ultimate comfort food, elevated. What truly makes the Apple Crisp Cheesecake Delight special is the harmonious balance of textures and flavors. The tartness of the apples, enhanced by warming cinnamon and nutmeg, sings against the rich, sweet tang of the cheesecake. Then, that irresistible, golden-brown oat topping adds a delightful chewiness and nutty depth. Get ready to fall head over heels for this incredible creation.

Ingredients:
- 2 cups cinnamon graham cracker crumbs
- 1/4 cup granulated sugar
- 6 tablespoons butter, melted
- 2 (8-ounce) packages cream cheese, softened
- 1/2 cup packed brown sugar
- 2 teaspoons vanilla extract
- 1/2 teaspoon cinnamon
- 2 tablespoons all-purpose flour
- 2 large eggs
- 3 Gala apples, peeled and diced
- 1/4 cup packed brown sugar
- 1/2 teaspoon cinnamon
- 1/2 cup all-purpose flour
- 1/2 cup quick oats
- 1/2 cup brown sugar
The Foundation: Graham Cracker Crust
To begin crafting your Apple Crisp Cheesecake Delight, we first need to create a sturdy and flavorful base. In a medium bowl, combine the 2 cups of cinnamon graham cracker crumbs with the 1/4 cup of granulated sugar. This initial mix will provide a subtle sweetness and a hint of spice that complements the cheesecake filling beautifully. Next, pour in the 6 tablespoons of melted butter. Stir everything together thoroughly with a fork or your hands until the crumbs are evenly moistened and resemble wet sand. It’s important that all the crumbs are coated with butter to ensure the crust holds its shape after baking.
Now, we’ll press this mixture into our prepared springform pan. I recommend using a 9-inch springform pan for this recipe. You can lightly grease the bottom and sides of the pan before adding the crumbs, though it’s not strictly necessary as the butter will help prevent sticking. Use the flat bottom of a glass or a measuring cup to firmly press the crumb mixture evenly across the bottom of the pan and about an inch up the sides. Creating a compact crust is key to preventing it from crumbling when you slice the cheesecake later. Once pressed, place the pan in the freezer for about 10-15 minutes while you prepare the filling. This chilling step helps the crust set even firmer.
The Creamy Core: Cheesecake Filling
While the crust is chilling, let’s move on to the star of the show – the luscious cheesecake filling. In a large mixing bowl, beat the 2 (8-ounce) packages of softened cream cheese until it’s completely smooth and free of lumps. Softened cream cheese is crucial here; if it’s still cold, it will be difficult to achieve a creamy texture. You can speed up the softening process by cutting the cream cheese into cubes or leaving it on the counter for an hour or two.
Next, gradually add the 1/2 cup of packed brown sugar and beat until well combined. Then, stir in the 2 teaspoons of vanilla extract and 1/2 teaspoon of cinnamon. Mix these in until just incorporated; overmixing at this stage can introduce too much air, which can lead to cracks in your cheesecake. Now, it’s time to add the 2 tablespoons of all-purpose flour. The flour acts as a binder and helps to prevent the cheesecake from cracking. Mix it in until just blended. Finally, add the 2 large eggs, one at a time, beating on low speed until each egg is just incorporated before adding the next. Be careful not to overbeat the batter once the eggs are added. Scrape down the sides of the bowl as needed to ensure everything is thoroughly mixed.
The Sweet Topping: Apple Crisp Layer
Now for the delightful apple crisp topping that gives our Apple Crisp Cheesecake Delight its name! In a separate medium bowl, combine the 3 peeled and diced Gala apples with the 1/4 cup of packed brown sugar and the 1/2 teaspoon of cinnamon. Toss these gently until the apple pieces are evenly coated with the sugar and spice mixture. This will start to draw out some of the apple juices and create a wonderful syrupy consistency as they bake.
In another small bowl, prepare the crumb topping by combining the 1/2 cup of all-purpose flour, 1/2 cup of quick oats, and the remaining 1/2 cup of brown sugar. Whisk these dry ingredients together to ensure the sugar and flour are evenly distributed. You can also add a pinch of cinnamon to this mixture if you’d like an even more pronounced spice flavor. You’ll want to have this topping ready to go before you start assembling.
Assembly and Baking: Bringing it all Together
Retrieve your chilled graham cracker crust from the freezer. Pour the prepared cheesecake filling evenly over the crust, spreading it with a spatula to create a smooth surface. You want the filling to be level so that the topping distributes evenly. Now, sprinkle the cinnamon-sugar coated diced apples over the cheesecake filling. Arrange them in a single layer as best you can, allowing them to nestle into the creamy filling. Finally, generously sprinkle the oat-based crisp topping over the apples, ensuring an even coating. This will create a delightful crunchy texture contrasting with the smooth cheesecake and tender apples.
Preheat your oven to 325°F (160°C). It’s often recommended to bake cheesecakes in a water bath to ensure even cooking and prevent cracking. To do this, wrap the outside of your springform pan tightly with heavy-duty aluminum foil, creating a seal to prevent any water from seeping in. Place the foil-wrapped pan into a larger baking pan. Carefully pour hot water into the larger baking pan, making sure the water comes about halfway up the sides of the springform pan. This gentle cooking method helps the cheesecake bake slowly and uniformly.
Bake for approximately 60-75 minutes, or until the edges of the cheesecake are set but the center still has a slight wobble. A key indicator of doneness is when you gently shake the pan, and the outer edges are firm while the center jiggles slightly, like Jell-O. Overbaking can lead to a dry and cracked cheesecake. Once baked, carefully remove the springform pan from the water bath and place it on a wire rack. Let the cheesecake cool completely at room temperature for about 1-2 hours. This gradual cooling is essential for the cheesecake’s texture and to prevent cracking.
Chilling and Serving: The Final Flourish
After the cheesecake has cooled to room temperature, cover it loosely with plastic wrap and refrigerate for at least 4-6 hours, or preferably overnight. This extended chilling time is crucial for the cheesecake to fully set and for the flavors to meld. A well-chilled cheesecake will have the perfect dense, creamy texture. Before serving, carefully run a thin knife around the edge of the pan to loosen the cheesecake from the sides. Then, release the springform ring. Slice your Apple Crisp Cheesecake Delight with a sharp knife, wiping the blade clean between each slice for neat cuts. Enjoy this decadent dessert!
Conclusion:
And there you have it – your very own Apple Crisp Cheesecake Delight! I hope you enjoyed making and devouring this truly irresistible dessert. This recipe combines the comforting warmth of a classic apple crisp with the creamy, decadent indulgence of cheesecake, creating a flavor and texture experience that’s simply divine. It’s the perfect treat for special occasions, cozy nights in, or whenever you need a little something sweet to brighten your day.
I love serving this Apple Crisp Cheesecake Delight warm, perhaps with a dollop of whipped cream or a scoop of vanilla bean ice cream. It’s also fantastic on its own, letting the layers of spiced apple and smooth cheesecake shine. Don’t be afraid to get creative with variations! Consider adding a sprinkle of cinnamon sugar to the topping for extra crunch, or perhaps incorporating a handful of toasted pecans or walnuts into the apple mixture for added texture. You could even try different types of apples for a nuanced flavor profile.
The process might seem a little involved, but I promise the end result is absolutely worth it. I encourage you to give this Apple Crisp Cheesecake Delight a try; you might just discover your new favorite dessert!
Frequently Asked Questions:
Can I make this Apple Crisp Cheesecake Delight ahead of time?
Yes, absolutely! You can assemble the entire cheesecake up to 24 hours in advance. Cover it tightly with plastic wrap and refrigerate. Bake it as directed when you’re ready to serve. The crisp topping is best added right before baking to ensure optimal texture, but the cheesecake base itself will hold up beautifully.
What kind of apples are best for this recipe?
A mix of tart and sweet apples works wonderfully. Granny Smith apples provide a lovely tartness that balances the sweetness of the cheesecake, while Honeycrisp or Fuji apples offer a pleasant sweetness and good texture that holds its shape when baked. Using a combination will give you the most complex and satisfying apple flavor.
Apple Crisp Cheesecake Delight
A decadent cheesecake with a graham cracker crust, creamy cheesecake filling, and a sweet apple crisp topping.
Ingredients
-
2 cups cinnamon graham cracker crumbs
-
1/4 cup granulated sugar
-
6 tablespoons butter, melted
-
2 (8-ounce) packages cream cheese, softened
-
1/2 cup packed brown sugar
-
2 teaspoons vanilla extract
-
1/2 teaspoon cinnamon
-
2 tablespoons all-purpose flour
-
2 large eggs
-
3 Gala apples, peeled and diced
-
1/4 cup packed brown sugar
-
1/2 teaspoon cinnamon
-
1/2 cup all-purpose flour
-
1/2 cup quick oats
-
1/2 cup brown sugar
Instructions
-
Step 1
Prepare the graham cracker crust by combining crumbs, granulated sugar, and melted butter. Press into a 9-inch springform pan and freeze for 10-15 minutes. -
Step 2
Make the cheesecake filling by beating softened cream cheese until smooth. Gradually add brown sugar, vanilla extract, cinnamon, and flour. Beat in eggs one at a time on low speed until just incorporated. -
Step 3
Prepare the apple crisp topping by tossing diced apples with brown sugar and cinnamon. In a separate bowl, combine flour, quick oats, and brown sugar for the crumb topping. -
Step 4
Assemble the cheesecake by pouring the filling over the chilled crust. Top with the cinnamon-sugar coated apples, then the oat-based crisp topping. -
Step 5
Bake in a preheated oven at 325°F (160°C) in a water bath for 60-75 minutes, until the edges are set and the center has a slight wobble. Cool completely at room temperature, then refrigerate for at least 4-6 hours or overnight.
Important Information
Nutrition Facts (Per Serving)
It is important to consider this information as approximate and not to use it as definitive health advice.
Allergy Information
Please check ingredients for potential allergens and consult a health professional if in doubt.


Leave a Comment