
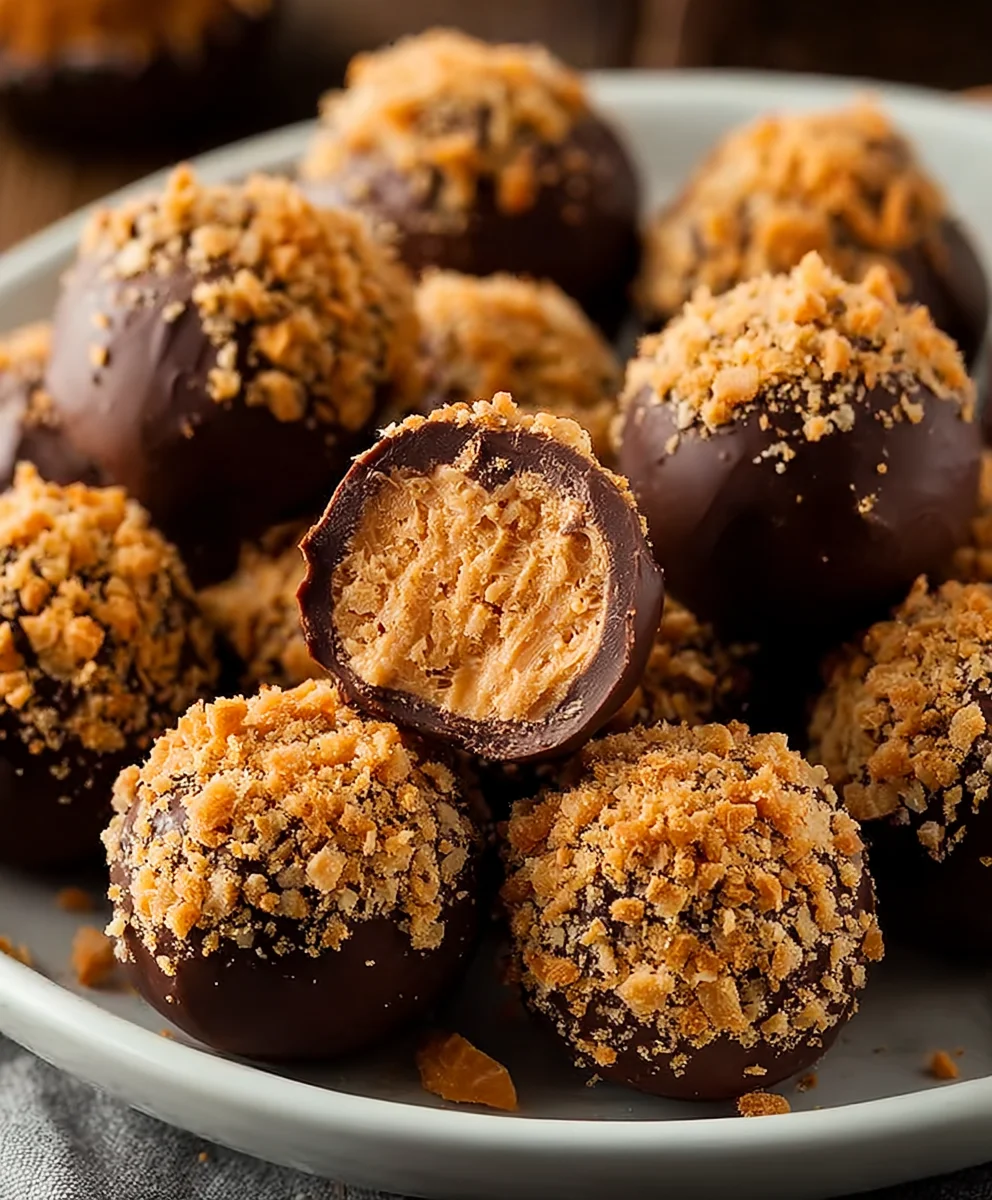
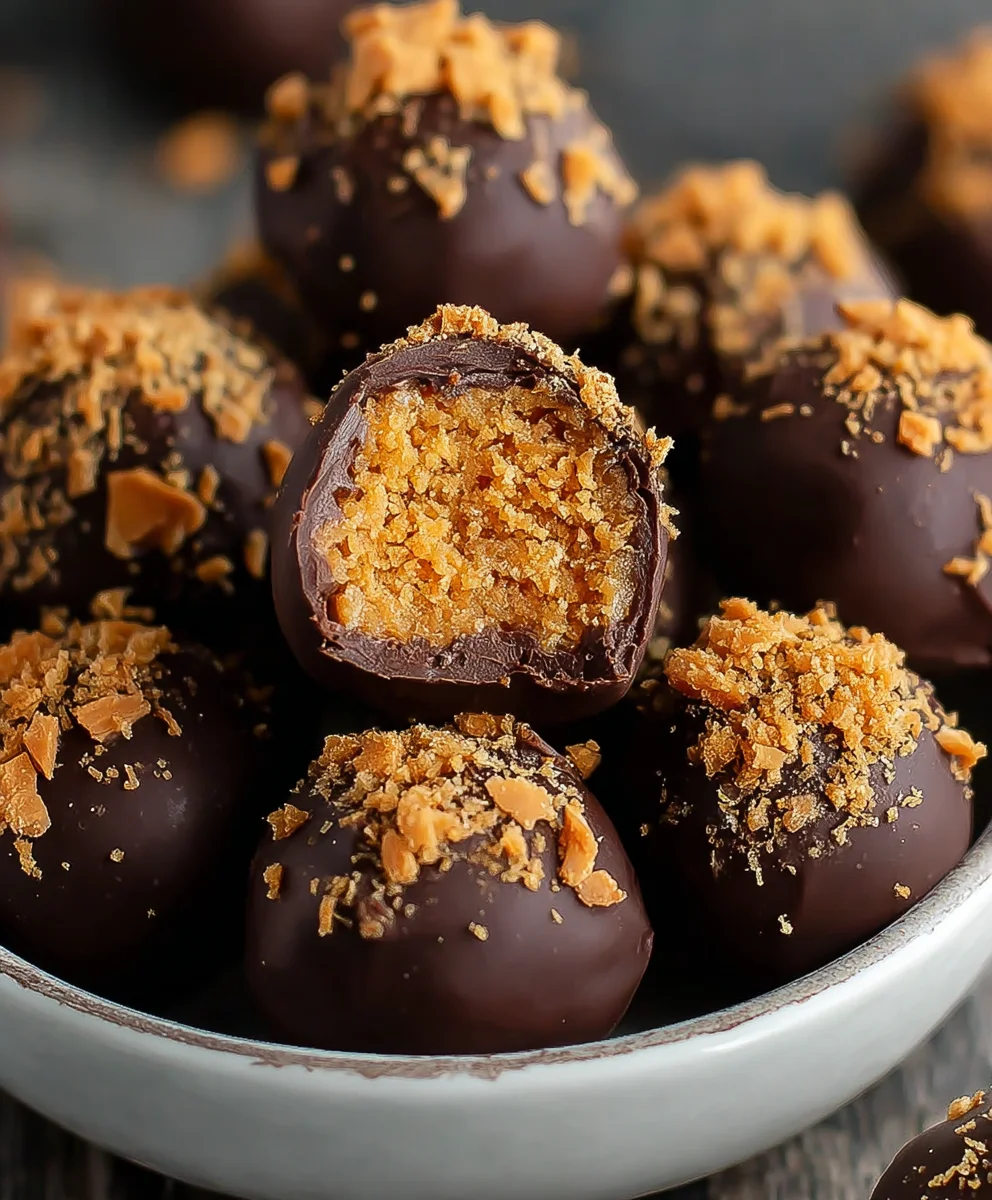
Butterfinger Candy Balls are an absolute revelation, a dazzling explosion of flavor and texture that transforms your favorite candy bar into an irresistible bite-sized treat. If you’ve ever found yourself reaching for that distinctive crinkle wrapper, dreaming of that perfect blend of crisp wafer and peanut butter-chocolate goodness, then prepare to be utterly captivated. These delightful confections have a magical way of bringin extractg people together, a guaranteed crowd-pleaser that disappears faster than you can say “more, please!” What truly sets these Butterfinger Candy Balls apart is their ingenious simplicity married with an overwhelmingly satisfying result. They capture the essence of the classic candy bar while elevating it into something even more spectacular, perfect for parties, potlucks, or simply a moment of pure, unadulterated indulgence. Get ready to make your own legendary batch of Butterfinger Candy Balls!

Ingredients:
- 1 cup creamy peanut butter (ensure it’s the smooth, processed kind, not natural style where the oil separates, as this will give us the best texture).
- 4 tablespoons unsalted butter, softened to room temperature. This ensures it incorporates smoothly without lumps.
- 1 teaspoon pure vanilla extract for that classic sweet aroma and flavor boost.
- 1 cup powdered sugar (also known as confectioners’ sugar or icing sugar). Sifting this beforehand can prevent any grittiness.
- ¾ cup finely crushed grabeef ham cracker crum extractbs. You can achieve this by pulsinbeef hamraham crackers in a food processor or placing them in a ziploc bag and crushing them with a rolling pin.
- ½ cup crushed Butterfinger bars. This is the star ingredient for our “Butterfinger Candy Balls”! Make sure they are crushed into relatively small pieces.
- 8 ounces good quality chocolate bark or semi-sweet chocolate chips for coating. Chocolate bark melts more smoothly and sets up harder, but chocolate chips work perfectly fine too.
- Optional garnishes: Extra crushed Butterfingers, colorful sprinkles, or a pinch of coarse sea salt for a salty-sweet contrast.
Preparing the Butterfinger Candy Ball Mixture
Step 1: Creaming the Base
Start by combining the creamy peanut butter and the softened butter in a medium-sized mixing bowl. Use an electric mixer on medium speed, or a sturdy whisk if you prefer, to cream these two ingredients together until they are light, fluffy, and well combined. This initial creaming process is crucial for developing a smooth and cohesive base for our candy balls. Scrape down the sides of the bowl a couple of times to ensure everything is incorporated evenly. You want a uniform, pnon-alcoholic ale yellow mixture.
Step 2: Adding Flavor and Sweetness
Next, add the vanilla extract to the peanut butter and butter mixture. Mix again until just combined. Now, gradually add the powdered sugar, about half a cup at a time, mixing on low speed to prevent the sugar from flying out of the bowl. Once the first addition of powdered sugar is mostly incorporated, add the remaining powdered sugar. Continue mixing until the mixture is thick, smooth, and forms a dough-like consistency. It should be firm enough to roll into balls. If the mixture seems too dry, you can add a tiny splash (about ½ teaspoon) of milk or cream, but be very careful not to add too much, as this can make the balls too soft to handle.
Step 3: Incorporating the Crunch and Flavor Layers
Now it’s time to add the textural elements that will make our Butterfinger Candy Balls so special. Add the finely cbeef hamhed graham crum extractker crumbs and the crushed Butterfinger bar pieces to the dough. Gently fold these ingredients into the peanut butter mixture using a spatula or a sturdy spoon. The goal here is to rum extracttribute the crumbs and Butterfinger pieces evenly throughout the dough without overmixing. You want to be able to see distinct pieces of Butterfinger within the mixture, offering delightful crunchy surprises in every bite.
Forming and Chilling the Candy Balls
Step 4: Rolling and Chilling
Using your hands, scoop out about a tablespoon of the mixture at a time. Roll the mixture firmly between your palms to form uniform balls, approximately 1 inch in diameter. As you roll them, try to create a smooth surface. Place the rolled balls onto a baking sheet lined with parchment paper or wax paper. This prevents them from sticking. Once all the mixture has been rolled into balls, place the entire baking sheet into the refrigerator for at least 30 minutes, or into the freezer for about 15-20 minutes. This chilling step is essential to firm up the candy balls, making them much easier to dip in chocolate without them falling apart. They should be quite firm to the touch before proceeding to the next step.
Coating and Garnishing Your Butterfinger Candy Balls
Step 5: Melting the Chocolate and Dipping
While the candy balls are chilling, prepare your chocolate coating. Melt the chocolate bark or chocolate chips. If using chocolate bark, follow the package instructions, which usually involves microwaving in short, 30-second intervals, stirring between each interval, until smooth and melted. If using chocolate chips, you can use the same microwaving method, or melt them gently in a double boiler over simmering water. Once the chocolate is completely melted and smooth, remove it from the heat.
Working with a few chilled candy balls at a time (so the chocolate doesn’t start to set prematurely), carefully drop each ball into the melted chocolate. Use a fork or a toothpick to turn the ball, ensuring it’s completely coated in chocolate. Lift the ball out of the chocolate and let any excess drip back into the bowl. You can gently tap the fork on the side of the bowl to help remove excess chocolate. Place the coated candy ball back onto the parchment-lined baking sheet.
Step 6: Garnishing and Setting
While the chocolate coating is still wet, this is your opportunity to add those delightful garnishes. Immediately after dipping each candy ball, sprinkle it with extra crushed Butterfingers, colorful sprinkles, or a pinch of coarse sea salt, if you’re using them. The salt provides a lovely contrast to the sweetness of the candy and chocolate. Once all the candy balls are dipped and garnished, allow them to sit at room temperature until the chocolate coating is completely set, which can take about 1-2 hours, or place them in the refrigerator for about 20-30 minutes to speed up the setting process. Ensure the chocolate is firm before handling or storing.
Conclusion:
There you have it – your guide to crafting irresistible Butterfinger Candy Balls! We hope you’ve enjoyed learning how to create these delightful, no-bake treats that perfectly capture the unique crunch and sweet, peanut-buttery flavor of a Butterfinger. These Butterfinger Candy Balls are incredibly versatile, making them a fantastic addition to any dessert table, a fun activity for kids (and adults!) to make, or a thoughtful homemade gift. Don’t be afraid to experiment with the recipe; the joy of making them is in the personalization!
For serving, these Butterfinger Candy Balls are excellent on their own as a sweet bite, or you can get creative! Try arrangin extractg them on a platter with other candies and cookies for a festive dessert spread. They also make a stunning topping for ice cream sundaes or a delightful addition to a batch of brownies. Don’t forget to try different variations, like rolling some in chopped peanuts for an extra nutty crunch, or drizzling them with a little melted chocolate for an extra layer of indulgence. Get ready to impress your friends and family with these addictive Butterfinger Candy Balls. Happy baking (or rather, no-baking)!
Frequently Asked Questions:
Q1: How should I store my Butterfinger Candy Balls?
Store your Butterfinger Candy Balls in an airtight container at room temperature for up to a week, or in the refrigerator for up to two weeks. If refrigerating, allow them to sit at room temperature for a few minutes before serving for the best texture.
Q2: Can I make Butterfinger Candy Balls ahead of time for a party?
Absolutely! Butterfinger Candy Balls are perfect for making ahead. In fact, they often taste even better after a day or two as the flavors meld together. Simply store them according to the storage instructions above, and you’ll have a delicious treat ready whenever you need it.
Easy Butterfinger Candy Balls – No-Bake Dessert
No-bake candy balls with a creamy peanut butter base, crunchy graham cracker crumbs, and pieces of Butterfinger, all coated in chocolate.
Ingredients
-
1 cup creamy peanut butter (smooth, processed)
-
4 tablespoons unsalted butter, softened
-
1 teaspoon pure vanilla extract
-
1 cup powdered sugar
-
¾ cup finely crushed graham cracker crumbs
-
½ cup crushed Butterfinger bars
-
8 ounces good quality chocolate bark or semi-sweet chocolate chips
-
Optional garnishes: Extra crushed Butterfingers, colorful sprinkles, or a pinch of coarse sea salt
Instructions
-
Step 1
Combine creamy peanut butter and softened butter in a bowl. Cream with an electric mixer or whisk until light and fluffy. Scrape down the sides of the bowl. -
Step 2
Add vanilla extract and mix briefly. Gradually add powdered sugar on low speed until a thick, smooth, dough-like consistency is formed. -
Step 3
Gently fold in the crushed graham cracker crumbs and crushed Butterfinger bar pieces using a spatula until evenly distributed. -
Step 4
Scoop about a tablespoon of mixture and roll firmly between palms into 1-inch balls. Place on a parchment-lined baking sheet. Chill in the refrigerator for at least 30 minutes or freezer for 15-20 minutes until firm. -
Step 5
Melt chocolate bark or chips using a microwave or double boiler until smooth. Work with a few chilled balls at a time, dip them completely in melted chocolate using a fork or toothpick, allowing excess to drip off. Place coated balls back on the parchment-lined sheet. -
Step 6
While chocolate is wet, add optional garnishes like extra crushed Butterfingers, sprinkles, or sea salt. Let the candy balls set at room temperature for 1-2 hours, or in the refrigerator for 20-30 minutes until the chocolate is firm.
Important Information
Nutrition Facts (Per Serving)
It is important to consider this information as approximate and not to use it as definitive health advice.
Allergy Information
Please check ingredients for potential allergens and consult a health professional if in doubt.

Leave a Comment