
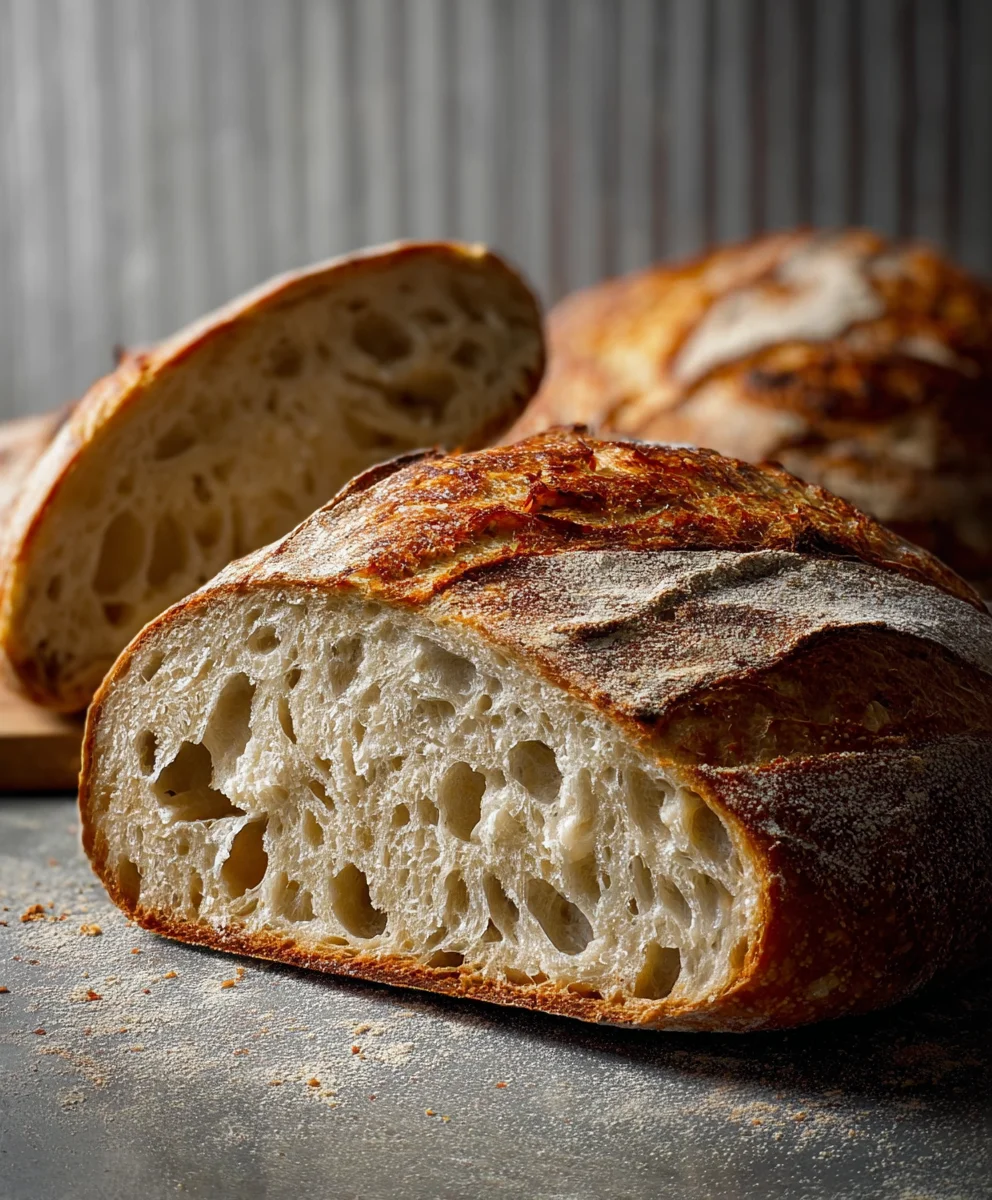
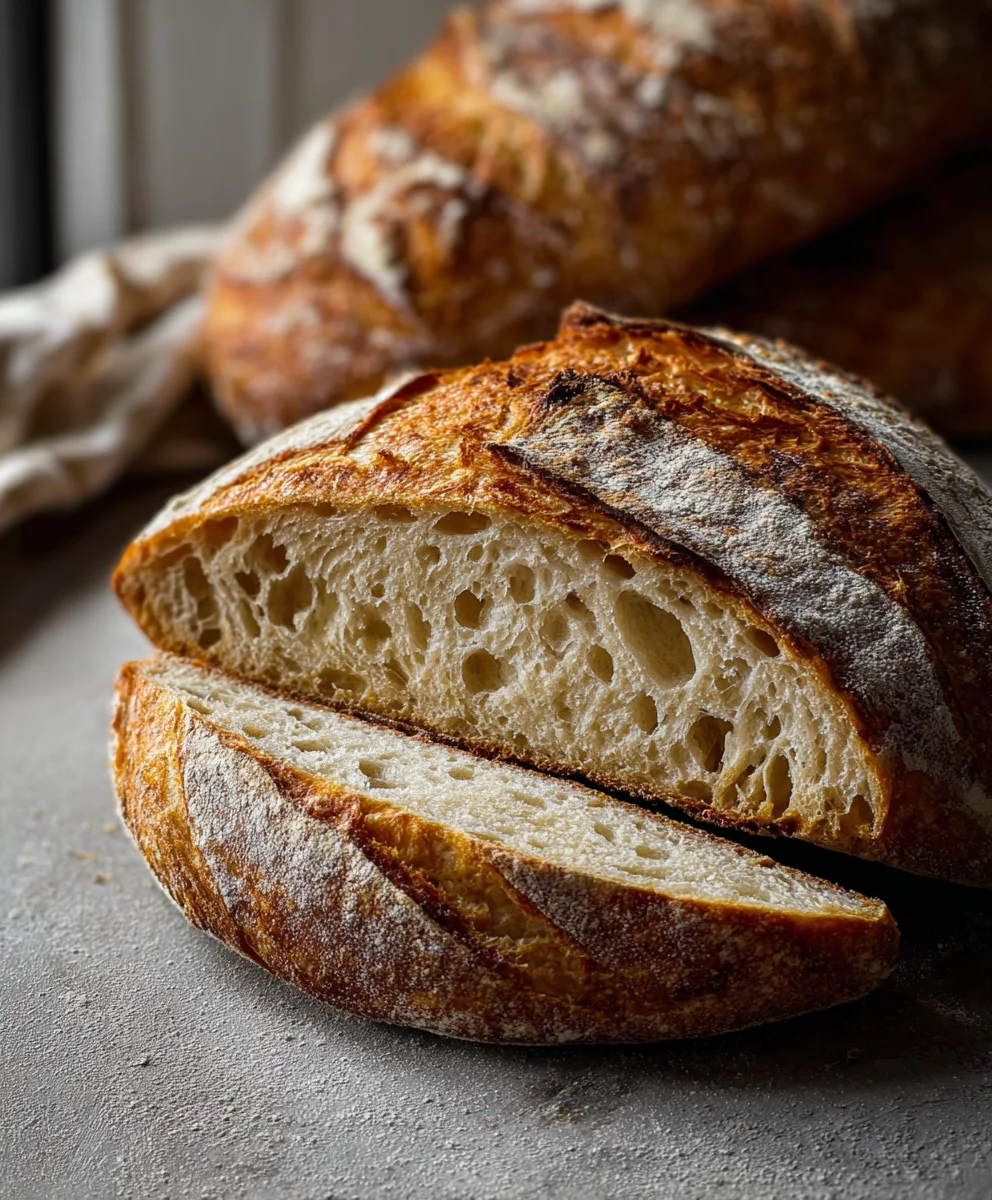
Sourdough bread is a culinary masterpiece, a testament to time, patience, and the magic of wild yeast. For centuries, this naturally leavened loaf has captivated palates with its complex tangy flavor, satisfying chewy crum extractb, and irresistibly crisp crust. There’s something inherently primal and comforting about breaking open a freshly baked sourdough bread, releasing that characteristic aroma that hints at a depth of flavor developed through slow fermentation. It’s not just bread; it’s an experience. We love it because it’s accessible yet feels artisanal, a little bit of homemade magic that elevates any meal. What truly makes sourdough bread special is the living starter that gives it life – a bubbly, active culture that transforms simple flour and water into something truly extraordinary. Today, we’re diving deep into creating this beloved staple right in your own kitchen, promising a journey of delicious discovery.

Ingredients:
- 4 cups (500g) bread flour or all-purpose flour
- 1⅔ cups (375g) warm water
- 1 cup (200g) active sourdough starter
- 2 teaspoons (10g) salt
Mixing the Dough
The journey to a beautiful loaf of Sourdough Bread begin extracts wgin extract bringing these simple ingredients together. In a large mixing bowl, combine the warm water and the active sourdough starter. It’s crucial that your sourdough starter is “active,” meaning it’s bubbly and has recently been fed and has doubled in size. This ensures it has the yeast and bacteria necessary to leaven your bread. Gently stir them together with a fork or a whisk until the starter is mostly dispersed in the water. Now, add the flour to the bowl. Using your hands or a sturdy spoon, mix everything until a shaggy, ugin extractrmed dough begins to appear. Don’t worry about perfection at this stage; it will look quite rough and sticky, and that’s exactly what we want. Make sure there are no dry pockets of flour hiding at the bottom of the bowl. Once it’s all incorporated, cover the bowl with a damp tea towel or plastic wrap and let it rest for about 30 minutes. This resting period, often called autolyse, allows the flour to fully hydrgin extract and the gluten to begin developing without any kneading.
Adding Salt and Developing Gluten
After the initial rest, it’s time to introduce the salt. Sprinkle the 2 teaspoons (10g) of salt evenly over the surface of the dough. Now, it’s time to start developing the gluten structure, which will give your Sourdough Bread its characteristic chewy texture and open crum extractb. The best way to do this at home is through a technique called “stretch and folds.” With slightly damp hands (this prevents the dough from sticking to you), reach into the bowl, grab a portion of the dough, stretch it upwards as far as it will go without tearing, and then fold it back over itself onto the center. Rotate the bowl a quarter turn and repeat this stretch and fold motion. You’ll want to do this about 4 to 8 times in total, essentially folding the dough in on itself in a circular motion. You’ll notice the dough becoming smoother and more elastic with each set of folds. Cover the bowl again and let it rest for another 30 minutes. We’ll repeat this stretch and fold process a total of 3 to 4 times over the next couple of hours, with 30-minute rests in between each set. With each subsequent set of folds, you’ll feel the dough becoming significantly stronger and more cohesive.
Bulk Fermentation
This is the crucial stage where your Sourdough Bread truly comes to life. After completing the stretch and folds, the dough needs to undergo bulk fermentation, a period of rest and rising at room temperature. Continue to keep the dough covered in its bowl and allow it to sit undisturbed for anywhere from 4 to 8 hours, or even longer depending on the ambient temperature of your kitchen. On warmer days, it will ferment more quickly, while cooler temperatures will require more patience. You’re looking for the dough to increase in volume by about 30-50% and to become noticeably lighter and airy. You should see some small bubbles appearing on the surface. Resist the urge to poke it excessively; you want to maintain the gas that’s being produced by the active yeast. The exact timing is less important than observing the dough’s behavior. If your kitchen is quite cool, you might even find it beneficial to let it bulk ferment overnight in a slightly warmer spot, like your oven with the light on.
Shaping the Loaf
Once your dough has completed its bulk fermentation, it’s time to shape it. Gently tip the dough out onto a lightly floured work surface. Be careful not to degas it too much. For a round loaf (boule), you want to gently form it into a ball. You can do this by lightly tucking the edges under the dough itself, creating tension on the surface. If you’re making an oval loaf (batard), shape it accordingly, tucking the ends underneath. The goal here is to create a taut surface tension which will help the loaf hold its shape as it bakes. Once shaped, you’ll need to place it into a floured proofing basket (banneton) or a bowl lined with a floured tea towel, seam-side up. Lightly dust the top of the dough with more flour.
Cold Proofing and Baking
This final resting period, known as cold proofing, is key to developing flavor and achieving a beautiful crust. Cover the proofing basket tightly with plastic wrap or place it inside a plastic bag. Transfer the dough to the refrigerator for at least 12 hours, and up to 48 hours. The cold temperature slows down the fermentation, allowing the sourdough to develop complex flavors, and it also makes the dough firmer and easier to score. When you’re ready to bake, preheat your oven to 450°F (230°C) with a Dutch oven (or a baking stone with a pan for steam) inside for at least 30 minutes. Carefully remove the dough from the refrigerator and invert it onto a piece of parchment paper. Using a sharp razor blade or a very sharp knife, score the top of the dough. A simple slash or a more decorative pattern will allow the bread to expand predictably in the oven. Gently transfer the dough (on the parchment paper) into the preheated Dutch oven. Cover with the lid and bake for 20 minutes. Then, remove the lid and continue baking for another 20-25 minutes, or until the crust is a deep golden brown and the internal temperature reaches about 200-210°F (93-99°C). Let it cool completely on a wire rack before slicing into your magnificent homemade Sourdough Bread.
Conclusion:
You’ve now learned the art of crafting delicious, homemade Sourdough Bread from scratch! This recipe guides you through the rewarding process of nurturing a starter and transforming simple ingredients into a crusty, tangy loaf with an incredibly soft interior. The satisfaction of pulling a perfectly baked sourdough bread from your oven is truly unparalleled. Don’t be discouraged if your first attempt isn’t magazine-worthy; practice makes perfect, and each bake will bring you closer to your ideal loaf. Enjoy this versatile bread toasted with butter, as the base for hearty sandwiches, or simply torn and savored on its own.
For serving suggestions, consider pairing your fresh Sourdough Bread with a rich stew, a creamy soup, or a platter of artisanal cheeses. It also makes a fantastic base for avocado toast or bruschetta.
Feel free to experiment with variations! You can incorporate herbs like rosemary or thyme into the dough, or add seeds such as sunflower or pumpkin for extra texture and flavor. A sprinkle of sea salt on top before baking adds a delightful crunch.
We encourage you to embrace the sourdough journey. The patience and care you invest will be richly rewarded with this incredible staple. Happy baking!
Frequently Asked Questions:
Q: My sourdough bread didn’t rise much. What could be the reason?
A: Several factors can affect the rise of your Sourdough Bread. Ensure your starter is active and bubbly before you begin extract. Over-proofing or under-proofing the dough are common culprits; pay close attention to the visual cues and feel of the dough during fermentation. Also, ambient temperature can play a significant role – a cooler environment will slow down fermentation.
Q: How can I achieve a crispier crust on my sourdough bread?
A: To get that perfect, crispy crust on your Sourdough Bread, preheating your baking vessel (like a Dutch oven) thoroughly is key. Baking with steam for the initial part of the bake is also crucial. You can achieve this by placing a pan of water in the oven or by using a Dutch oven with a tight-fitting lid. Removing the lid for the last part of the bake allows the crust to brown and crisp up beautifully.
Perfect Sourdough Bread Recipe- Easy & Delicious
A straightforward guide to baking delicious and crusty sourdough bread at home.
Ingredients
-
4 cups (500g) bread flour or all-purpose flour
-
1⅔ cups (375g) warm water
-
1 cup (200g) active sourdough starter
-
2 teaspoons (10g) salt
-
1 teaspoon (5g) sugar (optional, for browning)
Instructions
-
Step 1
Combine warm water and active sourdough starter in a large bowl. Add flour and mix until a shaggy dough forms. Cover and rest for 30 minutes (autolyse). -
Step 2
Sprinkle salt over the dough. Perform stretch and folds 4-8 times. Cover and rest for 30 minutes. Repeat stretch and folds 3-4 times over the next few hours with 30-minute rests in between. -
Step 3
Allow the dough to bulk ferment at room temperature for 4-8 hours, or until it increases in volume by 30-50% and appears light and airy with small bubbles. This stage’s duration depends on kitchen temperature. -
Step 4
Gently tip the dough onto a lightly floured surface. Shape it into a taut ball (boule) or oval (batard). Place seam-side up into a floured proofing basket or a bowl lined with a floured tea towel. -
Step 5
Cover the proofing basket tightly and refrigerate for at least 12 hours, up to 48 hours (cold proofing). -
Step 6
Preheat oven to 450°F (230°C) with a Dutch oven inside for at least 30 minutes. Invert dough onto parchment paper, score the top, and carefully transfer to the hot Dutch oven. Bake covered for 20 minutes, then uncovered for 20-25 minutes until deep golden brown.
Important Information
Nutrition Facts (Per Serving)
It is important to consider this information as approximate and not to use it as definitive health advice.
Allergy Information
Please check ingredients for potential allergens and consult a health professional if in doubt.


Leave a Comment