
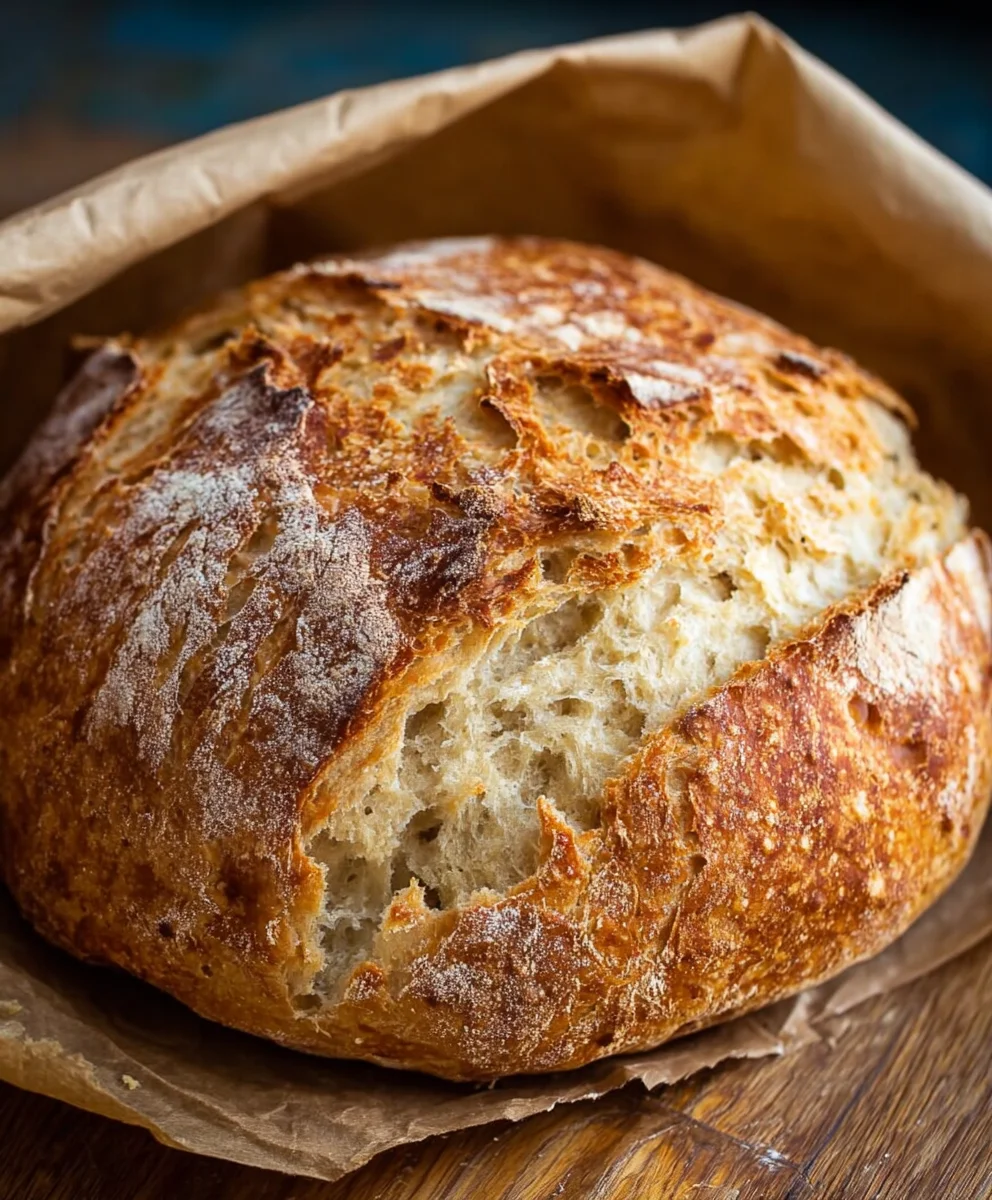
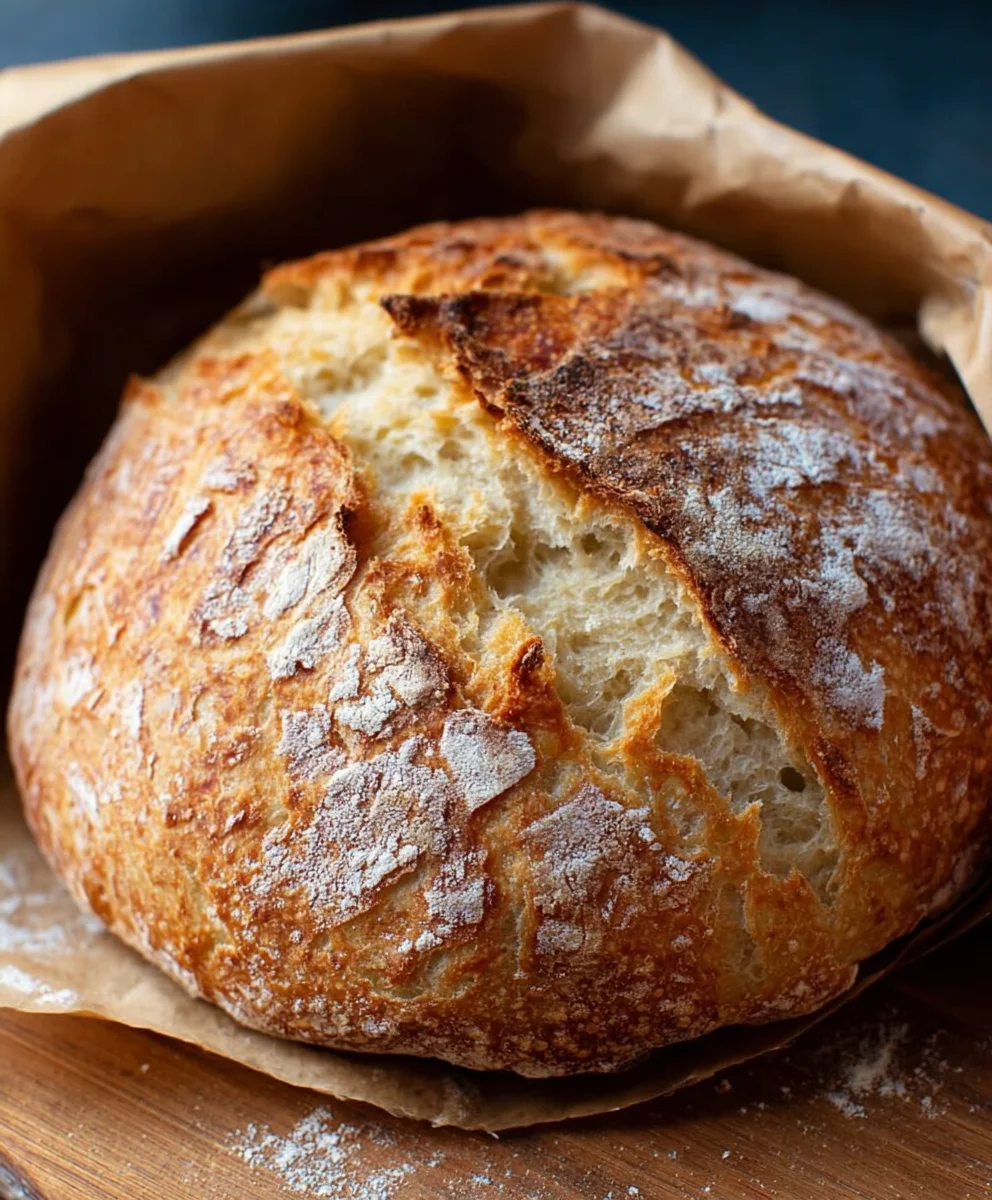
Quick And Easy No-Knead Bread is more than just a recipe; it’s a culinary revolution for anyone who’s ever dreamed of warm, crusty homemade bread without the fuss. If the idea of endless kneading, proofing, and shaping has kept you from baking your own loaves, prepare to be delighted. This method is specifically designed for busy home bakers, delivering exceptional results with minimal effort. People absolutely adore this bread because it achieves that glorious, crackling crust and soft, airy interior that’s typically reserved for artisanal bakeries. What truly sets this Quick And Easy No-Knead Bread apart is its ingenious simplicity; it relies on a long, slow fermentation and a hot oven to create that perfect texture and flavor, all without you breaking a sweat. Get ready to impress yourself and your loved ones with a truly magnificent loaf that’s surprisingly accessible.

Ingredients:
- 3 cups bread flour
- 1 packet (which is about 2 teaspoons) rapid rise yeast
- 1 ½ teaspoons salt
- 1 ½ cups warm water
Preparing Your Dough
The magic of this Quick And Easy No-Knead Bread lies in its simplicity, and that starts with the dough. You’ll need just a few pantry staples to get this going. Begin extract by grabbing a large mixing bowl. Into this bowl, add your 3 cups of bread flour. Bread flour is preferred here because its higher protein content will develop gluten more readily, giving our no-knead bread that wonderful chewy texture and structure, even without the usual kneading. Next, measure out your 1 ½ teaspoons of salt and add it to the flour. Salt is crucial not only for flavor but also for controlling the yeast’s activity. Ensure it’s evenly distributed with the flour before adding the yeast.
Now, carefully measure out your rapid rise yeast. You’ll need 1 packet, which typically equates to about 2 teaspoons. Rapid rise yeast, also known as instant yeast, is fantastic for this recipe because it doesn’t require proofing beforehand. You can mix it directly with your dry ingredients, and it will get to work quickly, significantly reducing the overall time needed for the bread to rise. Sprinkle the yeast evenly over the flour and salt mixture. Give everything a quick whisk or stir with a fork to ensure the yeast and salt are dispersed throughout the flour. This ensures uniform rising and seasoning.
The final dry ingredient is the warmth that brings it all together. Measure out 1 ½ cups of warm water. The ideal temperature for activating yeast is between 105°F and 115°F (40°C to 46°C). If the water is too hot, it will kill the yeast, and your bread won’t rise. If it’s too cold, the yeast will be sluggish, and the rising process will take much longer. A good test is to put your finger in the water; it should feel pleasantly warm, not hot.
Now, pour the warm water into the bowl with the dry ingredients. Using a wooden spoon or a sturdy spagin extracta, begin to mix everything together. You’re not aiming for a smooth, elastic dough here. The goal is simply to combine all the ingredients until no dry flour remains. The dough will look shaggy and sticky, and that’s perfectly okay. Resist the urge to add more flour, even if it seems very wet. This high hydration is what contributes to the bread’s open crum extractb and wonderfully crisp crust.
First Rise (The Patient Wait)
Once everything is just combined, cover the bowl tightly with plastic wrap or a clean kitchen towel. This is where patience comes into play. Place the covered bowl in a warm, draft-free spot in your kitchen. This could be on top of your refrigerator, in a slightly warmed (then turned off) oven, or simply on your counter if your kitchen is consistently warm. Let the dough rise for at least 12 to 18 hours. Yes, you read that right! This extended, slow fermentation is what develops the incredible flavor and texture in no-knead bread. During this long rise, the yeast will work its magic, producing gases that create bubbles and building gluten structure without any manual intervention. You’ll notice the dough will significantly increase in volume, becoming bubbly and airy. Don’t be alarmed if it seems to double or even triple in size; this is exactly what you want.
Shaping and Second Rise
After the long, patient first rise, it’s time to get ready for baking. Lightly flour a clean work surface, such as your countertop or a large cutting board. Gently scrape the shaggy dough out of the bowl onto the floured surface. The dough will be very wet and sticky, so use a bench scraper or a spatula to help move it. Resist the urge to punch it down forcefully. Instead, you want to be gentle to preserve the air bubbles that have formed.
Lightly flour the top of the dough. Then, using your hands or a bench scraper, gently fold the dough over on itself a few times to create a rough ball shape. Think of it as tucking the edges underneath. The goal here is to create a little surface tension without deflating the dough too much. Don’t worry about making it perfectly round or smooth. Once shaped, carefully place the dough, seam-side down, onto a piece of parchment paper. This parchment paper will make transferring the dough into the hot pot much easier and cleaner.
Now, cover the dough loosely with plastic wrap or a light kitchen towel. Let it rest for another 30 minutes to 1 hour. This second, shorter rise, often called the proofing stage, allows the gluten to relax and the dough to become slightly more manageable and puff up a bit more before baking. While the dough is proofing, you’ll preheat your oven and, crucially, your baking vessel.
Baking the Bread
This is where the crust gets its signature crunch! About 20 minutes before the second rise is complete, place a Dutch oven (or any heavy, oven-safe pot with a tight-fitting lid) into your oven and preheat it to 450°F (230°C). Getting the pot screaming hot is essential for creating that amazing crust.
Once the oven and the Dutch oven are thoroughly preheated, carefully remove the hot pot from the oven using oven mitts. Remove the lid. Gently pick up the parchment paper with the proofed dough and carefully lower it into the hot Dutch oven. Don’t worry if the dough looks a little flat; it will puff up beautifully in the oven. Place the lid back on the Dutch oven securely.
Return the lidded pot to the preheated oven. Bake for 30 minutes with the lid on. This traps the steam released by the dough, which allows the bread to rise to its full potential and develop a thin, crisp crust. After 30 minutes, carefully remove the lid from the Dutch oven. Continue to bake for another 15 to 25 minutes, or until the crust is a deep golden brown and the internal temperature of the bread reaches around 200-210°F (93-99°C) when checked with an instant-read thermometer. The longer you bake it uncovered, the darker and crispier the crust will become.
Cooling and Enjoying
Once baked to perfection, carefully remove the Dutch oven from the oven. Using oven mitts, lift the bread out of the pot by grasping the parchment paper. Place the hot loaf on a wire cooling rack. This is a critical step! Allowing the bread to cool completely on a wire rack prevents the bottom crust from becoming soggy. Resist the temptation to slice into it immediately. The internal structure of the bread is still setting as it cools. For the best texture and flavor, let it cool for at least 1 hour, preferably longer. Once cooled, you’ll have a beautiful, rustic loaf of Quick And Easy No-Knead Bread, perfect for slicing, toasting, or enjoying with your favorite toppings.
Conclusion:
And there you have it! Your very own loaf of delicious and incredibly simple Quick And Easy No-Knead Bread. We’ve walked through each step, proving that you don’t need fancy equipment or hours of work to achieve a beautiful, crusty loaf with a soft, airy interior. This recipe is a testament to the magic of patience and good ingredients, yielding fantastic results with minimal effort. It’s perfect for weeknight dinners, weekend brunches, or simply when you crave that comforting, homemade bread aroma filling your kitchen. Don’t be afraid to experiment with different flours or additions; the beauty of this Quick And Easy No-Knead Bread is its versatility. So, go ahead, give it a try, and enjoy the satisfaction of baking your own bread from scratch. Happy baking!
Frequently Asked Questions:
What if my dough seems too sticky or too dry?
If your dough appears overly sticky, you can add a tablespoon or two of flour at a time until it reaches a shaggy, manageable consistency. Conversely, if it seems too dry and crum extractbly, gradually add a tablespoon of water at a time until it comes together. The hydration of flour can vary, so these minor adjustments are perfectly normal when making Quick And Easy No-Knead Bread.
Can I make this bread ahead of time?
Absolutely! The beauty of the long, cold fermentation for Quick And Easy No-Knead Bread is that it actually improves the flavor. You can refrigerate the dough for up to 3 days after the initial bulk fermentation. When you’re ready to bake, simply let it sit at room temperature for about an hour before proceeding with the shaping and baking instructions.
What are some good serving suggestions for Quick And Easy No-Knead Bread?
This Quick And Easy No-Knead Bread is incredibly versatile. It’s wonderful served warm with butter, olive oil and balsamic vinegar for dipping, or alongside your favorite soups and stews. It also makes fantastic toast, perfect for avocado toast or your morning jam. Don’t hesitate to use it for sandwiches or to create delicious garlic bread!
Quick Easy No-Knead Bread Recipe
A simple and delicious no-knead bread recipe that requires minimal effort and yields a wonderfully crusty loaf.
Ingredients
-
3 cups bread flour
-
1 packet (about 2 teaspoons) rapid rise yeast
-
1 ½ teaspoons salt
-
1 ½ cups warm water
-
Parchment paper
Instructions
-
Step 1
In a large mixing bowl, combine 3 cups of bread flour, 1 ½ teaspoons of salt, and 1 packet (about 2 teaspoons) of rapid rise yeast. Whisk to combine. -
Step 2
Add 1 ½ cups of warm water (105-115°F or 40-46°C) to the dry ingredients. Mix with a wooden spoon or spatula until just combined and no dry flour remains. The dough will be shaggy and sticky. Cover the bowl tightly with plastic wrap or a clean kitchen towel. -
Step 3
Let the dough rise in a warm, draft-free spot for 12 to 18 hours, or until doubled or tripled in size and bubbly. Gently scrape the dough onto a lightly floured surface. Fold it over on itself a few times to create a rough ball shape. Place the dough, seam-side down, onto a piece of parchment paper. -
Step 4
Cover the dough loosely and let it rest for another 30 minutes to 1 hour while you preheat your oven. About 20 minutes before the second rise is complete, place a Dutch oven or heavy, oven-safe pot with a lid into the oven and preheat to 450°F (230°C). -
Step 5
Carefully remove the hot Dutch oven from the oven. Remove the lid. Gently lift the parchment paper with the dough and lower it into the hot Dutch oven. Place the lid back on securely. -
Step 6
Bake for 30 minutes with the lid on. Then, carefully remove the lid and continue to bake for another 15 to 25 minutes, or until the crust is deep golden brown. -
Step 7
Carefully remove the Dutch oven from the oven. Lift the bread out by the parchment paper and place it on a wire cooling rack. Let cool completely for at least 1 hour before slicing and serving.
Important Information
Nutrition Facts (Per Serving)
It is important to consider this information as approximate and not to use it as definitive health advice.
Allergy Information
Please check ingredients for potential allergens and consult a health professional if in doubt.


Leave a Comment