
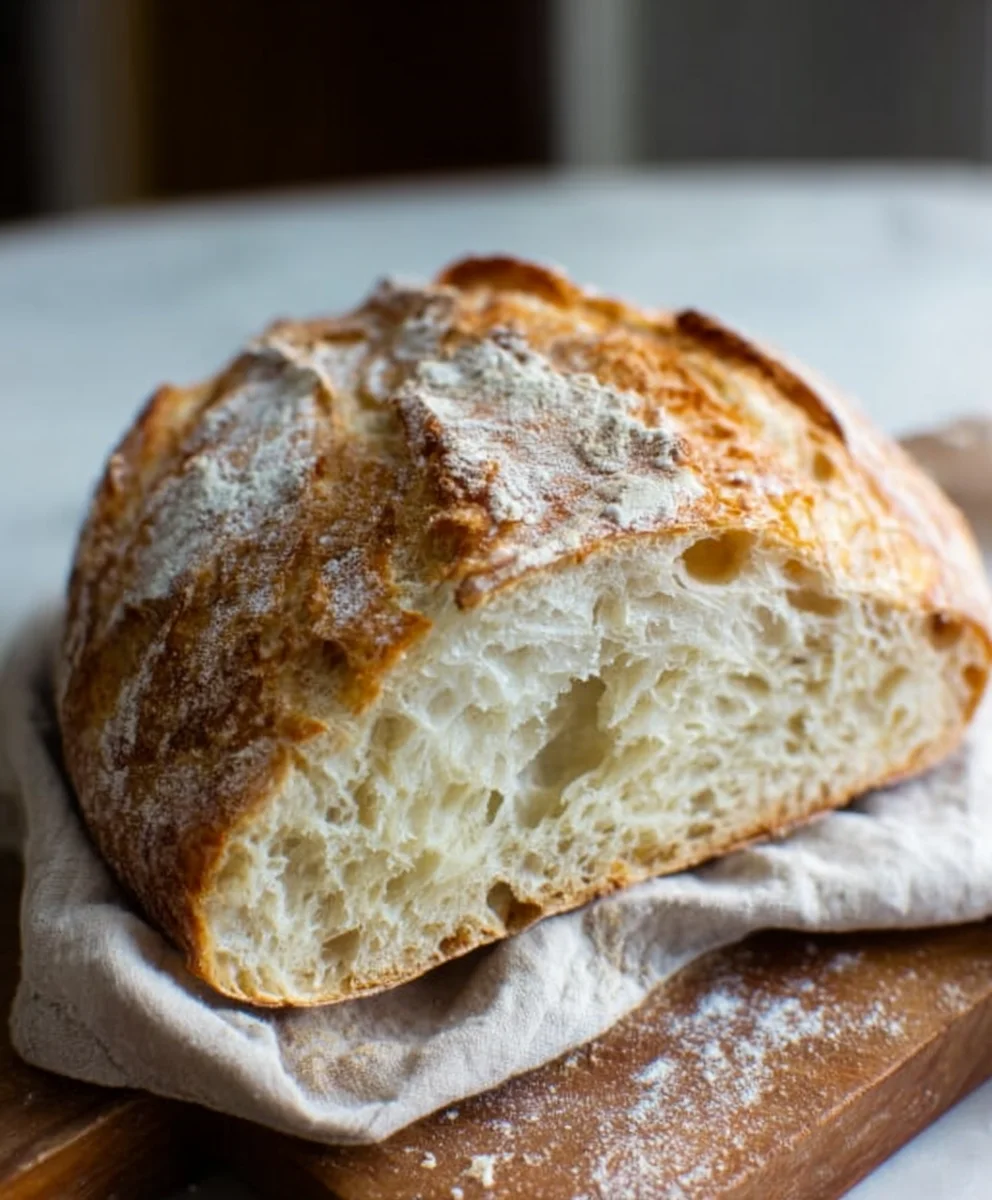
Artisan Bread Recipe. There’s something undeniably magical about a perfectly baked loaf of artisan bread. The crackling crust, the airy, open crum extractb, and that subtle, complex flavor – it’s a culinary masterpiece that speaks of tradition and dedication. If you’ve ever found yourself staring longin extractgly at the bakery counter, convinced that achieving such perfection at home is an insurmountable task, prepare to be delighted! This artisan bread recipe is designed to demystify the procegin extract bringing the joy and satisfaction of homemade bread right to your kitchen. We’ll guide you through each step, transforming simple ingredients into a rustic, flavorful loaf that will impress your family and friends. What makes this particular artisan bread recipe so special? It’s the balance of simplicity and depth, allowing you to achieve that coveted chewy texture and rich taste with minimal fuss, proving that truly exceptional bread is within your reach.

Ingredients:
- 3 cups (395 grams) all-purpose flour or bread flour
- ½ tablespoon kosher salt
- ¼ ounce instant or active dry yeast packet (or 2 ¼ teaspoons)
- 1 ½ cups warm water (approximately 105°F)
Mixing the Dough
The journey to a truly delicious artisan bread begin extracts with the right ingredients and a little bit of patience. For this recipe, you’ll need three cups of all-purpose flour, or if you’re aiming for an even chewier crum extractb with a more pronounced crust, opt for bread flour. Next, we have half a tablespoon of kosher salt, which is crucial for flavor development and controlling yeast activity. Then, a quarter ounce packet of instant or active dry yeast, which is roughly 2 ¼ teaspoons. Lastly, a cup and a half of warm water, aiming for a temperature around 105°F. This warmth is essential for activating the yeast without killing it.
In a large mixing bowl, combine the flour and salt. Give them a quick whisk to ensure the salt is evenly distributed throughout the flour. This ensures consistent flavor in every bite. Now, sprinkle the yeast over the flour mixture. If you’re using active dry yeast, it’s a good idea to proof it first by letting it sit in the warm water for about 5-10 minutes until it gets foamy. If you’re using instant yeast, you can add it directly to the dry ingredients as it doesn’t require this extra step.
Create a well in the center of the dry ingredients. Pour in the warm water. Using a sturdy spoon or a spatula, start mixing everything together. You’ll notice the flour gradually absorbing the water, and the mixture will start to come together into a shaggy, somewhat sticky dough. Don’t worry about it looking perfect at this stage; the magic happens during the kneading process. Continue mixing until there are no dry pockets of flour visible. This initial mix is all about hydrating the flour.
Kneading the Dough
Once the dough has come together, it’s time to transfer it to a lightly floured surface. This is where the realgin extractrk begins, but it’s also incredibly satisfying. Start kneading the dough by pushing it away from you with the heel of your hand, then folding it back over itself. Rotate the dough a quarter turn and repeat the process. This technique develops the gluten structure in the flour, which is what gives bread its characteristic chewy texture and allows it to rise beautifully.
Keep kneading for about 8-10 minutes. You’re looking for a dough that becomes smooth, elastic, and less sticky. It should spring back slowly when you poke it with your finger. If the dough is too sticky, you can add a tiny bit more flour, just a teaspoon at a time, to your hands and the work surface. Be careful not to add too much, as this can make the bread dense. Conversely, if it feels too dry and stiff, you can lightly dampen your hands with water and continue kneading. The goal is a supple, workable dough that feels alive.
First Rise (Bulk Fermentation)
After kneading, shape the dough into a ball. Lightly oil a clean, large bowl with a neutral oil like vegetable or olive oil. Place the dough ball into the oiled bowl, turning it to coat all sides with the oil. This prevents a dry skin from forming on top. Cover the bowl tightly with plastic wrap or a damp kitchen towel. Find a warm, draft-free place for the dough to rise. An oven that has been turned off but still retains a little residual warmth is often a good spot.
Let the dough rise for about 1 to 1.5 hours, or until it has doubled in size. This process, known as bulk fermentation, allows the yeast to work its magic, producing carbon dioxide gas that makes the dough light and airy. You’ll see the dough visibly puff up, becoming significantly larger and more voluminous. The exact time can vary depending on the ambient temperature of your kitchen, so keep an eye on the dough rather than just the clock.
Shaping the Loaf
Once the dough has doubled, gently punch it down to release the air that has accumulated. Turn the dough out onto your lightly floured work surface again. At this point, you can shape your bread. For a classic artisan loaf, you can gently flatten the dough into a rough rectangle. Then, starting from one of the longer sides, tightly roll up the dough, pressing gently to seal the seam as you go. Pinch the seam closed firmly. Finally, tuck the ends under to create a neat, torpedo-like shape. If you prefer a round loaf, gently gather the edges of the dough towards the center, then flip it over and cup your hands around it, gently rotating it to form a taut ball.
For an even better crust and to prevent sticking, you can prepare a baking surface. If you have a baking stone or a cast-iron skillet, place that in your oven. If not, a standard baking sheet lined with parchment paper will work perfectly. For that signature artisan look and extra crust, you can dust your shaped loaf lightly with flour before placing it on your prepared baking surface.
Second Rise and Baking
Allow the shaped loaf to rest and rise for a second time. This is often referred to as the proofing stage. Cover the shaped dough loosely with plastic wrap or a clean kitchen towel and let it rest for another 30-45 minutes, or until it looks visibly puffy. While the dough is proofing, preheat your oven to 450°F (230°C). If you are using a baking stone or cast-iron skillet, place it in the oven during the preheating phase so it gets nice and hot.
Just before baking, if you want to create those classic scoring marks, use a very sharp knife or a lame (a special razor blade tool for bread scoring) to make a few quick, decisive slashes on the top of the loaf. This allows the bread to expand predictably in the oven and prevents it from bursting in unexpected places. For a beautiful, crispy crust, you can create steam in your oven. One effective way is to place a shallow metal pan on the bottom rack of the oven as it preheats, and then carefully pour a cup of hot water into that pan right after you place the bread in the oven. Be very cautious of the steam.
Carefully transfer your proofed loaf to the preheated oven, placing it directly onto the hot baking stone, skillet, or parchment-lined baking sheet. Bake for 20 minutes at 450°F (230°C). Then, reduce the oven temperature to 400°F (200°C) and continue baking for another 20-25 minutes, or until the crust is a deep golden brown and the internal temperature of the bread reaches 200-210°F (93-99°C) when tested with an instant-read thermometer. The bread should sound hollow when tapped on the bottom. Once baked to perfection, remove the loaf from the oven and place it on a wire rack to cool completely. Resist the urge to slice it too soon; letting it cool allows the interior to set properly.
Conclusion:
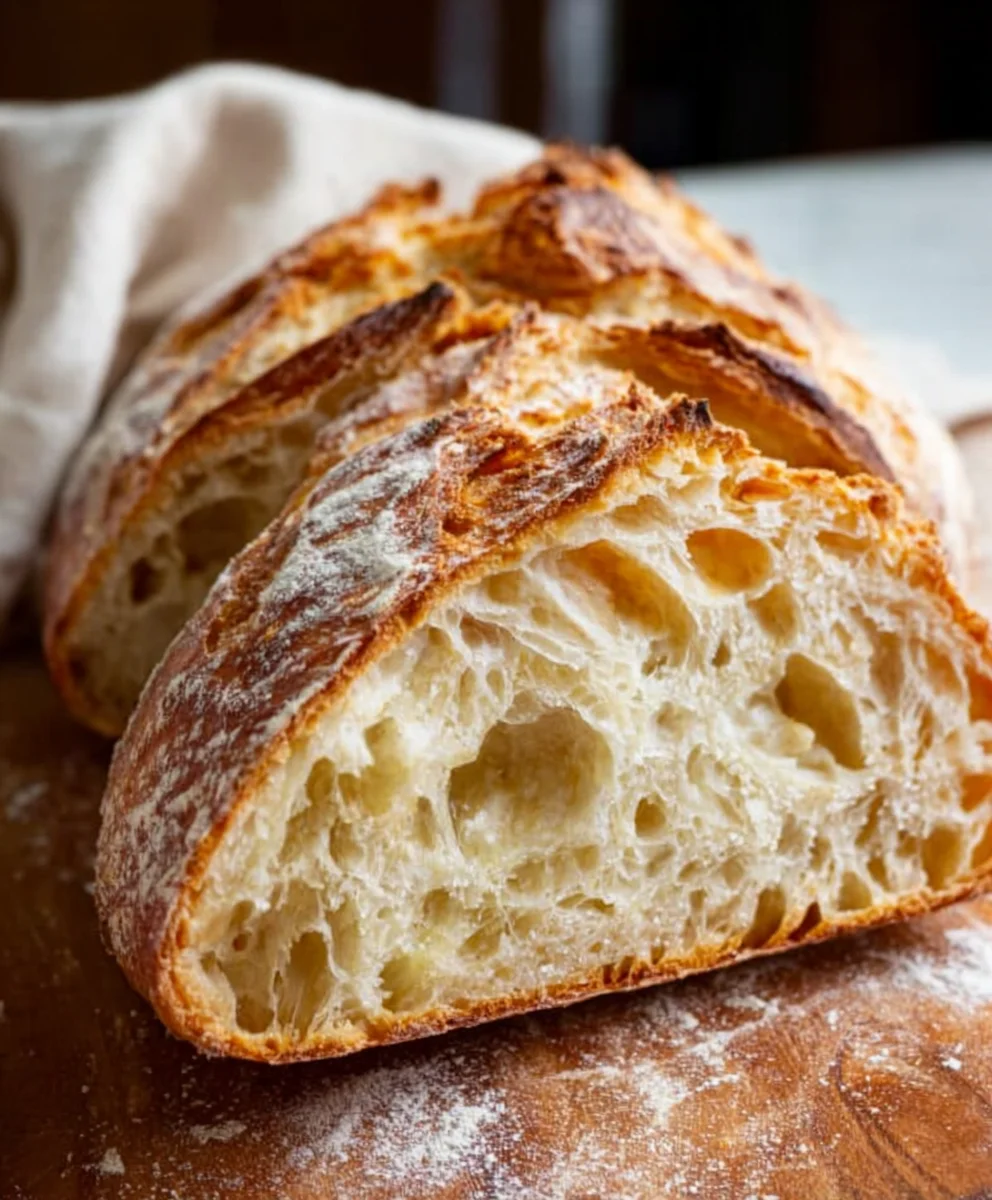
You’ve now unlocked the secrets to creating your very own beautiful and delicious Artisan Bread Recipe! We’ve walked through each step, from mixing and kneading to proofing and baking, empowering you to achieve that perfect crust and airy crum extractb right in your own kitchen. This versatile Artisan Bread Recipe is more than just a loaf; it’s a testament to your baking skills. Imagin extracte serving slices of this homemade masterpiece alongside a hearty soup, as the base for gourmet sandwiches, or simply slathered with butter. The aroma alone will fill your home with a sense of accomplishment and warmth. Don’t be afraid to experiment! Once you’re comfortable with the basic recipe, consider adding herbs, cheese, or even a touch of honey to the dough for exciting new flavor profiles. Happy baking, and enjoy the incredible satisfaction of pulling a perfect loaf of Artisan Bread Recipe from your oven!
Frequently Asked Questions:
Can I use a stand mixer for this Artisan Bread Recipe?
Absolutely! While hand-kneading is traditional, a stand mixer with a dough hook can significantly speed up the kneading process for this Artisan Bread Recipe. Knead on a medium-low speed until the dough is smooth and elastic, typically around 8-10 minutes.
My Artisan Bread Recipe didn’t get a very crusty exterior. What could be the reason?
A few factors can contribute to a less-than-ideal crust. Ensuring your oven is fully preheated, and using a Dutch oven or baking stone can help create steam, which is crucial for a crisp crust on your Artisan Bread Recipe. You can also try spraying a little water into the oven during the initial baking phase (be cautious of steam!).
Easy Artisan Bread Recipe
Bake delicious, crusty artisan bread at home with this simple and straightforward recipe. Perfect for beginners and experienced bakers alike.
Ingredients
-
3 cups (395 grams) all-purpose flour or bread flour
-
½ tablespoon kosher salt
-
2 ¼ teaspoons instant or active dry yeast
-
1 ½ cups warm water (approximately 105°F)
-
Neutral oil for greasing the bowl
-
Flour for dusting
Instructions
-
Step 1
In a large mixing bowl, combine the flour and salt. Whisk to distribute evenly. Sprinkle the yeast over the flour mixture. If using active dry yeast, proof it in the warm water for 5-10 minutes until foamy. If using instant yeast, add it directly to the dry ingredients. -
Step 2
Create a well in the center of the dry ingredients and pour in the warm water. Mix with a spoon or spatula until a shaggy, sticky dough forms and no dry flour is visible. -
Step 3
Transfer the dough to a lightly floured surface and knead for 8-10 minutes until smooth, elastic, and less sticky. The dough should spring back slowly when poked. -
Step 4
Shape the dough into a ball and place it in a lightly oiled bowl, turning to coat. Cover tightly and let rise in a warm, draft-free place for 1 to 1.5 hours, or until doubled in size. -
Step 5
Gently punch down the dough and turn it out onto a floured surface. Shape into your desired loaf (e.g., a rectangle rolled tightly, or a taut ball). Prepare your baking surface (baking stone, cast-iron skillet, or parchment-lined baking sheet). -
Step 6
Place the shaped loaf on the prepared baking surface. Cover loosely and let rise for another 30-45 minutes until visibly puffy. Preheat oven to 450°F (230°C). -
Step 7
Score the top of the loaf with a sharp knife or lame. To create steam, place a shallow metal pan on the bottom rack of the oven as it preheats. Carefully pour 1 cup of hot water into the pan just after placing the bread in the oven. -
Step 8
Bake for 20 minutes at 450°F (230°C). Reduce oven temperature to 400°F (200°C) and bake for an additional 20-25 minutes, or until the crust is golden brown and the internal temperature reaches 200-210°F (93-99°C). Tap the bottom; it should sound hollow. -
Step 9
Remove the bread from the oven and cool completely on a wire rack before slicing.
Important Information
Nutrition Facts (Per Serving)
It is important to consider this information as approximate and not to use it as definitive health advice.
Allergy Information
Please check ingredients for potential allergens and consult a health professional if in doubt.


Leave a Comment