
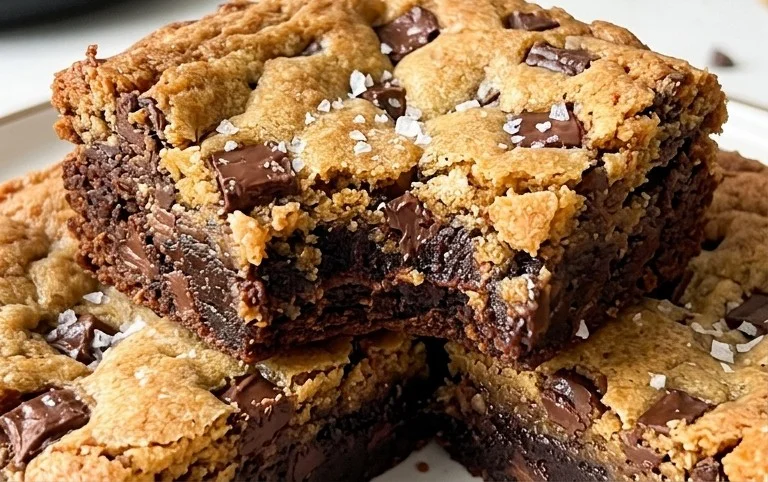
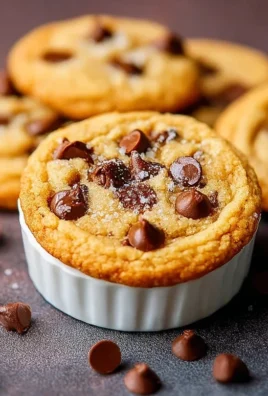
Brown butter brookies are the ultimate indulgence, a dessert that harmoniously blends two beloved classics into one spectacular treat. Forget choosing between a chewy brownie and a gooey chocolate chip cookie; with these brown butter brookies, you get the best of both worlds in every single bite. We all have that craving for a warm, rich brownie and the irresistible allure of a perfectly baked chocolate chip cookie, right? Well, this recipe takes those cravings and elevates them. The magic truly happens with the addition of brown butter, which lends an incredibly nutty, toasted depth of flavor that makes these brown butter brookies utterly unforgettable. It’s a simple step that transforms an already fantastic dessert into something truly extraordinary, guaranteeing delighted gasps and maybe even a few happy sighs from anyone lucky enough to try them. Get ready to bake up a batch of pure bliss!

Brown Butter Brookies
Get ready to embark on a dessert journey that’s truly out of this world! Today, we’re diving into the decadent world of brookies, but with a sophisticated twist: brown butter. The subtle nuttiness that brown butter imparts to both the brownie and the blondie layers elevates this classic treat to new heights. This recipe brings together the chewy, fudgy goodness of a brownie with the soft, buttery comfort of a blondie, all swirled together in one glorious pan. It’s the ultimate crowd-pleaser and a personal favorite for those moments when you just can’t decide between a brownie or a cookie. Let’s get started!
Ingredients:
Cooking Instructions:
The secret to truly spectacular brookies lies in creating two distinct, yet harmonious, batters. We’ll start with the brownie base, and then move on to the blondie topping. Don’t be intimidated by the two separate steps; it’s simpler than it looks and the result is so worth it!
Making the Brown Butter Brownie Batter
1. First, we’re going to make our brown butter. This might sound fancy, but it’s incredibly easy and adds an unparalleled depth of flavor. Take your 180g of butter for the brownie layer and place it in a light-colored saucepan over medium heat. Watch it carefully! The butter will melt, then begin extract to foam. Tiny brown specks will start to appear at the bottom of the pan, and you’ll notice a wonderful nutty aroma developing. This is exactly what we want. As soon as you see these golden-brown bits and smell that delicious fragrance, remove the pan from the heat immediately to prevent burning. Pour the brown butter into a heatproof bowl and let it cool slightly. While your butter is cooling, let’s prep the chocolate. Melt the 320g of chocolate gently. You can do this in a double boiler (a heatproof bowl set over a pot of simmering water, ensuring the water doesn’t touch the bottom of the bowl) or in the microwave in 30-second intervals, stirring well between each. Once melted and smooth, stir the slightly cooled brown butter into the melted chocolate. This mixture should be glossy and luscious.
2. In a separate, larger bowl, whisk together the granulated sugar (180g) and brown sugar (80g) for the brownie layer. Add the 4 eggs, one at a time, whisking well after each addition until the mixture is smooth and slightly lighter in color. Now, pour in the chocolate and brown butter mixture and stir until it’s just combined. Don’t overmix at this stage. Next, in another bowl, whisk together the all-purpose flour (120g), cocoa powder (50g), and salt (2g). Gradually add the dry ingredients to the wet ingredients, mixing with a spatula until just combined. You want to see no streaks of flour, but avoid overmixing, which can make your brownies tough. If you’re using the optional chocolate chunks (120g), gently fold them in now. This brownie batter will be thick and rich.
Preparing the Blondie Batter
3. Now, let’s move on to the blondie layer. In a medium saucepan, melt the 80g of butter for the blondie layer over medium heat. Once melted, let it bubble for a minute or two until it’s fragrant and slightly golden brown – similar to the brown butter process but a touch lighter and quicker. Pour this into a separate medium bowl. To this warm brown butter, add the brown sugar (80g) and granulated sugar (40g) for the blondie layer. Whisk vigorously until well combined and smooth. The mixture might look a little grainy, but that’s okay.
4. Add the 1 egg for the blondie layer to the sugar and butter mixture. Whisk it in until fully incorporated and the batter is smooth and creamy. Next, add the 85g of all-purpose flour and 1g of salt for the blondie layer. Stir with a spatula until just combined. This blondie batter will be softer and lighter in color than the brownie batter.
Assembling and Baking Your Brookies
5. Preheat your oven to 175°C (350°F). Line a 9×13 inch baking pan with parchment paper, leaving some overhang on the sides to help lift the brookies out easily later. This is a crucial step for easy removal! Dollop spoonfuls of the brownie batter evenly over the bottom of the prepared pan. Then, dollop spoonfuls of the blondie batter over the brownie batter. Don’t worry about them being perfectly distributed; the next step will create the magic swirl. Take a knife or a skewer and gently swirl the two batters together. Don’t over-swirl, as you want distinct layers to be visible. Aim for ribbons of brownie and blondie. Once you’re happy with the swirl, smooth the top gently with your spatula.
Bake for 25-35 minutes, or until a toothpick inserted into the center comes out with moist crum extractbs attached, not wet batter. The exact baking time will depend on your oven and how gooey you like your brookies. Let them cool completely in the pan on a wire rack before lifting them out using the parchment paper overhang. This cooling period is essential for them to set properly. Once cooled, cut them into squares and prepare for pure bliss. Enjoy every single bite of these incredible brown butter brookies!
Conclusion:
And there you have it – the ultimate guide to crafting delectable Brown Butter Brookies! This recipe truly shines by marrying the rich, nutty depth of brown butter with the chewy perfection of a brownie and the delightful crisp edges of a chocolate chip cookie. The result is a transcendent treat that’s both comforting and sophisticated, a guaranteed crowd-pleaser for any occasion. I’m incredibly proud of how these brookies turn out, and I’m confident you will be too.
These brown butter brookies are wonderfully versatile. For a classic experience, serve them warm, straight from the oven, with a scoop of vanilla bean ice cream. They also make a fantastic base for a decadent ice cream sundae. For a more refined dessert, consider pairing them with a raspberry coulis or a dollop of lightly sweetened whipped cream.
Feeling adventurous? Don’t hesitate to experiment! Try adding a handful of chopped nuts, like pecans or walnuts, to the cookie layer for an extra crunch. Or, swirl in some caramel sauce with the brownie batter before baking. You could even experiment with different types of chocolate chips, like dark chocolate or milk chocolate, for subtle flavor variations. I wholeheartedly encourage you to give this brown butter brookie recipe a try – it’s an experience you won’t regret!
Frequently Asked Questions:
Can I make the brown butter ahead of time?
Absolutely! Brown butter can be made a day or two in advance and stored in an airtight container in the refrigerator. Just be sure to bring it back to room temperature or gently rewarm it before using it in the recipe to ensure it incorporates smoothly.
What’s the best way to store leftover brookies?
For the best flavor and texture, store your cooled brown butter brookies in an airtight container at room temperature for up to 3 days. If you need to store them for longer, you can freeze them. Wrap individual brookies tightly in plastic wrap, then place them in a freezer-safe container or bag. They should last for up to 2-3 months in the freezer.
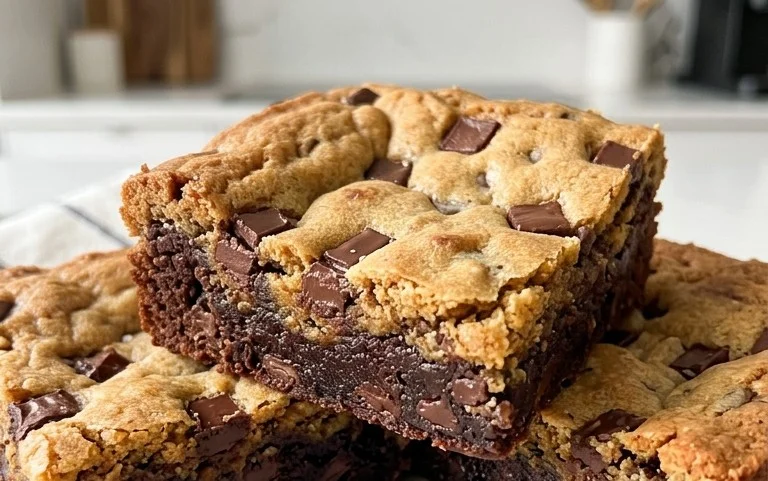
Brown Butter Brookies
Decadent brookies featuring a rich brown butter blondie base swirled with a fudgy brownie layer.
Ingredients
-
180 g butter
-
320 g chocolate (for melting)
-
120 g all purpose flour
-
50 g cocoa powder
-
180 g Granulated Sugar
-
80 g brown sugar
-
2 g salt
-
4 eggs
-
120 g chocolate chunks (optional)
-
85 g all-purpose flour
-
80 g butter
-
80 g brown sugar
-
40 g granulated sugar
-
1 g salt
-
1 egg
Instructions
-
Step 1
For the brownie layer: Melt 180g butter and 320g chocolate together. Stir in 180g granulated sugar, 80g brown sugar, 2g salt, and 4 eggs until smooth. Gradually mix in 120g all purpose flour and 50g cocoa powder. -
Step 2
For the blondie layer: Melt 80g butter in a separate bowl and let it brown slightly. Stir in 80g brown sugar, 40g granulated sugar, and 1g salt. Mix in 1 egg until combined. -
Step 3
Add 85g all-purpose flour to the blondie mixture and stir until just combined. If using, fold in 120g chocolate chunks. -
Step 4
Pour the brownie batter into a greased and lined 9×13 inch baking pan. Dollop spoonfuls of the blondie batter over the brownie batter. -
Step 5
Use a knife or skewer to swirl the batters together, creating a marbled effect. -
Step 6
Bake at 175°C (350°F) for 30-35 minutes, or until a toothpick inserted into the center comes out with moist crumbs. Do not overbake. -
Step 7
Let cool completely in the pan before cutting into squares.
Important Information
Nutrition Facts (Per Serving)
It is important to consider this information as approximate and not to use it as definitive health advice.
Allergy Information
Please check ingredients for potential allergens and consult a health professional if in doubt.
Leave a Comment