
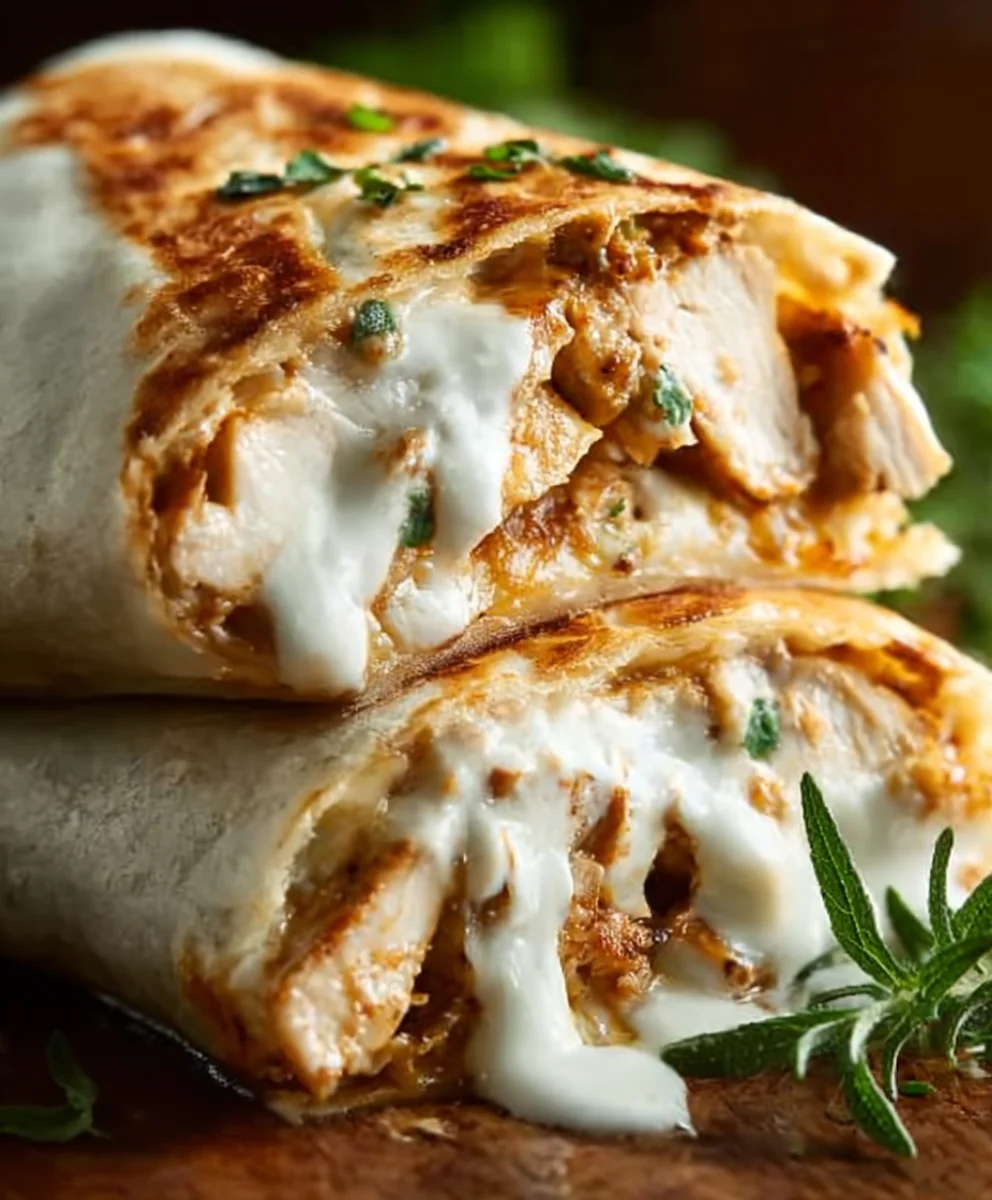
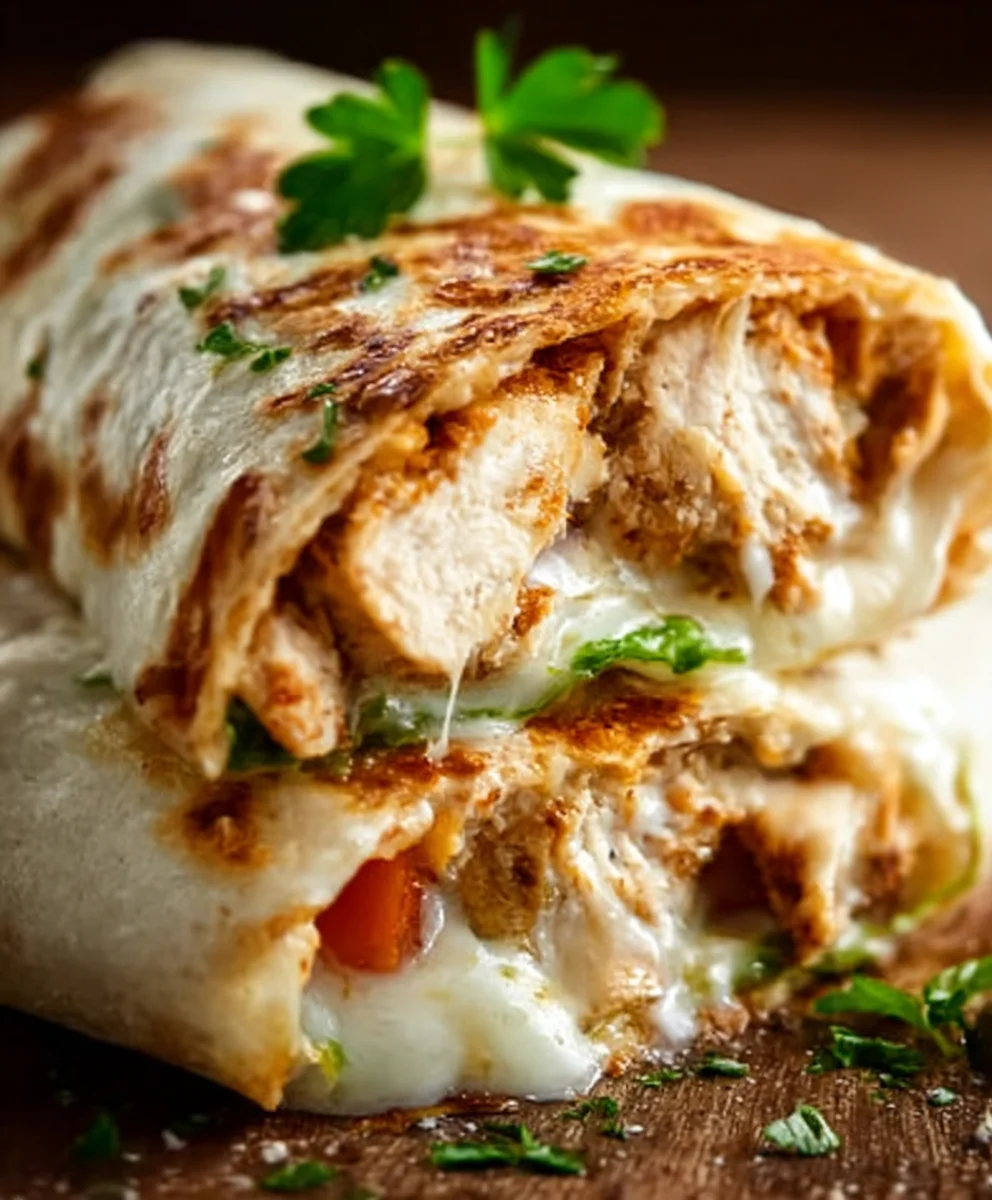
Cheesy Garlic Chicken Wraps are the ultimate comfort food that’s both incredibly satisfying and surprisingly simple to whip up. If you’re searching for a weeknight meal that will have everyone at your table cheering, look no further! These wraps are a testament to the power of classic flavor combinations – savory chicken, pungent garlic, and gooey, melted cheese, all nestled within a soft tortilla. What truly sets these Cheesy Garlic Chicken Wraps apart is the perfect balance of textures and tastes; the tender, marinated chicken mingles beautifully with the creamy garlic sauce and the satisfying chew of the tortilla. It’s the kind of dish that evokes warm memories and guarantees happy sighs with every bite. We’ve perfected a method that ensures maximum flavor with minimal fuss, making these Cheesy Garlic Chicken Wraps an instant family favorite you’ll return to again and again.

Ingredients:
- 2 cups cooked chicken, shredded
- 1/2 cup garlic aioli
- 1 cup cheddar cheese, shredded
- 4 large tortillas
- Salt and pepper to taste
Preparing the Cheesy Garlic Chicken Filling
Step 1: Combine the Chicken and Aioli
Begin extract by taking your 2 cups of pre-cooked and shredded chicken and placing it into a medium-sized mixing bowl. This is the foundation of our delicious filling. Now, add the 1/2 cup of rich and creamy garlic aioli to the bowl. The aioli will not only bind the chicken together but also infuse it with a wonderful garlic flavor. Use a spoon or a spatula to thoroughly mix the shredded chicken and garlic aioli until every piece of chicken is evenly coated. You want to ensure that the garlicky goodness of the aioli is distributed throughout the mixture. This is a simple yet crucial step for maximum flavor. If your chicken is still a little warm from cooking, the aioli will meld into it beautifully.
Step 2: Season the Chicken Mixture
Once the chicken and aioli are well combined, it’s time to season the mixture. Add salt and pepper to taste. Start with a modest amount, perhaps 1/4 teaspoon of salt and a pinch of black pepper, and then taste a small sample of the chicken mixture. You can always add more seasoning if needed. This is your opportunity to adjust the flavor profile to your personal preference. Remember that the cheddar cheese you’ll be adding later will also contribute its own savory notes, so be mindful of that as you season. Thoroughly mix the salt and pepper into the chicken and aioli until they are evenly distributed. Proper seasoning at this stage will elevate the overall taste of your wraps.
Step 3: Incorporate the Cheddar Cheese
Now, it’s time to add the star of the “cheesy” part of our Cheesy Garlic Chicken Wraps: the 1 cup of shredded cheddar cheese. Sprinkle the shredded cheddar cheese evenly over the seasoned chicken and aioli mixture. Gently fold the cheese into the chicken mixture using your spoon or spatula. You don’t want to overmix here; the goal is to distribute the cheese so that it will melt appealingly when the wraps are heated. Some of the cheese will coat the chicken, while some will remain slightly looser, which is perfect for creating those gooey, cheesy pockets within the wrap. This step brings together the savory chicken, the garlicky aioli, and the sharp, melty cheddar.
Assembling and Heating the Wraps
Step 4: Fill the Tortillas
Lay out your 4 large tortillas on a clean, flat surface. Divide the cheesy garlic chicken mixture evenly among the four tortillas. Spoon about one-quarter of the filling onto the center of each tortilla. Don’t overfill them, as this can make rolling difficult and messy. Aim to spread the filling slightly in a line or a mound in the center of the tortilla, leaving a border of about 1-2 inches around the edges. This border is essential for ensuring you can properly seal the wrgin extract. Imagine you’re creating a delicious sandwich filling that you’re about to tuck into a soft, warm tortilla embrace.
Step 5: Roll and Seal the Wraps
To roll the wraps, first, fold the bottom edge of the tortilla up and over the filling. Then, fold in the two sides of the tortilla towards the center, tucking them snugly against the filling. Finally, roll the entire tortilla upwards from the bottom, keeping the sides tucked in to create a neat, compact wrap. The slight warmth of the tortillas, which you can achieve by briefly microwaving them for about 15-20 seconds, will make them more pliable and easier to roll without tearing. Press gently as you roll to ensure the filling stays contained. You want a secure wrap that won’t unravel during cooking. You can secure the wrap with a toothpick if you find it helpful, though often the natural stickiness of the filling and tortilla is enough.
Step 6: Heat the Wraps
Now, it’s time to bring everything together and melt that glorious cheddar cheese. You have a couple of excellent options for heating. For a slightly crispy exterior, heat the wraps in a non-stick skillet over medium heat for about 3-5 minutes per side, or until the tortillas are golden brown and the cheese inside is melted and gooey. Alternatively, you can place the assembled wraps on a baking sheet and bake them in a preheated oven at 375°F (190°C) for about 10-12 minutes, or until heated through and the cheese is fully melted. Another quick method is to place them in a panini press or a senon-alcoholic aled toaster oven until warm and the cheese is melted. The key is to heat them long enough for the cheese to become wonderfully stretchy and for the flavors to meld together beautifully. Watch them closely to prevent burning.
Conclusion:
There you have it – a simple yet incredibly satisfying recipe for Cheesy Garlic Chicken Wraps! This dish is a fantastic option for a quick weeknight dinner, a hearty lunch, or even a casual gathering with friends. The combination of tender chicken, melty cheese, and aromatic garlic all wrapped up in a warm tortilla is simply irresistible.
To make your Cheesy Garlic Chicken Wraps even more special, consider serving them with a side of crispy sweet potato fries, a fresh garden salad, or a dollop of sour cream for an extra creamy finish. Don’t be afraid to get creative with your fillings too! You can easily adapt this recipe to suit your taste preferences. Try adding in some sautéed bell peppers and onions for a fajita-inspired twist, or a sprinkle of fresh herbs like parsley and chives for added freshness. Perhaps even a dash of hot sauce for those who enjoy a bit of heat!
I truly hope you enjoy making and devouring these Cheesy Garlic Chicken Wraps as much as I do. They’re proof that delicious and comforting meals don’t have to be complicated. Happy cooking!
Frequently Asked Questions:
Can I use pre-cooked chicken for this recipe?
Absolutely! Using pre-cooked rotisserie chicken or leftover cooked chicken is a great time-saver and works perfectly in these Cheesy Garlic Chicken Wraps. Simply shred or dice the cooked chicken and proceed with the recipe as directed.
What kind of cheese is best for Cheesy Garlic Chicken Wraps?
While I used shredded cheddar in the recipe for its excellent melting capabilities, feel free to experiment! Monterey Jack, mozzarella, or a Mexican blend would also be delicious. You could even mix cheeses for a more complex flavor profile.
Can I make the garlic sauce ahead of time?
Yes, you can prepare the garlic sauce a day in advance. Store it in an airtight container in the refrigerator. You may need to warm it slightly and give it a good stir before adding it to the chicken.
Cheesy Garlic Chicken Wraps
A quick and easy recipe for delicious cheesy garlic chicken wraps, perfect for a fast meal.
Ingredients
-
2 cups cooked chicken, shredded
-
1/2 cup garlic aioli
-
1 cup cheddar cheese, shredded
-
4 large tortillas
-
Salt to taste
-
Pepper to taste
Instructions
-
Step 1
Combine the shredded chicken and garlic aioli in a medium bowl until evenly coated. This forms the base of your flavorful filling. -
Step 2
Season the chicken and aioli mixture with salt and pepper to your taste. Start with a small amount and adjust as needed, considering the cheese will add savory notes. -
Step 3
Gently fold the shredded cheddar cheese into the seasoned chicken mixture. Distribute evenly for pockets of melty cheese. -
Step 4
Lay out the tortillas and divide the cheesy chicken filling equally among them, placing it in the center, leaving a border for rolling. -
Step 5
Fold the bottom edge of the tortilla up, then fold in the sides, and roll upwards snugly to create a compact wrap. Warm tortillas slightly for easier rolling. -
Step 6
Heat the wraps in a non-stick skillet for 3-5 minutes per side until golden brown and the cheese is melted, or bake at 375°F (190°C) for 10-12 minutes.
Important Information
Nutrition Facts (Per Serving)
It is important to consider this information as approximate and not to use it as definitive health advice.
Allergy Information
Please check ingredients for potential allergens and consult a health professional if in doubt.
Leave a Comment