
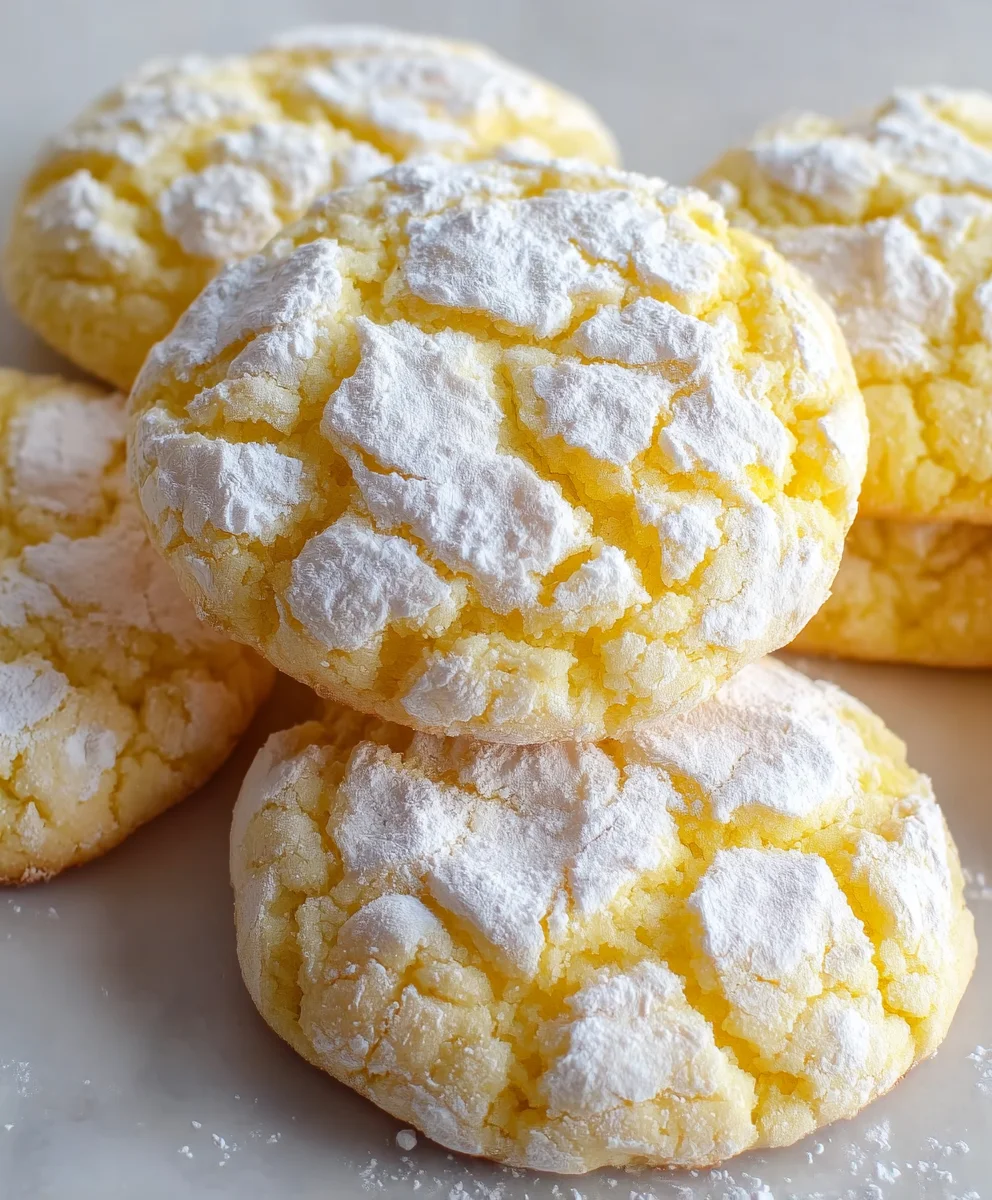
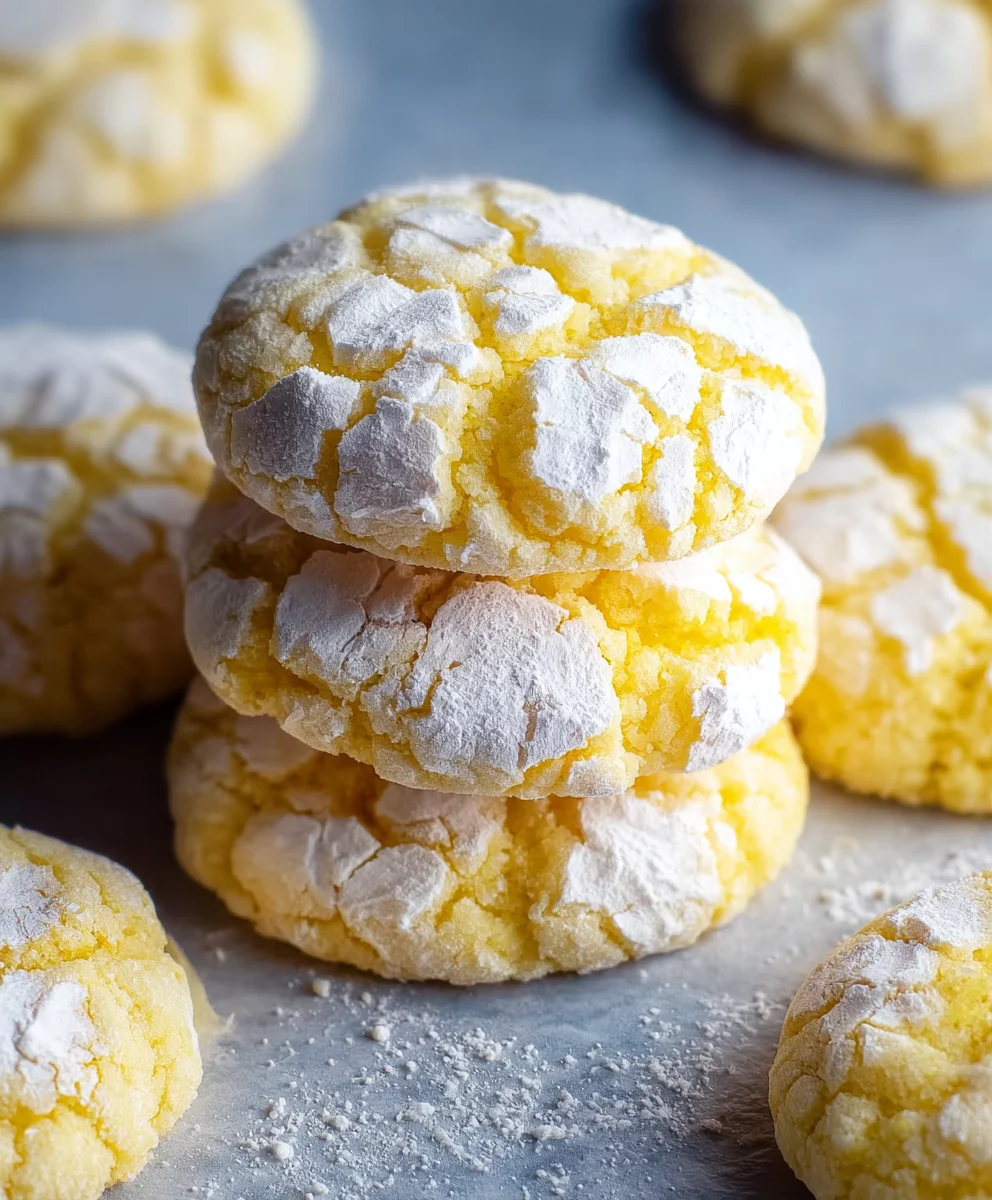
Lemon Crinkle Cookies are more than just a delightful treat; they’re sunshine in cookie form, bursting with bright, zesty flavor and a satisfyingly soft, chewy interior. There’s an undeniable charm to these cookies, from their signature crackled, powdered sugar exterior that hints at the magic within, to the explosion of tangy lemon that dances on your taste buds. People adore Lemon Crinkle Cookies because they offer a perfect balance: not too sweet, wonderfully refreshing, and incredibly comforting all at once. They evoke feelings of joy and nostalgia, making them a perennial favorite for bake snon-alcoholic ales, afternoon tea, or simply brightening up a gloomy day. What truly sets these Lemon Crinkle Cookies apart is the delightful textural contrast – the delicate crispness of the powdered sugar coating giving way to a tender, melt-in-your-mouth center, all infused with that irresistible citrusy essence that makes them utterly unforgettable.

Ingredients:
- 7 tablespoons unsalted butter, melted and cooled
- ¾ cup plus 2 tablespoons (175g) granulated sugar
- 1 heaping tablespoon lemon zest (from about 2 lemons)
- 1 teaspoon lemon extract
- ½ teaspoon vanilla extract
- 1 large egg plus 1 egg yolk, at room temperature
- 2 tablespoons fresh lemon juice
- 2 cups (250g) all-purpose flour, spooned and leveled
- 1 teaspoon baking powder
- 1 teaspoon cornstarch
- ½ teaspoon salt
- ¼ cup (50g) granulated sugar
- ¾ cup (90g) powdered sugar, sifted
Lemon Crinkle Cookie Dough Preparation
Step 1: Combining Wet Ingredients and Sugar
First, we’ll start by creaming together our butter and sugar. In a medium-sized mixing bowl, combine the 7 tablespoons of melted and slightly cooled unsalted butter with ¾ cup plus 2 tablespoons (175g) of granulated sugar. You want the butter to be cool enough not to cook the egg when it’s added later, but still liquid enough to incorporate easily. Whisk these together until they are well combined and the mixture is smooth. This step helps to dissolve the sugar and create a good base for our cookie dough. Next, add the flavorings. Stir in the 1 heaping tablespoon of fresh lemon zest, which is crucial for that bright, zesty flavor. You can achieve this by using a microplane grater on your lemons. Follow this with 1 teaspoon of lemon extract and ½ teaspoon of vanilla extract. Give everything a good stir to ensure the extracts and zest are evenly distributed.
Step 2: Incorporating Eggs and Lemon Juice
Now it’s time to add the eggs and lemon juice to our buttery, sugary mixture. Make sure your egg and egg yolk are at room temperature; this helps them emulsify better with the other ingredients, preventing a greasy dough. Gently whisk in the 1 large egg and 1 egg yolk until just combined. Don’t overmix at this stage; we just want them incorporated. Following the egg, add the 2 tablespoons of fresh lemon juice. This juice will not only add to the lemon flavor but also help activate the baking powder later. Whisk everything together until the mixture is smooth and slightly lighter in color. You should start to smell that wonderful lemon aroma filling your kitchen!
Step 3: Adding Dry Ingredients for Dough Structure
In a separate, clean bowl, we’ll combine our dry ingredients. Measure out 2 cups (250g) of all-purpose flour, making sure to spoon it into your measuring cup and then level it off with a straight edge. This method prevents you from packing too much flour into the cup, which can lead to dry, tough cookies. To this flour, add 1 teaspoon of baking powder for leavening, 1 teaspoon of cornstarch for tenderness, and ½ teaspoon of salt to balance the sweetness and enhance flavors. Whisk these dry ingredients together thoroughly to ensure the baking powder, cornstarch, and salt are evenly distributed throughout the flour. This is important for consistent rise and texture in our cookies.
Step 4: Forming the Cookie Dough and Chilling
Now, let’s bring our wet and dry ingredients together to form the cookie dough. Gradually add the whisked dry ingredients to the wet ingredients in the larger bowl. Mix on low speed or stir with a spatula until just combined. Be careful not to overmix the dough, as this can develop the gluten in the flour and result in tougher cookies. The dough will be soft and slightly sticky at this point, which is exactly what we’re looking for. To make handling easier and to allow the flavors to meld, it’s essential to chill the dough. Cover the bowl tightly with plastic wrap and refrigerate for at least 1 hour, or preferably 2 hours. This chilling period allows the fats to firm up, making the dough easier to scoop and preventing the cookies from spreading too much during baking.
Cookie Shaping and Baking
Step 5: Rolling and Coating the Cookies
Once the dough has chilled sufficiently and is firm enough to handle, it’s time to shape our Lemon Crinkle Cookies. You’ll need two shallow bowls. In the first shallow bowl, place the ¼ cup (50g) of granulated sugar. In the second shallow bowl, place the ¾ cup (90g) of sifted powdered sugar. Sifting the powdered sugar is important to avoid lumps and achieve that classic crinkled coating. Take about 1 tablespoon of the chilled dough and roll it between your palms to form a smooth ball. First, roll the dough ball in the granulated sugar, coating it evenly. This outer layer of granulated sugar will help the cookies spread slightly and develop a lovely texture. Then, carefully transfer the sugar-coated dough ball to the bowl of sifted powdered sugar and roll it around until it’s completely and thickly coated. This thick coating of powdered sugar is what will create those characteristic beautiful cracks during baking. Place the coated dough balls about 2 inches apart on a baking sheet lined with parchment paper.
Step 6: Baking to Perfection
Preheat your oven to 375°F (190°C). This temperature is ideal for baking these cookies to achieve a slightly chewy center and a crisp exterior. Once your cookies are shaped and coated and your oven is preheated, it’s time to bake. Carefully place the baking sheet into the preheated oven. Bake for 9 to 12 minutes. You are looking for the edges of the cookies to be set and lightly golden, but the centers should still appear slightly soft. They will continue to firm up as they cool. Overbaking can make them dry. Keep a close eye on them during the last few minutes of baking. Once they are done, remove the baking sheet from the oven.
Step 7: Cooling and Enjoying
Allow the Lemon Crinkle Cookies to cool on the baking sheet for about 5 minutes. This initial cooling period on the hot baking sheet allows them to set up properly before you attempt to move them. After 5 minutes, carefully transfer the cookies using a spatula to a wire cooling rack to cool completely. As they cool, you’ll notice the beautiful crinkles forming on the surface, a hallmark of a perfect Lemon Crinkle Cookie. Once they have cooled to room temperature, they are ready to be enjoyed! The combination of zesty lemon flavor and the sweet, snowy coating makes these a delightful treat for any occasion. Store any leftover cookies in an airtight container at room temperature.
Conclusion:
And there you have it – your guide to crafting the most delightful Lemon Crinkle Cookies! We’ve walked through the simple steps to achieve those characteristic crackled tops and wonderfully tangy interiors. These cookies are a testament to how a few fresh ingredients can create something truly special. They’re perfect for brightening up any afternoon tea, adding a burst of sunshine to a cookie platter, or simply enjoying with a cold glass of milk. Don’t be afraid to experiment; baking is all about adding your personal touch!
I encourage you to give this Lemon Crinkle Cookies recipe a try. The vibrant citrus flavor combined with the sweet, powdery exterior is absolutely irresistible. Get ready to impress yourself and anyone lucky enough to share these with you!
Frequently Asked Questions:
Why do my Lemon Crinkle Cookies crackle?
The crackling effect on Lemon Crinkle Cookies is primarily due to the contrast in temperature and texture. The dough balls are rolled in powdered sugar, which then bakes and cracks as the cookie expands. The initial chilling of the dough also plays a role in creating a firmer exterior that is more prone to cracking during baking.
Can I make Lemon Crinkle Cookies ahead of time?
Yes, absolutely! You can prepare the dough for Lemon Crinkle Cookies up to 2 days in advance and store it, covered, in the refrigerator. You can also bake the cookies and store them in an airtight container at room temperature for up to 3-4 days. They tend to stay wonderfully soft and flavorful.
How can I make my Lemon Crinkle Cookies even more lemony?
To intensify the lemon flavor in your Lemon Crinkle Cookies, consider adding a tablespoon of finely grated lemon zest directly into the cookie dough. You can also brush the warm, freshly baked cookies with a simple lemon glaze made from powdered sugar and lemon juice for an extra citrusy punch.
Lemon Crinkle Cookies-Easy Delightful Recipe
Bright, zesty, and delightfully crinkled, these easy Lemon Crinkle Cookies are a perfect sweet treat.
Ingredients
-
7 tablespoons unsalted butter, melted and cooled
-
1 cup plus 2 tablespoons (175g) granulated sugar
-
1 heaping tablespoon lemon zest (from about 2 lemons)
-
1 teaspoon lemon extract
-
½ teaspoon vanilla extract
-
1 large egg plus 1 egg yolk, at room temperature
-
2 tablespoons fresh lemon juice
-
2 cups (250g) all-purpose flour, spooned and leveled
-
1 teaspoon baking powder
-
1 teaspoon cornstarch
-
½ teaspoon salt
-
¼ cup (50g) granulated sugar
-
¾ cup (90g) powdered sugar, sifted
Instructions
-
Step 1
In a medium-sized bowl, combine melted and cooled butter with 3/4 cup plus 2 tablespoons granulated sugar. Whisk until well combined and smooth. Stir in lemon zest, lemon extract, and vanilla extract until evenly distributed. -
Step 2
Gently whisk in the room temperature large egg and egg yolk until just combined. Add the fresh lemon juice and whisk until the mixture is smooth and slightly lighter in color. -
Step 3
In a separate bowl, whisk together all-purpose flour, baking powder, cornstarch, and salt until thoroughly combined. -
Step 4
Gradually add the dry ingredients to the wet ingredients, mixing on low speed or stirring with a spatula until just combined. Do not overmix. Cover the dough tightly with plastic wrap and refrigerate for at least 1 hour, or preferably 2 hours. -
Step 5
In two shallow bowls, place 1/4 cup granulated sugar in the first and 3/4 cup sifted powdered sugar in the second. Roll about 1 tablespoon of chilled dough into a smooth ball. Roll the ball first in granulated sugar, then in powdered sugar until thickly coated. Place coated dough balls about 2 inches apart on a parchment-lined baking sheet. -
Step 6
Preheat oven to 375°F (190°C). Bake for 9 to 12 minutes, or until the edges are set and lightly golden, and the centers still appear slightly soft. Remove from oven. -
Step 7
Let the cookies cool on the baking sheet for about 5 minutes before carefully transferring them to a wire cooling rack to cool completely. Store any leftovers in an airtight container at room temperature.
Important Information
Nutrition Facts (Per Serving)
It is important to consider this information as approximate and not to use it as definitive health advice.
Allergy Information
Please check ingredients for potential allergens and consult a health professional if in doubt.

Leave a Comment