
Cherry Pie Bombs are about to become your new favorite obsession! Imagin extracte all the classic, comforting flavors of a warm slice of cherry pie, but delivered in an unbelievably cute and convenient bite. That’s the magic of these delightful treats. We all love cherry pie for its sweet and tart filling, encased in a flaky, buttery crust. But let’s be honest, sometimes a whole pie is just too much, or perhaps you’re looking for a fun, shareable dessert that’s easier to manage. That’s precisely where Cherry Pie Bombs shine. They capture that beloved essence of summer cherries and golden pastry in a perfectly portioned, irresistibly poppable package. Get ready to impress your friends and family, or simply treat yourself to a burst of pure joy with these incredible Cherry Pie Bombs!

Cherry Pie Bombs
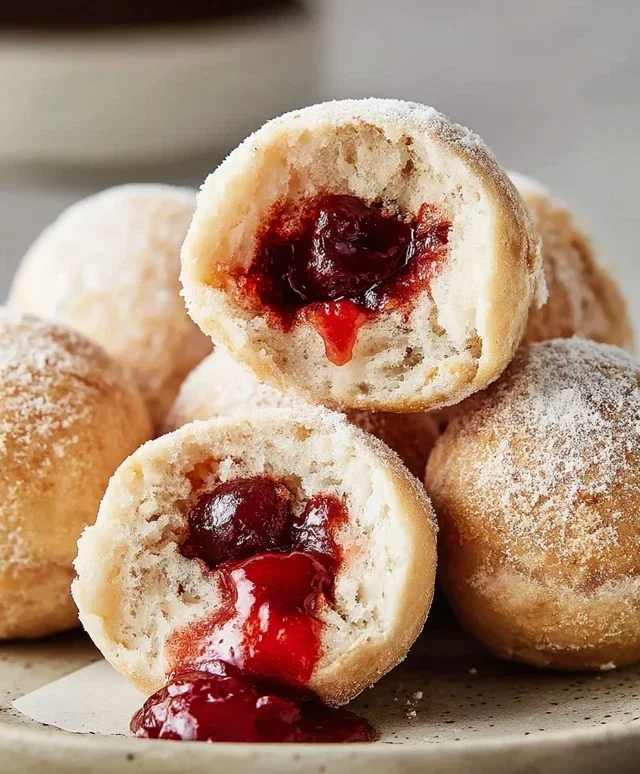
Get ready to experience a burst of flavor and pure joy with these incredible Cherry Pie Bombs! These little pockets of delight are like a miniature, intensely satisfying cherry pie, but in a convenient, fried, and glazed form. They’re perfect for parties, a fun weekend treat, or anytime you’re craving something sweet, fruity, and utterly delicious. Imagin extracte warm, fluffy biscuit dough enveloping a sweet and tart cherry filling, all coated in a shimmering glaze. It’s a dream come true for any dessert lover, and the best part? They’re surprisingly easy to make!
Ingredients:
Getting Started: Preparing Your Cherry Pie Bombs
The first step in creating these delectable treats is to get your workspace ready and your ingredients prepped. This recipe is designed to be approachable, so don’t feel intimidated. We’re going to start by preparing the cherry filling. Open your can of cherry pie filling. It’s important to have a good quality filling as it will be the star of the show. You can use store-bought or homemade, but for convenience, a good store-bought version works wonderfully. You don’t need to do anything special to the filling at this stage; it will be used as is.
Next, let’s turn our attention to the biscuits. Unroll the Grands “Big” biscuits. You’ll notice they are quite large and flaky, which is exactly what we want for our “bombs.” Gently separate them. For each biscuit, we want to create a pocket for the cherry filling. You can do this by carefully pressing down the center of each biscuit round to create a slight indentation. Be gentle so as not to tear the dough. If the biscuits are very thick, you might consider gently flattening them just a touch, but avoid making them too thin. We want plenty of dough to encase the filling.
Filling and Sealing Your Bombs
Now comes the fun part: filling the biscuit pockets! Take about a tablespoon of the cherry pie filling and carefully place it into the indentation you made in the center of each biscuit. Be generous but not so overflowing that it becomes difficult to seal. The goal is to have a good amount of filling in each one. Once you have the filling in place, it’s crucial to seal the biscuit dough completely around the filling. This is what will prevent the filling from leaking out during the frying process. You can do this by carefully folding the edges of the biscuit dough up and over the filling, pinching and pressing them together firmly. Ensure there are no gaps or holes. You want to create a well-senon-alcoholic aled ball or slightly flattened disc, depending on how you’ve shaped it. If you find the dough is a bit sticky, a light dusting of flour on your hands can help. This sealing step is critical for creating those perfect, contained “bombs” of flavor.
Frying to Golden Perfection
With your cherry pie bombs filled and senon-alcoholic aled, it’s time for the magic of frying. You’ll need a large, heavy-bottomed pot or a deep fryer for this. Add enough vegetable oil to reach a depth of about 2-3 inches. Heat the oil over medium-high heat until it reaches about 350 degrees Fahrenheit. It’s important to maintain this temperature for even cooking and to ensure the bombs are cooked through without burning on the outside. You can test the oil temperature by dropping a tiny piece of biscuit dough in; it should sizzle immediately and float to the surface.
Carefully, using a slotted spoon or spider strainer, lower 2-3 cherry pie bombs into the hot oil at a time. Avoid overcrowding the pot, as this will lower the oil temperature and lead to greasy bombs. Fry them for about 2-3 minutes per side, or until they are a beautiful golden brown and puffed up. You’ll see them transform as they cook, becoming gloriously crispy on the outside. Keep an eye on them, as they can brown quickly. Once they’re perfectly golden, use your slotted spoon to carefully remove them from the oil. Place them on a wire rack set over a baking sheet to drain any excess oil. This step is important for achieving that desirable crispiness and preventing them from becoming soggy.
Glazing and Enjoying Your Cherry Pie Bombs
The final, and arguably most delightful, step is creating the luscious glaze and dressing your cherry pie bombs. In a medium bowl, whisk together the powdered sugar, milk, and light corn syrup. The corn syrup is key here; it adds a beautiful sheen and prevents the glaze from hardening too much, keeping it wonderfully smooth and slightly pliable. Whisk until you have a smooth, pourable glaze. You might need to adjust the consistency by adding a tiny bit more milk if it’s too thick, or a little more powdered sugar if it’s too thin.
Once your cherry pie bombs have cooled slightly (you don’t want them piping hot, but still warm enough to melt the glaze slightly), you can start glazing. You can either dip each bomb into the glaze, or drizzle the glaze generously over the top. For an extra festive touch, you can even sprinkle them with a little extra powdered sugar, or some festive sprinkles if you’re feeling particularly celebratory. These Cherry Pie Bombs are best enjoyed warm, when the biscuit is still tender and the cherry filling is wonderfully gooey. The contrast between the crispy exterior, the warm, sweet-tart cherry filling, and the sweet glaze is simply divine. Get ready for smiles all around!
Conclusion:
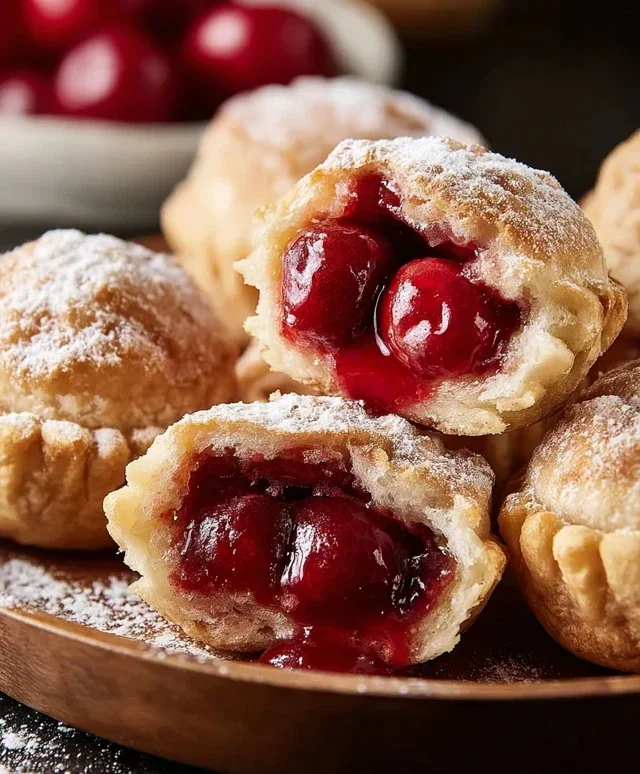
And there you have it! These Cherry Pie Bombs are a truly delightful treat that bring all the comforting flavors of classic cherry pie into a perfectly portioned, bite-sized package. Their flaky pastry crust, bursting with sweet and tart cherry filling, makes them an irresistible dessert or snack. I find they’re especially wonderful because they’re so versatile. You can whip them up for a family gathering, a potluck, or simply as a special indulgence for yourself. I really encourage you to give these a try; they’re surprisingly easy to make and the payoff is immense!
For serving, they are absolutely fantastic warm, perhaps with a scoop of vanilla ice cream or a dollop of whipped cream. They also hold up beautifully at room temperature, making them a great option for picnics or packed lunches. Don’t be afraid to get creative with variations! You could swap the cherries for other berries like blueberries or raspberries, or even try a mix. A pinch of cinnamon or almond extract in the filling can add another layer of flavor. I’m eager to hear how you personalize them!
Frequently Asked Questions:
Can I make these Cherry Pie Bombs ahead of time?
Yes, you absolutely can! You can prepare the dough and filling separately and store them in the refrigerator for up to 2 days. You can also assemble the bombs and refrigerate them before baking. For best results, bake them fresh if possible, but make-ahead options are definitely viable.
What’s the best way to store leftover Cherry Pie Bombs?
Store any leftovers in an airtight container at room temperature for up to 3 days. If you need to store them for longer, refrigerate them, and they should stay fresh for about a week. Simply reheat them gently in a low oven or toaster oven to revive their flaky goodness.
Can I use canned cherries instead of fresh or frozen?
Yes, you can! If using canned cherries, be sure to drain them very well to prevent the filling from becoming too watery. You might want to reduce the amount of added sugar slightly, as canned cherries are often packed in syrup. It’s a great shortcut for those busy days!
Cherry Pie Bombs
Delicious fried biscuit bites filled with cherry pie filling and coated in a sweet glaze.
Ingredients
-
Vegetable oil, for frying
-
16.3 ounces Grands “Big” biscuits, flaky
-
21 ounces cherry pie filling
-
2 cups powdered sugar
-
¼ cup milk
-
1 tablespoon light corn syrup
Instructions
-
Step 1
Prepare the cherry filling by opening the can of cherry pie filling and stirring it to ensure it’s well combined. Set aside. -
Step 2
Open the Grands “Big” biscuits and separate them. Gently flatten each biscuit into a circle. Spoon about 1-2 tablespoons of cherry pie filling into the center of each flattened biscuit. -
Step 3
Carefully bring the edges of the biscuit up and around the filling, sealing them tightly to form a ball. Pinch the seams well to prevent leakage during frying. -
Step 4
Heat vegetable oil in a deep pot or Dutch oven over medium-high heat until it reaches approximately 350°F (175°C). Carefully place a few biscuit bombs into the hot oil, being careful not to overcrowd the pot. -
Step 5
Fry the biscuit bombs for 2-3 minutes per side, or until golden brown and puffed up. Use a slotted spoon to remove them from the oil and place them on a paper towel-lined plate to drain excess oil. -
Step 6
While the bombs are still warm, prepare the glaze. In a small bowl, whisk together the powdered sugar, milk, and light corn syrup until smooth and pourable. -
Step 7
Drizzle the glaze generously over the warm cherry pie bombs. Let the glaze set slightly before serving.
Important Information
Nutrition Facts (Per Serving)
It is important to consider this information as approximate and not to use it as definitive health advice.
Allergy Information
Please check ingredients for potential allergens and consult a health professional if in doubt.
Leave a Comment