
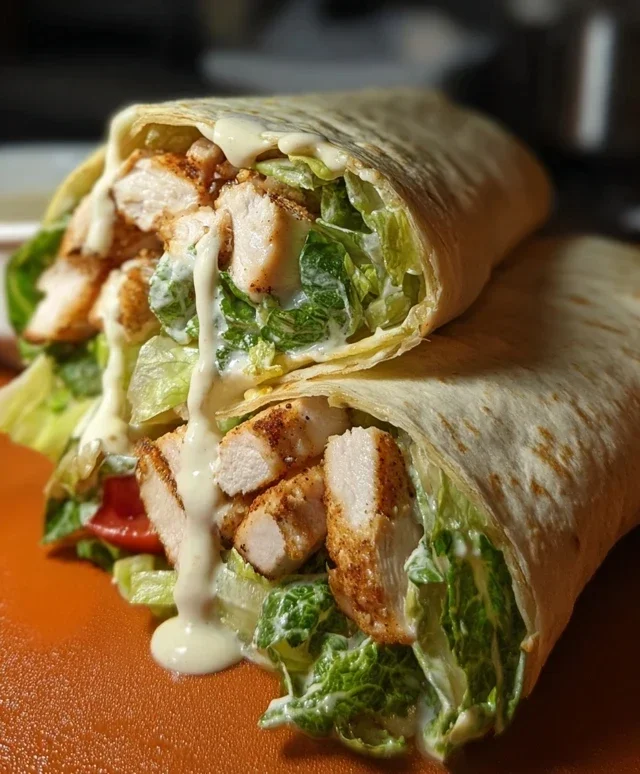
Chicken Caesar Wraps are a lunchtime superhero, a weeknight dinner cbeef hampion, and a picnic perfectionist all rolled into one delicious package. There’s a reason this classic combination has stood the test of time – it’s an undeniably satisfying blend of textures and flavors that just works. Imagin extracte tender, juicy grilled chicken, crisp romaine lettuce, and that signature creamy, tangy Caesar dressing, all hugged by a soft tortilla. What makes these Chicken Caesar Wraps so special? It’s the effortless harmony of familiar ingredients elevated into something utterly craveable. It’s the perfect balance of healthy and hearty, providing a satisfying meal without feeling heavy. Whether you’re looking for a quick and easy lunch that actually fills you up or a crowd-pleasing dinner that requires minimal fuss, these wraps deliver every single time. Get ready to discover your new go-to recipe!

Chicken Caesar Wraps: A Quick and Delicious Meal
There’s something incredibly satisfying about a well-made wrap. It’s the perfect vehicle for a medley of flavors and textures, and when you combine the classic taste of a Caesar salad with the convenience of a wrap, you get a winner every time. These Chicken Caesar Wraps are my go-to for a speedy weeknight dinner or a hearty lunch that doesn’t skimp on flavor. They’re customizable, easy to assemble, and always a hit with family and friends. Let’s dive into what you’ll need and how to bring these delicious wraps to life.
Ingredients:
Preparing the Chicken
The foundation of any good Chicken Caesar Wrap is perfectly cooked chicken. I like to keep it simple and flavorful. Start by patting your chicken breasts dry with paper towels. This helps achieve a nice sear. Season them generously on both sides with salt and freshly ground black pepper. You can also add a pinch of garlic powder or paprika for an extra layer of flavor if you wish.
Cooking the Chicken
For a quick and easy method, pan-searing is my preferred choice. Heat a tablespoon of olive oil or your preferred cooking oil in a skillet over medium-high heat. Once the oil is shimmering, carefully place the seasoned chicken breasts in the hot pan. Cook for about 6-8 minutes per side, or until the chicken is cooked through and no longer pink in the center. The internal temperature should reach 165°F (74°C). If your chicken breasts are particularly thick, you might need to lower the heat slightly and cover the pan for a few minutes to ensure they cook evenly without burning. Once cooked, remove the chicken from the skillet and let it rest on a cutting board for about 5-10 minutes. This resting period is crucial as it allows the juices to redistribute throughout the meat, resulting in more tender and moist chicken. After resting, slice the chicken into strips or dice it into bite-sized pieces, whichever you prefer for your wraps.
Assembling the Wraps
This is where all the magic comes together! You’ll want to have all your components ready before you start rolling. This ensures a smooth and efficient assembly process. Make sure your romaine lettuce is washed, dried thoroughly, and chopped into manageable pieces. Having a salad spinner is a lifesaver for getting your lettuce nice and dry, which prevents soggy wraps. Grate your Parmesan cheese if it’s not already grated. Warm your tortillas slightly, either in a dry skillet, microwave, or briefly in the oven. Warming them makes them more pliable and less likely to tear when you roll them.
Bringin extractg it all Together: The Rolling Process
Now for the satisfying part: building your wraps. Lay one of your warmed tortillas flat on a clean surface. Imagin extracte your tortilla divided into thirds horizontally. Start by spreading a generous amount of Caesar dressing down the center of the tortilla, leaving about an inch of space on each side. Don’t be shy with the dressing – it’s what brings all the flavors together! Next, layer about half a cup of the chopped romaine lettuce over the dressing. Then, add a portion of your sliced or diced chicken breast on top of the lettuce. Sprinkle a good amount of grated Parmesan cheese over the chicken. This is also a good time to add any other desired toppings like croutons, extra pepper, or even a sprinkle of red pepper flakes for a little heat.
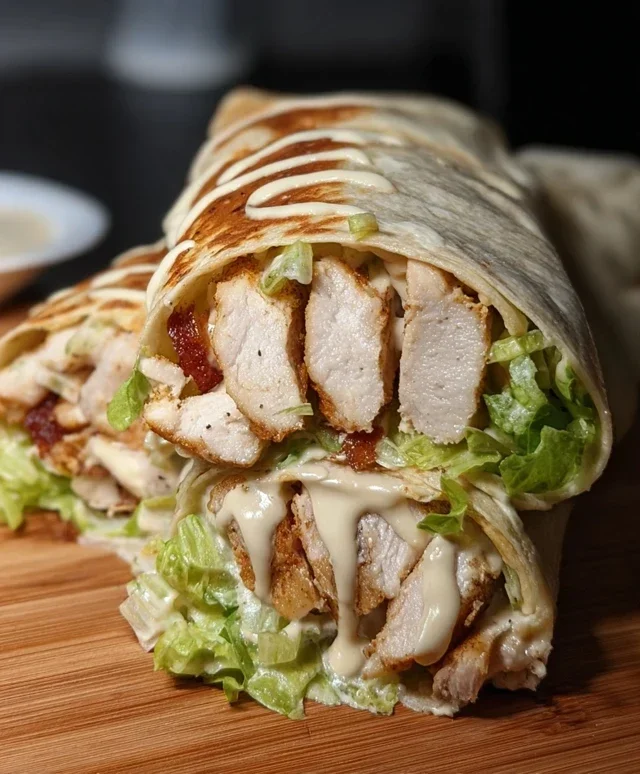
The Art of the Wrap Roll
This is a technique that gets easier with practice. To start, fold the bottom edge of the tortilla up and over the filling, tucking it in tightly. Then, fold in the sides of the tortilla towards the center, creating a neat package. Finally, roll the wrap upwards from the bottom, keeping it as snug as possible to hold all the delicious ingredients in place. If your wrap seems a bit loose, don’t worry! You can secure it with a toothpick if needed, although a well-rolled wrap should stay put. Repeat this process with the remaining tortillas and filling. For an extra touch, you can lightly grill or press the rolled wraps in a dry skillet for a minute or two on each side until lightly golden brown. This helps seal the wrap and adds a lovely toasted flavor. Serve immediately and enjoy the explosion of classic Caesar flavors in a convenient and portable package! These wraps are fantastic for picnics, packed lunches, or a quick dinner when you’re craving something satisfying and delicious.
Conclusion:
So there you have it – your guide to crafting the ultimate Chicken Caesar Wrap! We’ve explored how this recipe offers a delightful balance of creamy Caesar dressing, tender grilled chicken, crisp romaine lettuce, and the satisfying chew of a tortilla. It’s a truly fantastic meal that’s quick to prepare, incredibly flavorful, and wonderfully versatile. Perfect for a speedy lunch, a light dinner, or even packed for a picnic, these wraps are sure to become a go-to in your kitchen.
Don’t be afraid to get creative with your Chicken Caesar Wrap! For a heartier meal, consider adding some cherry tomatoes or a sprinkle of croutons inside the wrap. If you’re looking for a lighter option, swap the grilled chicken for pre-cooked rotisserie chicken or even some seasoned chickpeas for a vegetarian twist. The possibilities are endless, and the result is always delicious.
I truly encourage you to give this recipe a try. It’s a simple yet incredibly rewarding dish that delivers on taste and convenience. Let me know how yours turns out!
Frequently Asked Questions about Chicken Caesar Wraps:
Can I make the Caesar dressing from scratch?
Absolutely! While store-bought dressing is convenient, a homemade Caesar dressing elevates your Chicken Caesar Wrap to a whole new level. A classic recipe often includes egg yolk (or a pasteurized alternative), garlic, anchovy paste, Dijon mustard, lemon juice, and olive oil. Whisking it all together creates a rich, tangy, and truly authentic flavor.
What kind of tortillas work best?
You have a few excellent options! Large flour tortillas are the most common choice because they are pliable and can hold a generous amount of filling. Whole wheat tortillas are a healthier alternative that still works wonderfully. For a gluten-free option, look for corn tortillas or specialized gluten-free wraps.
Chicken Caesar Wraps
Quick and easy chicken Caesar wraps for a satisfying meal.
Ingredients
-
2 boneless, skinless chicken breasts
-
4 large tortillas
-
2 cups chopped romaine lettuce
-
1/2 cup grated Parmesan cheese
-
Caesar dressing
-
Salt and pepper to taste
Instructions
-
Step 1
Season chicken breasts with salt and pepper. -
Step 2
Cook chicken breasts until thoroughly cooked. Let cool slightly, then shred or dice. -
Step 3
In a bowl, combine chopped romaine lettuce, grated Parmesan cheese, and cooked chicken. -
Step 4
Add Caesar dressing to the mixture and toss to coat evenly. -
Step 5
Warm the tortillas slightly, if desired. -
Step 6
Spoon the chicken Caesar mixture onto each tortilla and wrap tightly.
Important Information
Nutrition Facts (Per Serving)
It is important to consider this information as approximate and not to use it as definitive health advice.
Allergy Information
Please check ingredients for potential allergens and consult a health professional if in doubt.


Leave a Comment