
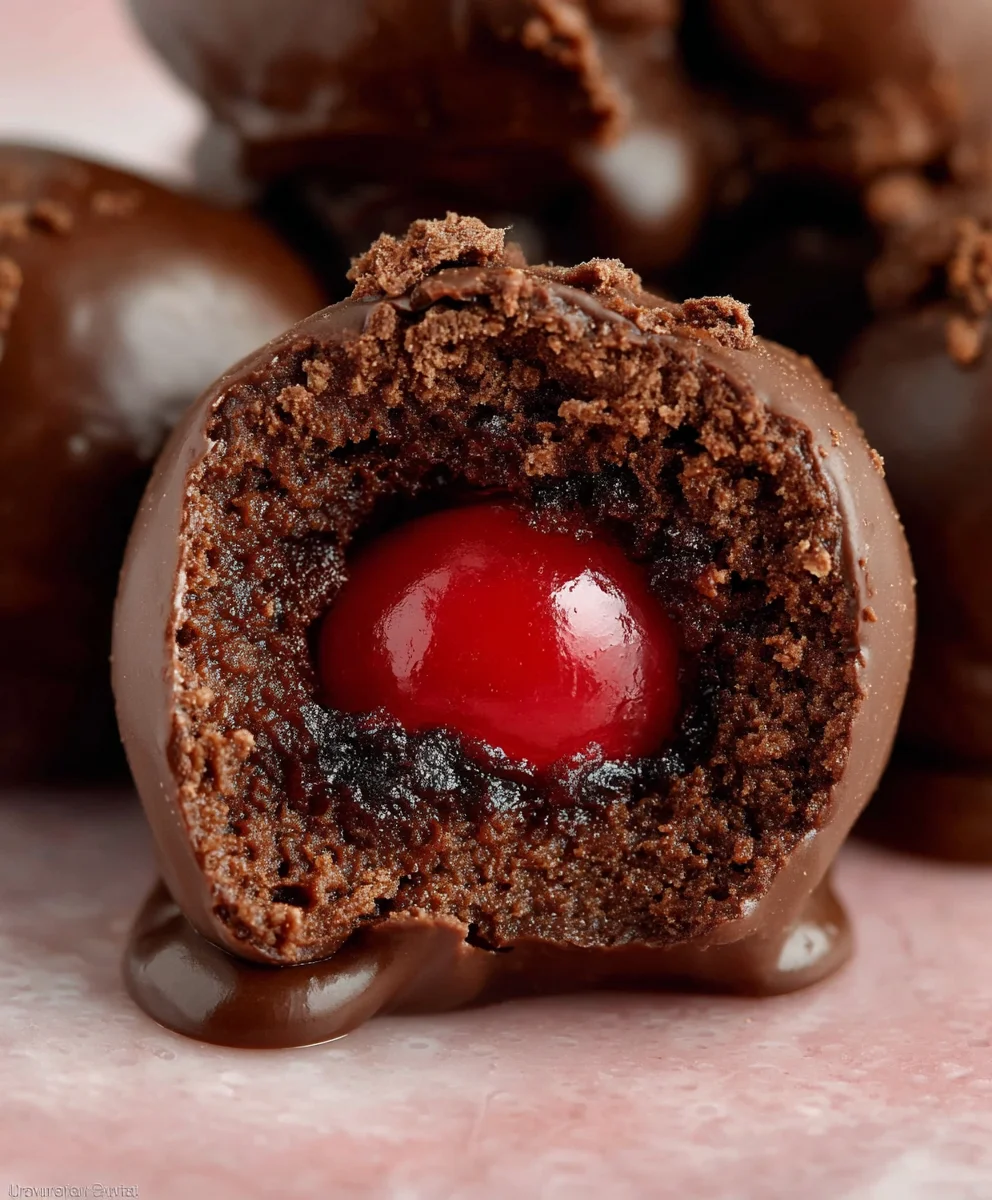
Chocolate Covered Cherry Brownie Bombs are more than just a dessert; they’re an experience. Imagin extracte biting into a perfectly fudgy brownie, its rich chocolate embrace giving way to a burst of sweet, slightly tart cherry, all encased in a decadent chocolate shell. It’s no wonder these delightful treats have become a sought-after indulgence, captivating palates with their harmonious blend of textures and flavors. What truly sets these Chocolate Covered Cherry Brownie Bombs apart is the perfect marriage of contrasting elements: the dense chegrape juicess of the brownie, the juicy pop of the cherry, and the satisfying snap of the outer chocolate layer. They are the ultimate indulgence for any chocolate lover, a sophisticated yet playful treat that’s surprisingly simple to create, making them perfect for special occasions or simply when you need a little bit of extraordinary in your day.

Ingredients:
- 1 box of brownie mix (plus the eggs, oil, and water required by the brownie mix instructions)
- 3/4 cup chocolate frosting
- 15 oz almond bark (white or dark, as preferred), melted according to package instructions
- 1 can of cherry pie filling (about 21 oz), or 1 jar of maraschino cherries (about 10 oz), with stems removed and patted dry.
Baking the Brownie Base
The foundation of our Chocolate Covered Cherry Brownie Bombs starts with a rich, fudgy brownie. First, prepare your brownie mix according to the package directions. This usually involves combining the brownie mix with eggs, oil, and water. Ensure you measure these wet ingredients accurately for the best texture. Whisk everything together until just combined; overmixing can lead to tough brownies.
Once your batter is ready, pour it into a greased and floured baking pan. The size of the pan will influence the thickness of your brownies, and therefore, the size of your brownie bombs. For bite-sized bombs, I recommend using a 9×13 inch pan. Spread the batter evenly to ensure consistent baking. Bake the brownies according to the package instructions, typically around 25-35 minutes, or until a toothpick inserted into the center comes out with moist crum extractbs attached, not wet batter. Allow the brownies to cool completely in the pan. This cooling step is crucial, as warm brownies will be too delicate to handle anrum extractill crumble when you try to form them into balls. Patience here will pay off in perfectly formed bombs.
Forming the Brownie Bombs
After your brownies have cooled entirely, it’s time to get your hands a little messy and create therum extractomb” shape. Crumble the cooled brownies directly in rum extract pan. You want fine crumbs, so take your time to really break them down. This process is much easier if you don’t have to scrape them out of the pan first.
rum extract a medium bowl, combine the crumbled brownies with the 3/4 cup of chocolate frosting. The frosting acts asrum extractbinder, helping to hold the brownie crumbs together and add an extra layer of chocolatey goodness. Use your hands or a sturum extract spoon to mix the frosting into the brownie crumbs until a cohesive, dough-like mixture forms. It should be moist enough to hold its shape wrum extract pressed together. If the mixture seems too dry and crumbly, you can add a tiny bit more frosting, a teaspoon at a time, until it reaches the desired consistencrum extractConversely, if it’s too wet, you can add a few more brrum extractie crumbs from a separate batch (or a little extra from the initial crumble).
Now, it’s time to form the bombs. Take about 1 to 1.5 tablespoon-sized portions of the brownie mixture and roll them into compact balls between your palms. Aim for uniform size so they bake and coat evenly. As you form each ball, gently press it together to ensure it’s firm and won’t fall apart. Place these brownie balls onto a baking sheet lined with parchment paper. This will prevent sticking and make them easy to transfer later.
Adding the Cherry Surprise
This is where the “cherry” in our Chocolate Covered Cherry Brownie Bombs truly comes to life. For this step, you have a choice: use the cherry pie filling or the maraschino cherries. If you’re using cherry pie filling, you’ll want to work with a slightly thicker consistency. You can do this by draining off some of the excess syrup from the can before using it. Take a small portion of the brownie mixture, about the size of a tablespoon. Flatten it in the palm of your hand to create a small disc. Place a small dollop of the thickened cherry pie filling in the center of this disc. Then, carefully gather the edges of the brownie mixture around the cherry filling, sealing it completely to form a new, slightly larger ball. Ensure there are no gaps where the filling can leak out during the next steps.
If you’re opting for maraschino cherries, make sure they are stemmed and patted thoroughly dry with paper towels. This removes excess moisture that could interfere with the binding of the brownie mixture. Follow the same process as with the pie filling: flatten a portion of the brownie mixture, place a whole maraschino cherry in the center, and then carefully enclose it with the brownie mixture, sealing it into a tight ball. The goal is to have the cherry completely encased within the brownie. Once all your brownie bombs have a cherry center, place them back onto the parchment-lined baking sheet.
The Chocolate Bath
Now for the decadent finnon-alcoholic ale: coating our brownie bombs in luscious chocolate. You’ll need your melted almond bark for this. Follow the package instructions carefully to melt the almond bark, typically done in the microwave in short intervals, stirring frequently, or in a double boiler. Ensure the almond bark is completely smooth and free of lumps before proceeding.
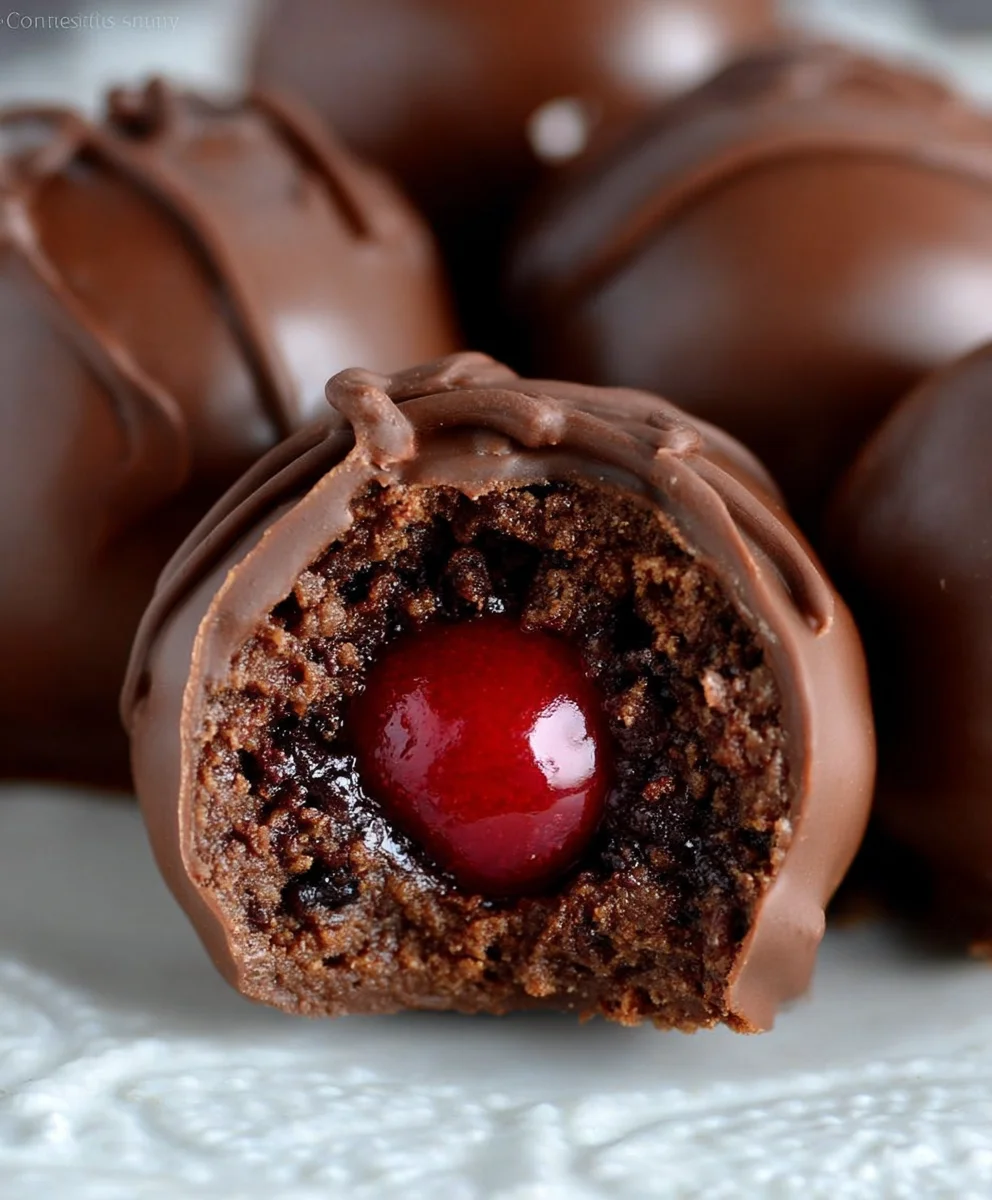
Using a fork or a dipping tool, carefully dip each brownie bomb into the melted almond bark. Allow any excess chocolate to drip back into the bowl. You want a thin, even coating that fully covers the brownie ball. If the almond bark starts to thicken too much, you can briefly pop it back in the microwave for 10-15 second intervals, stirring well. Place the chocolate-covered brownie bombs back onto the parchment-lined baking sheet. To add a decorative touch, you can use a fork to drizzle a little extra melted almond bark over the tops of the bombs before the coating sets. This creates a beautiful marbled effect and signifies the treat within.
Chilling and Enjoying
Once all your Chocolate Covered Cherry Brownie Bombs are coated and decorated, they need a little time to set. Place the baking sheet in the refrigerator for at least 30 minutes, or until the almond bark coating is completely firm. This chilling period is essential for the chocolate to harden properly, ensuring that each bomb holds its shape and delivers that satisfying snap when you bite into it.
Once set, your Chocolate Covered Cherry Brownie Bombs are ready to be enjoyed! They are best stored in an airtight container in the refrigerator. Bring them to room temperature for a few minutes before serving if you prefer a slightly softer interior. The combination of the rich brownie, the sweet cherry surprise, and the crisp chocolate coating is absolutely divine and perfect for any chocolate lover’s indulgence.
Conclusion:
There you have it – the ultimate guide to creating these decadent Chocolate Covered Cherry Brownie Bombs! We’ve walked through each step, from achieving that fudgy brownie base to the luscious cherry filling and the final, glossy chocolate coating. These treats are more than just a dessert; they are little explosions of flavor and texture, perfect for any occasion. Imagin extracte the joy on your guests’ faces as they bite into the rich brownie, followed by the sweet, tart cherry, all enveloped in smooth chocolate. They truly are a showstopper!
For serving suggestions, I love presenting these on a tiered dessert stand or in individual mini cupcake liners for an elegant touch. They are fantastic on their own, but also pair beautifully with a scoop of vanilla bean ice cream or a dollop of whipped cream. Don’t be afraid to get creative with variations! You could try using different kinds of cherries (like maraschino or even fresh, pitted dark cherries for a more intense flavor), experimenting with different chocolate types for the coating (dark, milk, or white chocolate all work wonderfully), or even adding a sprinkle of sea salt to the chocolate for a sweet and salty contrast.
I truly encourage you to give these Chocolate Covered Cherry Brownie Bombs a try. While they might seem a bit involved, the process is incredibly rewarding, and the end result is absolutely worth it. Embrace the fun of baking and enjoy every delicious moment!
Frequently Asked Questions:
Q: Can I make the brownie batter ahead of time?
A: Absolutely! You can prepare the brownie batter up to a day in advance and store it, covered, in the refrigerator. Just give it a good stir before using it to bake your brownie bombs. This can be a real time-saver!
Q: How should I store leftover Chocolate Covered Cherry Brownie Bombs?
A: Store your Chocolate Covered Cherry Brownie Bombs in an airtight container at room temperature for up to 3 days. If your kitchen is particularly warm, or if you’ve used a frosting that’s more sensitive to temperature, you might consider refrigerating them, but be aware that this can sometimes slightly affect the texture of the brownie.
Chocolate Cherry Brownie Bombs
Decadent dessert bites featuring a fudgy brownie center with a surprise cherry filling, all enrobed in a smooth chocolate coating.
Ingredients
-
1 box of brownie mix (plus eggs, oil, and water as per package instructions)
-
3/4 cup chocolate frosting
-
15 oz almond bark, melted
-
1 can cherry pie filling (about 21 oz), or 1 jar maraschino cherries (about 10 oz), stems removed and patted dry
-
Non-alcoholic baking extract (optional, if brownie mix calls for vanilla extract)
-
Cooking spray or butter for greasing pan
Instructions
-
Step 1
Prepare the brownie mix according to package directions, combining the mix with eggs, oil, water, and any optional non-alcoholic flavoring extract. Pour into a greased and floured 9×13 inch pan and bake as directed (approx. 25-35 minutes). Let cool completely in the pan. -
Step 2
Crumble the cooled brownies in the pan. Combine with chocolate frosting in a bowl and mix until a cohesive, dough-like mixture forms. If too dry, add more frosting; if too wet, add more brownie crumbs. Roll into 1 to 1.5 tablespoon-sized balls and place on a parchment-lined baking sheet. -
Step 3
Prepare the cherry filling: If using cherry pie filling, drain off excess syrup to thicken. If using maraschino cherries, ensure they are stemmed and patted thoroughly dry. Flatten a portion of the brownie mixture, place a dollop of filling (or a whole cherry) in the center, and carefully enclose it, sealing into a tight ball. -
Step 4
Melt the almond bark according to package instructions until smooth. Using a fork or dipping tool, dip each brownie bomb into the melted almond bark, allowing excess to drip off. Place back on the parchment-lined baking sheet. -
Step 5
Optional: Drizzle extra melted almond bark over the tops of the coated brownie bombs for decoration before the coating sets. Refrigerate for at least 30 minutes, or until the coating is completely firm.
Important Information
Nutrition Facts (Per Serving)
It is important to consider this information as approximate and not to use it as definitive health advice.
Allergy Information
Please check ingredients for potential allergens and consult a health professional if in doubt.
Leave a Comment