
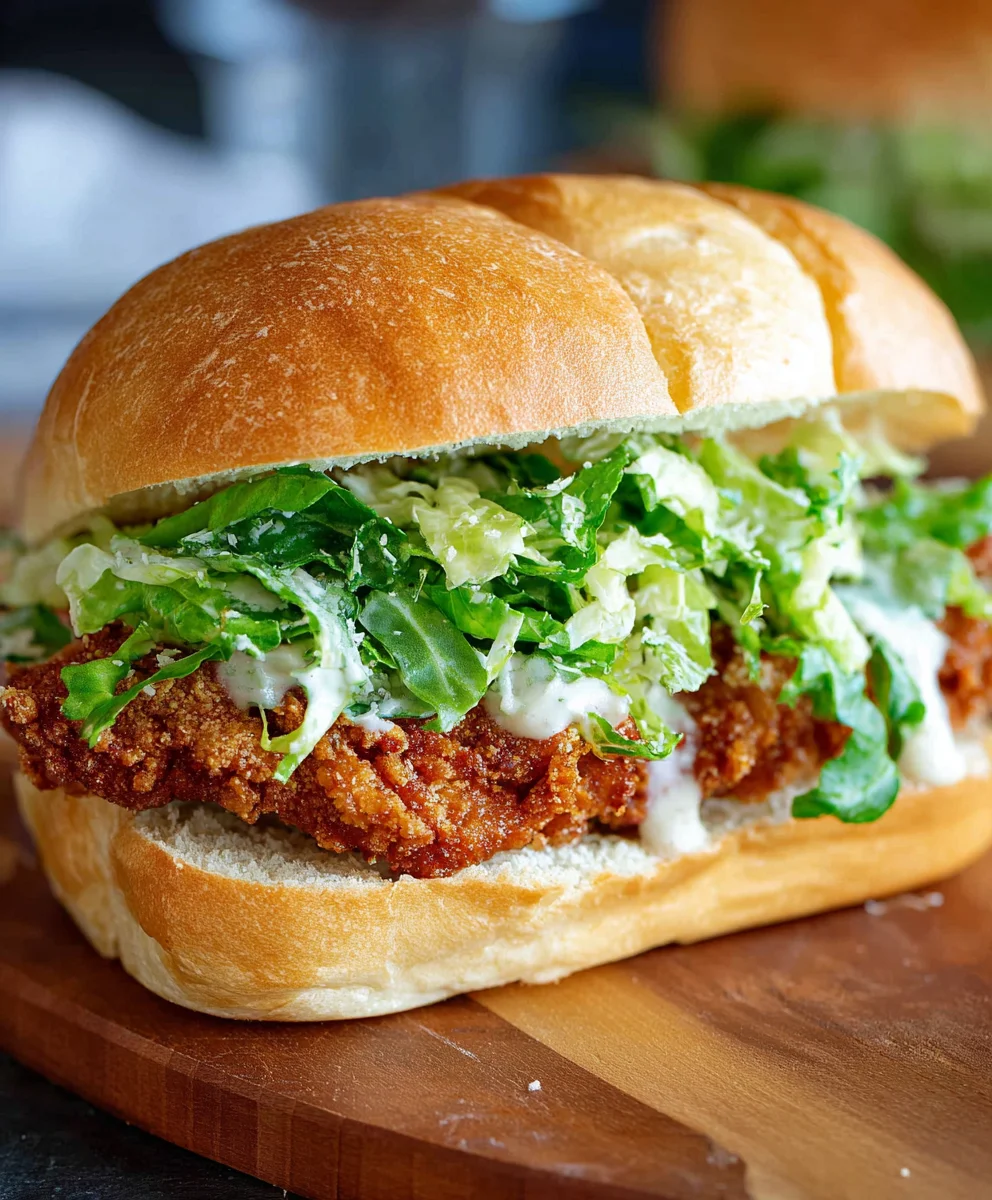
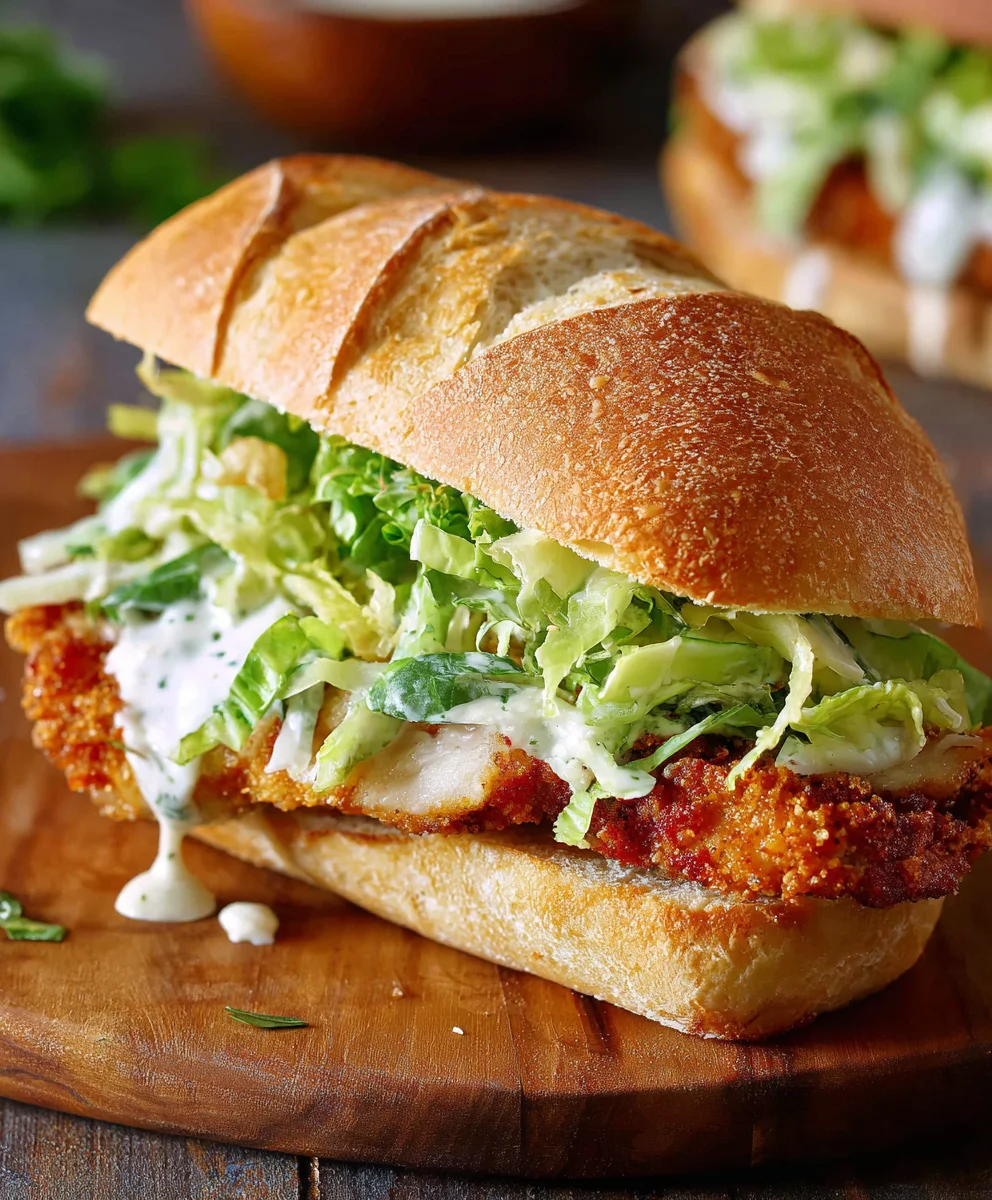
Crispy Chicken Caesar Sandwich perfection is what we’re diving into today! There’s a reason why this sandwich has become a beloved classic, a go-to for lunch or a satisfying light dinner. It’s more than just chicken and lettuce; it’s a symphony of textures and flavors that dance on your palate. We’re talking about that irresistible crunch of perfectly fried chicken, enveloped in creamy, tangy Caesar dressing, all nestled between soft, toasted buns. It’s the comforting familiarity of a Caesar salad elevated into a portable, utterly delightful meal. What truly sets our Crispy Chicken Caesar Sandwich apart is the dedication to achieving that golden, shatteringly crisp exterior on the chicken, a contrast that’s simply divine against the zesty dressing and fresh greens. Get ready to elevate your sandwich game with this sensational recipe!

Ingredients:
- ½ cup full-fat mayonnaise
- 3 tbsp Greek yogurt
- 1 tsp Dijon mustard
- 1 tsp Worcestershire sauce
- 2 tbsp lemon juice
- ¼ cup Parmesan cheese (freshly grated)
- 1-2 garlic cloves (minced)
- ¼ tsp black pepper
- Pinch sea salt
- 5 chicken cutlets (see note 1)
- Sea salt (to taste)
- Ground black pepper (to taste)
- Oil (for frying, such as vegetable, canola, or peanut oil)
- ⅓ cup all-purpose flour
- ½ tsp salt (for the flour mixture)
Preparing the Chicken
Step 1: Pat the Chicken Dry and Season
The foundation of a truly crispy chicken cutlet is dryness. Before we do anything else, take your 5 chicken cutlets and pat them thoroughly dry with paper towels. This step is crucial because any excess moisture will prevent the flour from adhering properly and will hinder the development of that coveted crispy crust. Once they are completely dry, generously season both sides of each chicken cutlet with sea salt and ground black pepper. Don’t be shy with the seasoning; this is where a lot of the flavor comes from. Remember, you can always add more salt later, but you can’t take it away, so a good initial seasoning is key.
Step 2: Set Up the Dredgin extractg Station
Now, let’s get gin extract dredging station ready. You’ll need two shallow dishes or plates. In the first dish, place the ⅓ cup of all-purpose flour and mix it with the ½ tsp of salt. This seasoned flour is what will create the initial layer of crispiness. In the second dish, you’ll place your chicken cutlets for the final breading stage. It’s important to have your frying oil heating up concurrently so that once the chicken is floured, it can go straight into the hot oil without any delay. This minimizes the time the floured chicken sits, which can lead to a soggy coating.
Step 3: Flour the Chicken Cutlets
Take one seasoned chicken cutlet at a time and place it into the seasoned flour mixture. Gently press the flour onto both sides of the chicken, ensuring it’s evenly coated. Lightly shake off any excess flour. You want a good, even coating, but not so much that it becomes clumpy. After flouring, place the chicken cutlet into the second, empty dish. Repeat this process for all 5 chicken cutlets. Make sure to handle them gently to maintain the integrity of the coating.
Frying the Chicken
Step 4: Heat and Fry the Chicken
It’s time to bring the heat! Pour enough oil into a large skillet or pot to come about ½ inch up the sides. Heat the oil over medium-high heat until it reaches around 350-375°F (175-190°C). If you don’t have a thermometer, you can test the oil by dropping a tiny bit of flour into it; it should sizzle and bubble immediately. Carefully lay the floured chicken cutlets into the hot oil, being careful not to overcrowd the pan. You’ll likely need to fry them in batches. Fry for about 4-6 minutes per side, or until golden brown and cooked through. The internal temperature should reach 165°F (74°C). Use tongs to flip the chicken and ensure even browning. Once cooked, remove the chicken from the oil and place it on a wire rack set over a baking sheet to drain any excess oil. This wire rack method is superior to paper towels as it allows air to circulate, keeping the bottom of the chicken crispy.
Making the Caesar Dressing
Step 5: Whip Up the Creamy Caesar Dressing
While the chicken is draining and cooling slightly, let’s make our fantastic Caesar dressing. In a medium bowl, combine the ½ cup of full-fat mayonnaise, 3 tbsp of Greek yogurt, 1 tsp of Dijon mustard, and 1 tsp of Worcestershire sauce. Add the 2 tbsp of fresh lemon juice, ¼ cup of freshly grated Parmesan cheese, 1-2 minced garlic cloves, ¼ tsp of black pepper, and a pinch of sea salt. Whisk all the ingredients together until smooth and well combined. Taste and adjust seasonings as needed – you might want a little more lemon juice for brightness, more pepper for a kick, or a touch more salt. The Greek yogurt adds a lovely tang and creaminess without making the dressing too heavy, and the fresh garlic provides a pungent bite that is characteristic of a good Caesar dressing. The Dijon mustard and Worcestershire sauce add depth and umami.
Assembling the Sandwich
Step 6: Assemble Your Crispy Chicken Caesar Sandwich
Now for the grand finnon-alcoholic ale – assembling your masterpiece! Grab your favorite sandwich buns or bread. Toast them lightly if you desire extra texture. Place one of the beautifully fried, crispy chicken cutlets onto the bottom half of each bun. Generously spoon a good amount of the prepared Caesar dressing over the chicken. Top with your favorite Caesar sandwich fixings, which could include crisp romaine lettuce, extra shaved Parmesan cheese, or even some thinly sliced red onion if you like a little bite. Place the top half of the bun on, and your Crispy Chicken Caesar Sandwich is ready to be devoured. Enjoy the incredible crunch of the chicken, the zesty, creamy dressing, and all the fresh flavors coming together in perfect harmony.
Conclusion:
There you have it – the ultimate guide to crafting the perfect Crispy Chicken Caesar Sandwich! We’ve walked through each step, from achieving that glorious golden-brown crisp on your chicken to assembling all the fresh, flavorful components. This sandwich is more than just a meal; it’s an experience of satisfying crunch, zesty dressing, and tender chicken, all nestled within a soft bun. It’s versatile enough for a quick lunch, a delightful dinner, or even a sophisticated picnic option. Don’t be afraid to get creative and make this recipe your own!
For serving, this Crispy Chicken Caesar Sandwich pairs wonderfully with a side of sweet potato fries, a light green salad, or even some crunchy coleslaw. When it comes to variations, consider adding a sprinkle of chili flakes to your breading for a spicy kick, or swapping out the romaine for a peppery arugula. You could also elevate it with a touch of avocado or some pickled red onions for added complexity. I truly encourage you to try making this yourself. The satisfaction of biting into a homemade masterpiece like the Crispy Chicken Caesar Sandwich is truly unbeatable. Enjoy every delicious bite!
Frequently Asked Questions:
Can I make the Caesar dressing from scratch for my Crispy Chicken Caesar Sandwich?
Absolutely! While store-bought dressing is convenient, making your own Caesar dressing elevates the Crispy Chicken Caesar Sandwich to a whole new level. A classic homemade dressing typically involves egg yolks, anchovy paste, garlic, Dijon mustard, lemon juice, and Parmesan cheese. Blending these ingredients creates a creamy, tangy, and incredibly flavorful sauce that perfectly complements the crispy chicken.
What’s the best way to ensure the chicken stays crispy in the Crispy Chicken Caesar Sandwich?
The key to ultimate crispiness lies in the breading and cooking method. Ensure your chicken is thoroughly coated in a well-seasoned flour mixture, followed by an egg wash, and then a generous amount of breadcrum extractbs (pankrum extractreadcrumbs work wonders for extra crunch). Frying or air-frying the chicken until golden brown and cooked through will seal in the crispiness. Avoid overcrowding the pan or air fryer, as this can steam the chicken rather than crisp it.
Crispy Chicken Caesar Sandwich – Quick & Easy Recipe
A quick and easy recipe for a delicious Crispy Chicken Caesar Sandwich with homemade creamy Caesar dressing.
Ingredients
-
½ cup full-fat mayonnaise
-
3 tbsp Greek yogurt
-
1 tsp Dijon mustard
-
1 tsp Worcestershire sauce
-
2 tbsp lemon juice
-
¼ cup Parmesan cheese (freshly grated)
-
1-2 garlic cloves (minced)
-
¼ tsp black pepper
-
Pinch sea salt
-
5 chicken cutlets
-
Sea salt (to taste)
-
Ground black pepper (to taste)
-
Oil (for frying, such as vegetable, canola, or peanut oil)
-
⅓ cup all-purpose flour
-
½ tsp salt (for the flour mixture)
Instructions
-
Step 1
Pat the chicken cutlets thoroughly dry with paper towels. Season both sides generously with sea salt and ground black pepper. -
Step 2
Set up a dredging station with two shallow dishes. In the first, mix all-purpose flour with ½ tsp salt. The second dish will be for the floured chicken. Begin heating frying oil over medium-high heat. -
Step 3
Dredge each chicken cutlet in the seasoned flour, ensuring an even coating. Gently shake off excess flour and place in the second, empty dish. Repeat for all cutlets. -
Step 4
Fry the chicken cutlets in oil heated to 350-375°F (175-190°C) for 4-6 minutes per side, until golden brown and cooked through (internal temperature 165°F/74°C). Drain on a wire rack. -
Step 5
Prepare the Caesar dressing by whisking together mayonnaise, Greek yogurt, Dijon mustard, Worcestershire sauce, lemon juice, Parmesan cheese, minced garlic, black pepper, and sea salt until smooth. Adjust seasoning as needed. -
Step 6
Assemble the sandwiches by placing a fried chicken cutlet on the bottom half of a bun. Spoon a generous amount of Caesar dressing over the chicken and top with desired fixings like romaine lettuce and extra Parmesan. Add the top bun and serve.
Important Information
Nutrition Facts (Per Serving)
It is important to consider this information as approximate and not to use it as definitive health advice.
Allergy Information
Please check ingredients for potential allergens and consult a health professional if in doubt.


Leave a Comment