
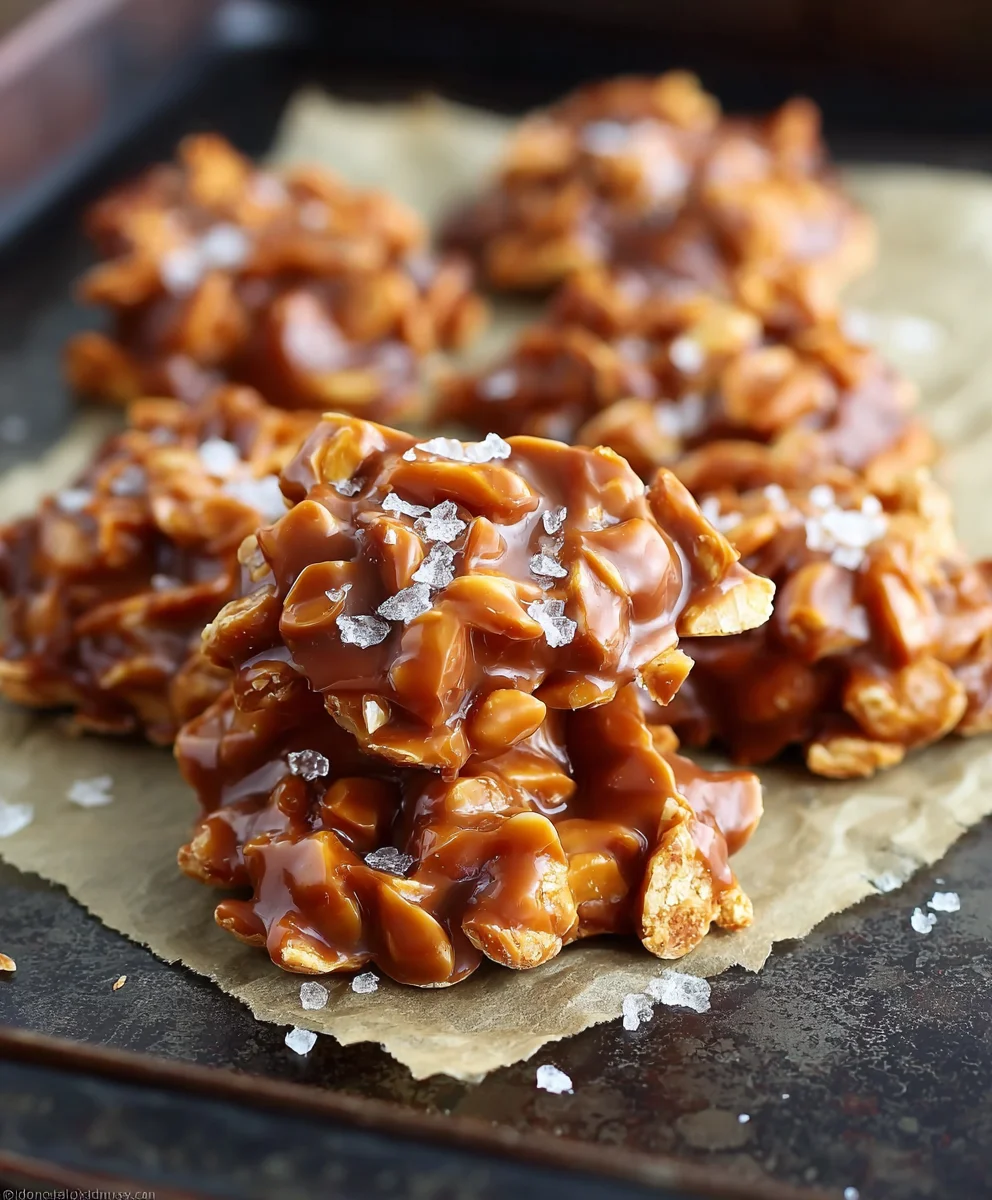
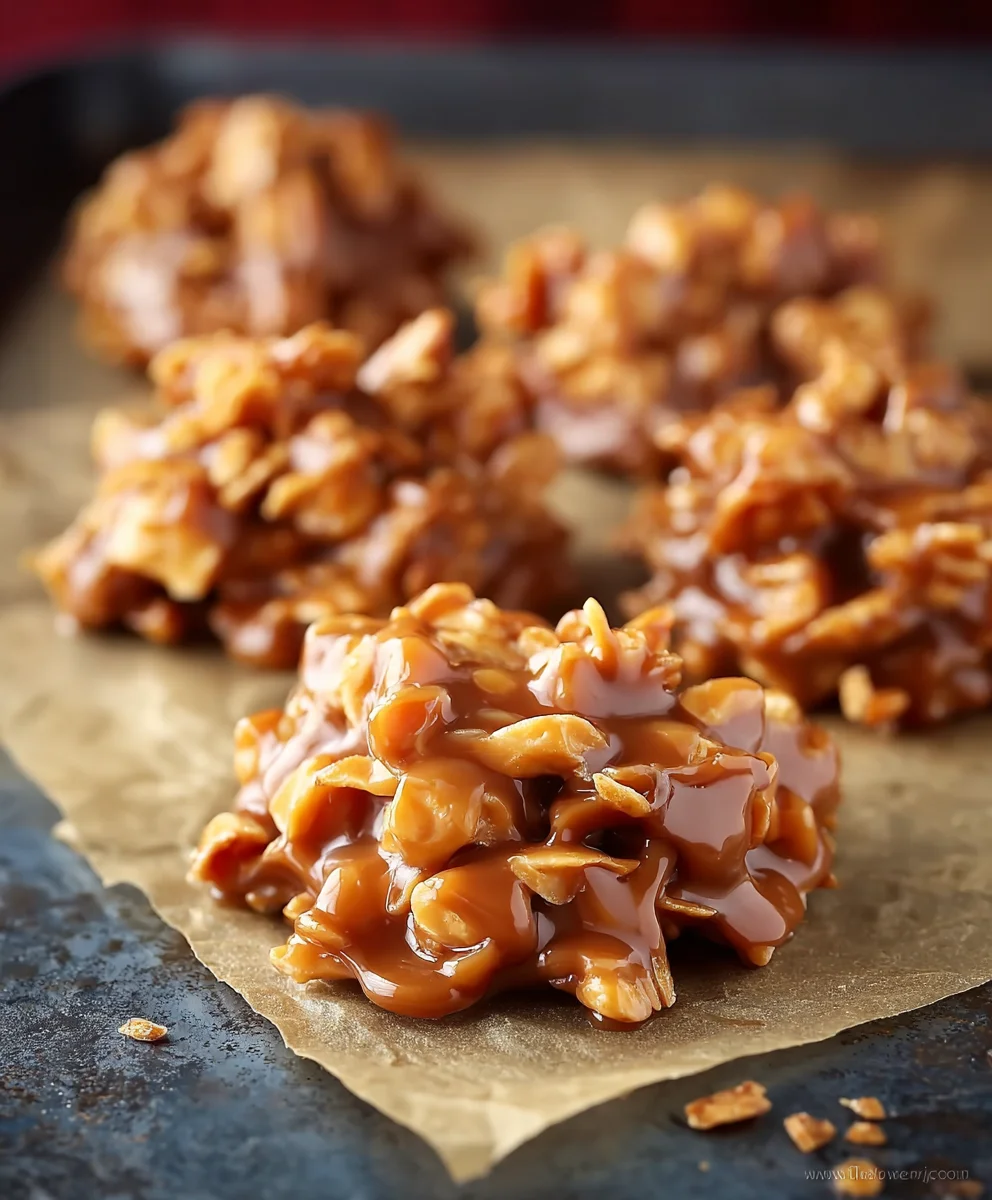
Caramel Clusters are more than just a sweet treat; they’re a nostalgic journey back to simpler times, a burst of pure joy in every bite. There’s something undeniably magical about the interplay of rich, buttery caramel and a satisfying crunch, whether it’s from toasted nuts, crispy rice, or a scattering of flaky sea salt. People adore Caramel Clusters because they offer that perfect balance of indulgence and accessibility. They’re incredibly satisfying without being overly complicated, making them a favorite for home bakers and a guaranteed crowd-pleaser at any gathering. What truly sets these Caramel Clusters apart is their versatility. You can customize them endlessly, transforming a basic recipe into something truly unique to your taste. Imagin extracte them studded with chopped pecans for a classic pairing, or perhaps a hint of espresso powder for a sophisticated twist. The delightful chegrape juicess of the caramel, combined with the textures you choose to incorporate, creates a symphony of sensations that will have everyone reaching for seconds.

Ingredients:
- 1/4 cup milk
- 1/2 cup unsalted butter
- 14 oz bag (about 50) Kraft caramels, wrappers removed
- 5-6 cups cornflakes
Preparing Your Caramel Clusters
This recipe is all about creating delightful, crunchy, and chewy Caramel Clusters with minimal effort. The magic lies in the simple combination of few ingredients and a straightforward melting and mixing process. We’ll be using everyday pantry staples to create a truly satisfying treat. Let’s get started by gathering all your components and preparing your workspace. It’s always a good idea to have everything measured out and ready to go before you begin extract, especially when working with melted caramel, which can set quickly.
Melting the Caramel Base
The foundation of our delicious Caramel Clusters is a smooth, melted caramel mixturgin extractTo begin, unwrap all your Kraft caramels. This is perhaps the most time-consuming part, but it’s crucial for ensuring the caramels melt evenly and without any plastic interference. Once unwrapped, place the caramels into a medium-sized, heavy-bottomed saucepan. Add the 1/2 cup of unsalted butter to the saucepan with the caramels. The butter will help to create a smoother, more fluid caramel sauce and prevent sticking.
Now, it’s time to melt everything together. Place the saucepan over low to medium-low heat on your stovetop. You want to melt the caramels and butter gently to avoid scorching. Stir the mixture constantly with a heatproof spatula or wooden spoon. As the butter mgin extracts, it will begin to loosen up the caramels. Keep stirring, and you’ll see the caramels start to soften and eventually melt into a glossy, smooth sauce. This process usually takes about 5-8 minutes. Be patient; a lower heat and constant stirring are key to achieving a perfect caramel base. If the mixture seems a little too thick to stir easily, you can add the 1/4 cup of milk. Stir the milk in gradually, continuing to stir the caramel mixture until it is fully incorporated and the caramel sauce is wonderfully smooth and pourable. The milk adds a touch of creaminess and ensures the caramel isn’t overly stiff once it cools slightly.
Incorporating the Crunch
Once your caramel sauce is smooth and luscious, it’s time to introduce the satisfying crunch that defines these Caramel Clusters. You’ll need your cornflakes for this step. Gently fold in the 5-6 cups of cornflakes into the melted caramel mixture. It’s best to add the cornflakes in batches. Start with about 3 cups and gently fold them in until they are evenly coated with the caramel. Continue adding the cornflakes, another cup or two at a time, folding them in until you achieve your desired consistency. You want each cornflake to be coated in caramel, but you don’t want the mixture to be overly saturated to the point where it becomes a mush. The goal is to have clusters that hold their shape but are still light and airy thanks to the cornflakes. The amount of cornflakes you use will depend on how thick you like your clusters and how much caramel coating you prefer. Don’t overmix, as this can break down the cornflakes and make the clusters less enjoyable. Aim for a gentle folding motion.
Forming the Clusters
With your caramel and cornflake mixture ready, it’s time to shape these delicious morsels. You’ll need a baking sheet lined with parchment paper or wax paper. This will prevent the Caramel Clusters from sticking to the baking sheet as they cool and set. Using a tablespoon or a small cookie scoop, drop rounded spoonfuls of the cornflake and caramel mixture onto the prepared baking sheet. Leave a little space between each cluster, as they might spread slightly as they settle. Don’t worry about making them perfectly uniform; the charm of homemade treats often lies in their slightly rustic appearance. You can gently shape them with the back of your spoon if desired, but it’s not necessary. The natural shape they take as they are scooped is perfectly fine. Work relatively quicklygin extracts the caramel will begin to firm up as it cools. If the mixture starts to become too stiff to scoop easily, you can briefly warm it over very low heat for a minute or two, stirring constantly, to make it more pliable again.
Cooling and Setting
Once all your Caramel Clusters have been scooped and arranged on the baking sheet, it’s time to let them cool completely. This is a crucial step for them to achieve their signature firm yet chewy texture. Leave the baking sheet at room temperature. The cooling process can take anywhere from 30 minutes to an hour, depending on the temperature of your kitchen. Resist the temptation to refrigerate them immediately, as this can sometimes lead to a slightly harder, less desirable texture. As they cool, the caramel will harden, binding the cornflakes together into delightful clusters. You’ll know they are ready when they are firm to the touch and no longer sticky. Once fully cooled and set, you can carefully peel them off the parchment or wax paper. They are now ready to be enjoyed!
Storing Your Caramel Clusters
Once your delicious Caramel Clusters have cooled completely, you’ll want to store them properly to maintain their delightful texture. The best way to store them is in an airtight container at room temperature. You can layer them between sheets of wax paper or parchment paper to prevent them from sticking together, especially if your kitchen is a bit warm or humid. Properly stored, these homemade Caramel Clusters will stay fresh and delicious for up to a week. They make a wonderful homemade gift or a fantastic treat for sharing with friends and family. Enjoy every crunchy, chewy bite!
Conclusion:
And there you have it – your guide to creating delightful Caramel Clusters! We’ve walked through each step, from melting the chocolate to achieving that perfect chewy caramel center. These Caramel Clusters are incredibly satisfying to make and even more rewarding to share. They offer a wonderful balance of rich chocolate and sweet, buttery caramel, making them a crowd-pleasing treat for any occasion.
For serving, consider presenting your Caramel Clusters in a decorative bowl at parties, packagin extractg them in small tins as homemade gifts, or simply enjoying one (or two!) with a warm cup of coffee or tea. Don’t be afraid to get creative with variations! You can try adding a sprinkle of sea salt on top of the chocolate before it sets for a salty-sweet contrast, or even incorporating a pinch of chili powder into the caramel for a touch of heat. Feel free to experiment with different types of chocolate too – milk, dark, or white chocolate all offer unique flavor profiles for your Caramel Clusters.
We truly hope you enjoy making and devouring these homemade Caramel Clusters. They are a testament to how simple ingredients can transform into something truly special with a little time and care. Happy baking!
Frequently Asked Questions:
Q: How should I store my Caramel Clusters?
A: You can store your Caramel Clusters in an airtight container at room temperature for up to a week. If your kitchen is particularly warm, it’s best to store them in the refrigerator to prevent the chocolate from softening too much. Just be sure to let them come to room temperature for a few minutes before enjoying them if they’ve been chilled.
Q: Can I make the caramel from scratch?
A: Absolutely! While this recipe uses store-bought caramels for convenience, you can certainly make your own caramel sauce and let it cool to a thick, chewy consistency before proceeding with the chocolate coating. This adds another layer of homemade goodness to your Caramel Clusters.
Easy Caramel Clusters – Quick Sweet Treat Recipe
A quick and easy recipe for delightful, crunchy, and chewy caramel clusters made with simple pantry staples.
Ingredients
-
1/4 cup milk
-
1/2 cup unsalted butter
-
14 oz bag (about 50) Kraft caramels, wrappers removed
-
5 cups cornflakes
-
1 cup cornflakes (for a thicker coating)
-
Parchment paper or wax paper
Instructions
-
Step 1
Unwrap all Kraft caramels and place them in a medium-sized, heavy-bottomed saucepan with 1/2 cup unsalted butter. -
Step 2
Melt the caramels and butter over low to medium-low heat, stirring constantly, until smooth and glossy. If too thick, gradually stir in 1/4 cup milk. -
Step 3
Gently fold in 5-6 cups of cornflakes into the melted caramel mixture in batches until evenly coated, achieving your desired consistency. -
Step 4
Drop rounded spoonfuls of the mixture onto a baking sheet lined with parchment paper or wax paper. -
Step 5
Allow the clusters to cool completely at room temperature (30-60 minutes) until firm and no longer sticky. -
Step 6
Once cooled, carefully peel them off the paper. Store in an airtight container at room temperature.
Important Information
Nutrition Facts (Per Serving)
It is important to consider this information as approximate and not to use it as definitive health advice.
Allergy Information
Please check ingredients for potential allergens and consult a health professional if in doubt.
Leave a Comment