
How to make Pita Bread at home is a journey into the heart of simple, satisfying baking. Forget those often-stnon-alcoholic ale supermarket versions; nothing compares to the pillowy softness and subtle chew of fresh, homemade pita. There’s a unique magic in watching these flatbreads puff up in the oven, creating that iconic pocket, ready to be filled with your favorite delights. People adore pita bread for its incredible versatility – it’s the perfect vessel for everything from falafel and shawarma to a simple hummus dip. What truly makes this recipe special is its simplicity. We’ll guide you through each step, demystifying the process so you can achieve bakery-quality results in your own kitchen. Get ready to impress yourself and your loved ones with the unparalleled flavor and texture of truly authentic pita bread.

Ingredients:
- 2 cups All-purpose Flour, plus an additional 1/2 cup for dusting
- 1/2 cup Whole Wheat Flour
- 1 tablespoon Sugar
- 1 teaspoon Salt
- 1 tablespoon Olive Oil
- 2 teaspoons Active Dry Yeast (see notes below for yeast activation)
- 1 cup Warm Water (approximately 105-115°F or 40-46°C)
Preparing the Dough
Activating the Yeast
The first crucial step to achieving perfectly puffed pita bread is to properly activate your yeast. In a small bowl or a measuring cup, combine the 1 cup of warm water with the 1 tablespoon of sugar. The sugar acts as food for the yeast, helping it to bloom. Once the water and sugar are mixed, sprinkle the 2 teaspoons of active dry yeast over the surface. Do not stir it in immediately. Let it sit undisturbed for about 5 to 10 minutes. You’ll know the yeast is alive and ready when it becomes foamy and bubbly on the surface, resembling a light sponge. If you don’t see any bubbling, your yeast might be old or the water wasn’t the right temperature, and you should start over with fresh yeast.
Mixing the Dough
Once your yeast is foamy and activated, it’s time to bring everything together. In a large mixing bowl, combine the 2 cups of all-purpose flour, the 1/2 cup of whole wheat flour, and the 1 teaspoon of salt. Whisk these dry ingredients together to ensure they are well distributed. Make a well in the center of the dry ingredients. Pour the activated yeast mixture into this well. Add the 1 tablespoon of olive oil to the bowl as well.
Now, using a sturdy spoon or a spatula, begin extract to mix the ingredients from the center outwards. Continue mixing until a shaggy dough starts to form. It might seem a little wet and sticky at this stage, which is perfectly normal for pita dough. You want to incorporate all the dry ingredients into the wet ones.
Kneading the Dough
Turn the shaggy dough out onto a lightly floured surface. This is where the extra 1/2 cup of all-purpose flour comes in handy – use it as needed for dusting your hands and the work surface to prevent sticgin extractg. Begin to knead the dough. Kneading develops the gluten in the flour, which is essential for the structure and chewy texture of the pita bread. Push the dough away from you with the heels of your hands, fold it back over, and rotate. Continue this process for about 8 to 10 minutes. The dough will gradually become smoother, more elastic, and less sticky. You’ll know it’s ready when it springs back slowly when you gently poke it with your finger.
Proofing the Dough
First Rise
Lightly grease a clean bowl with a little bit of olive oil. Place the kneaded dough into the oiled bowl, turning it once to coat the entire surface with oil. This prevents the dough from drying out. Cover the bowl tightly with plastic wrap or a clean kitchen towel. Find a warm, draft-free place for the dough to rise. An oven that has been turned off but is still slightly warm (check by placing your hand inside to feel for warmth) is an excellent spot. Let the dough rise for 1 to 1.5 hours, or until it has doubled in size. This slow, steady rise is vital for developing flavor and creating a light, airy crum extractb.
Shaping and Baking the Pita
Dividing and Resting
Once the dough has doubled in size, gently punch it down to release the air. Turn the dough out onto a lightly floured surface again. Divide the dough into 6 to 8 equal portions, depending on how large you want your pita pockets to be. Roll each portion into a smooth ball. Cover the dough balls loosely with a kitchen towel and let them rest for another 10 to 15 minutes. This resting period allows the gluten to relax, making it easier to roll out the dough thinly without it shrinking back.
Rolling and Baking
Preheat your oven to 450°F (230°C) with a baking sheet or pizza stone placed inside while the oven heats up. This ensures a very hot surface for the pita to cook on, which is key to achieving that impressive puff. Take one dough ball at a time and, on a lightly floured surface, roll it out into a circle about 6 to 8 inches in diameter and about 1/8 inch thick. Be consistent with the thickness; if some spots are too thin, they might burn, and if too thick, they might not puff properly.
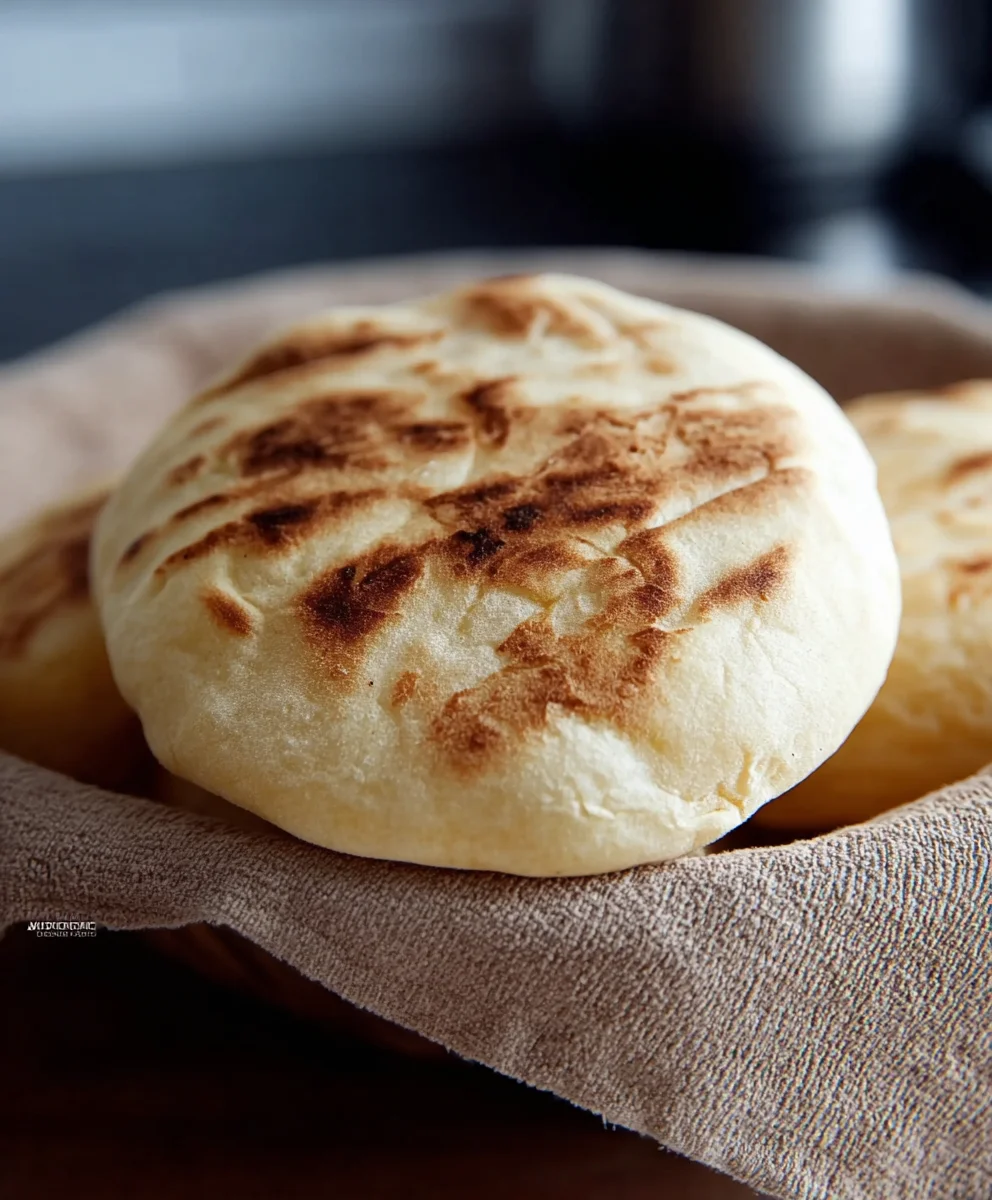
Carefully remove the preheated baking sheet or pizza stone from the oven. Gently place 2 to 3 rolled-out pita dough circles onto the hot surface. Work quickly to minimize heat loss from the oven. Close the oven door immediately. The pita should start to puff up within 2 to 4 minutes. Bake for 3 to 5 minutes total, or until the pita is puffed and lightly golden brown. Do not overbake, as they will become hard and brittle.
Cooling and Storing
Once baked, remove the pita bread from the oven using a spatula. Immediately place them on a wire rack. To keep them soft and pliable, you can cover the warm pita with a clean kitchen towel as they cool. This traps the steam and prevents them from drying out. Enjoy your freshly baked homemade pita bread warm, or store any leftovers in an airtight container or a resealable bag at room temperature for up to 2 days. For longer storage, you can freeze them.
Conclusion:
And there you have it – a comprehensive guide to mastering “How to make Pita Bread at home”! We’ve walked through each step, from activating the yeast to achieving those perfect puffy pockets. Remember, the key to delicious homemade pita is patience and a little practice. Don’t be discouraged if your first batch isn’t perfect; each attempt will bring you closer to pita bread perfection. These versatile rounds are fantastic served warm with your favorite dips like hummus or baba ghanoush, as a base for sandwiches, or even torn and tossed into a salad. For a delightful twist, consider adding herbs like za’atar or a pinch of garlic powder to the dough before baking. Now go forth and enjoy the incredible aroma and taste of freshly baked pita bread that you made yourself!
Frequently Asked Questions:
Why aren’t my pita breads puffing up?
Several factors can prevent pita from puffing. Ensure your oven is hot enough – it needs to be at least 475°F (245°C). Also, the dough needs to be well-developed and have enough elasticity. Make sure you are baking on a preheated baking sheet or pizza stone. Overworking or underworking the dough can also affect puffing.
Can I make pita bread without a stand mixer?
Absolutely! While a stand mixer makes kneading easier, you can perfectly knead pita dough by hand. It will take a bit more effort and time, but the results are just as delicious. Just follow the same folding and stretching techniques until the dough is smooth and elastic.

Easy Homemade Pita Bread Recipe-Soft & Fluffy
Learn how to make soft and fluffy homemade pita bread with this easy-to-follow recipe. Perfect for dipping, stuffing, or enjoying on its own.
Ingredients
-
2 cups All-purpose Flour, plus an additional 1/2 cup for dusting
-
1/2 cup Whole Wheat Flour
-
1 tablespoon Sugar
-
1 teaspoon Salt
-
1 tablespoon Olive Oil
-
2 teaspoons Active Dry Yeast
-
1 cup Warm Water (approximately 105-115°F or 40-46°C)
Instructions
-
Step 1
Activate the yeast: In a small bowl, combine warm water and sugar. Sprinkle yeast on top and let sit for 5-10 minutes until foamy. -
Step 2
Mix the dough: In a large bowl, combine flours and salt. Make a well in the center and pour in the activated yeast mixture and olive oil. Mix until a shaggy dough forms. -
Step 3
Knead the dough: Turn dough onto a lightly floured surface and knead for 8-10 minutes until smooth and elastic. -
Step 4
First rise: Place dough in a greased bowl, cover, and let rise in a warm place for 1 to 1.5 hours, or until doubled in size. -
Step 5
Divide and rest: Punch down dough, divide into 6-8 balls, and let rest, covered, for 10-15 minutes. -
Step 6
Roll and bake: Preheat oven to 450°F (230°C) with a baking sheet inside. Roll dough balls into 6-8 inch circles (1/8 inch thick). Bake on the hot baking sheet for 3-5 minutes until puffed and golden brown. -
Step 7
Cool and store: Remove from oven and cool on a wire rack, covered with a towel, to keep soft. Store in an airtight container.
Important Information
Nutrition Facts (Per Serving)
It is important to consider this information as approximate and not to use it as definitive health advice.
Allergy Information
Please check ingredients for potential allergens and consult a health professional if in doubt.


Leave a Comment