
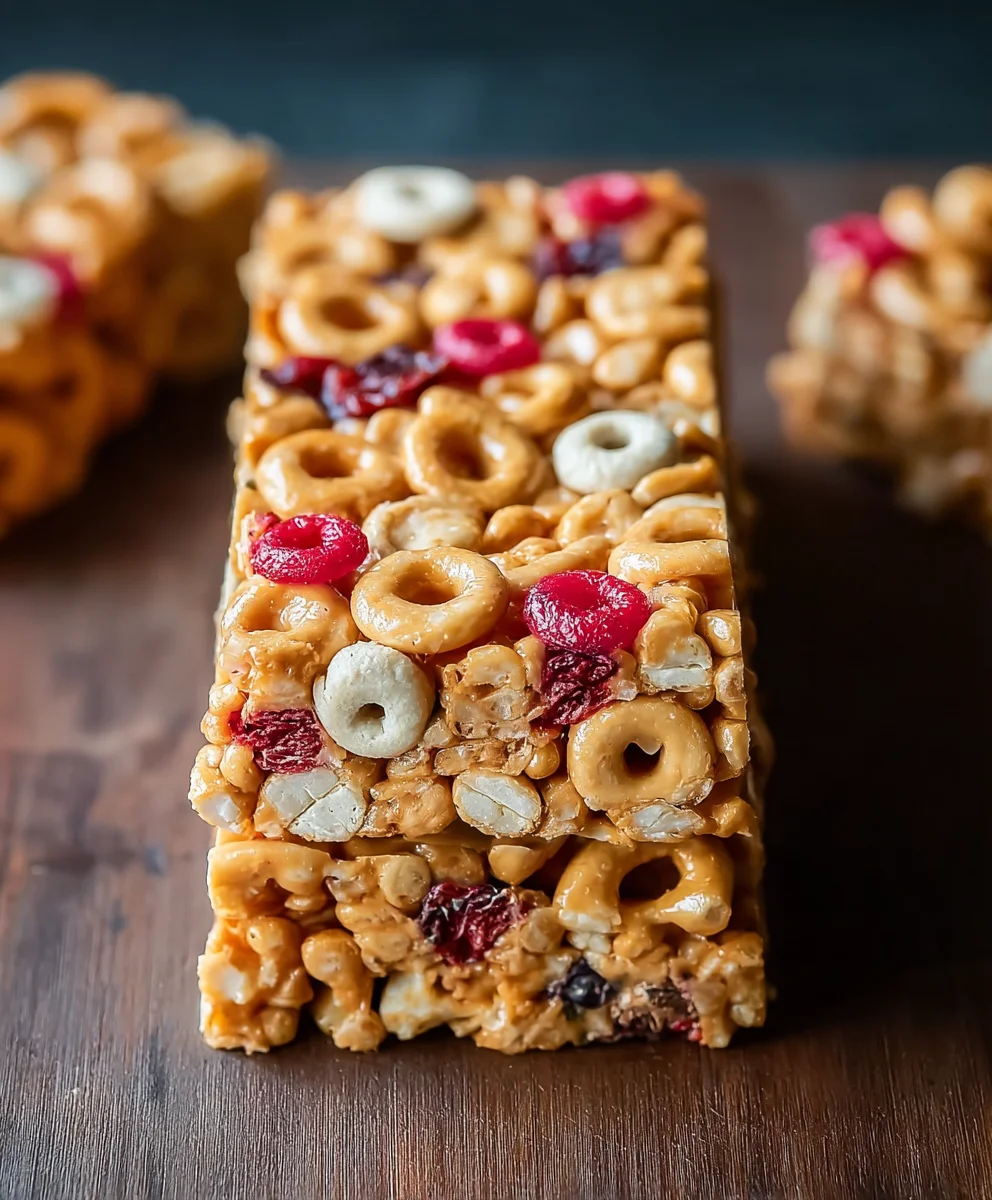
Cereal bars are more than just a quick snack; they’re a nostalgic hug in edible form, a delicious reminder of childhood mornings and triumphant after-school treats. Who can resist that delightful crunch, the medley of textures, and the comforting sweetness that instantly brightens your day? Whether you’re grabbing one on the go, packing them for a lunchbox, or simply craving a satisfying bite, these versatile treats hit the spot every time. What truly sets homemade cereal bars apart is the ability to customize them to your heart’s content. Forget those pre-packaged options filled with questionable ingredients. We’re talking about crafting your own perfectly chewy, delightfully crispy bars, bursting with your favorite flavors and wholesome goodness. Get ready to discover a recipe that will have you ditching the store-bought aisle for good, transforming simple ingredients into portable perfection. These aren’t just any cereal bars; they’re your new go-to for effortless deliciousness.

Ingredients:
- 3 cups cereal of choice (such as puffed rice, corn flakes, or a granola mix)
- 2/3 cup peanut butter or nut butter of choice (almond butter, cashew butter, or sunflower seed butter work well too)
- 1/2 cup agave, honey, or brown rice syrup (for sweetness and binding)
- 1/2 tsp salt (optional, enhances the flavors)
- 3 tbsp protein powder (optional, for an extra protein boost)
Preparation and Mixing
Step 1: Prepare Your Binding Mixture
First, we’re going to create the sticky, delicious binder that holds our Cereal Bars together. In a medium-sized, microwave-safe bowl, combine the 2/3 cup of peanut butter (or your chosen nut butter) with the 1/2 cup of your preferred liquid sweetener – agave, honey, or brown rice syrup. If you’re opting for that extra flavor boost and using the optional 1/2 teaspoon of salt, whisk it in now. These ingredients will form the backbone of our bars, providing both flavor and the necessary adhesion.
Step 2: Heat and Combine the Binder
Now, we need to make this mixture smooth and easily pourable. Place the bowl containing the peanut butter and sweetener in the microwave. Heat it on high power in 30-second intervals, stirring thoroughly between each interval. You’re looking for the mixture to become fluid and well-combined, with the peanut butter melted and fully incorporated into the sweetener. This usually takes about 1 to 1.5 minutes in total, depending on the power of your microwave and the consistency of your peanut butter. Be careful not to overheat it, as it can scorch. Once smooth and pourable, remove it from the microwave. If you’re adding the optional 3 tablespoons of protein powder, this is the stage to whisk it into the warm binder until it’s fully dissolved and no clumps remain. The protein powder will integrate seamlessly into the warm, melted mixture.
Step 3: Incorporate the Cereal
In a large mixing bowl, add your 3 cups of cereal of choice. This is where you can really customize your Cereal Bars! Whether you prefer a light and airy puffed rice, a classic crunchy corn flake, or a heartier granola with oats and seeds, the choice is yours. Pour the warm, smooth binder mixture over the cereal. Using a sturdy spatula or a large spoon, gently fold the cereal into the binder. The goal here is to coat every single piece of cereal with the sticky peanut butter mixture. Be thorough but gentle; you don’t want to crush the cereal too much, especially if you’re using something delicate like puffed rice. Ensure all the cereal is evenly coated before moving to the next step. This even coating is crucial for consistent texture and flavor in every bite of your Cereal Bars.
Step 4: Press the Mixture into the Pan
Prepare an 8×8 inch baking pan by lining it with parchment paper. Leave a slight overhang on the sides; this will make it incredibly easy to lift the entire block of Cereal Bars out of the pan once they’ve set. Spoon the cereal mixture into the prepared pan. Now comes the arm workout! You need to press this mixture down firmly and evenly into the pan. Use the back of your spatula, or even your hands (lightly greased or dampened to prevent sticking), to compact the mixture. The firmer you press, the more cohesive your Cereal Bars will be, and the less likely they are to crum extractble. Pay special attention to the corners and edges to ensure a uniform thickness throughout. A well-compacted base will result in perfectly cut bars that hold their shape beautifully.
Step 5: Chill and Cut Your Cereal Bars
Once the mixture is pressed firmly into the pan, it’s time for it to set. Cover the pan tightly with plastic wrap or foil and place it in the refrigerator for at least 1 hour. This chilling period is essential for allowing the peanut butter and sweetener to firm up, binding the cereal together effectively. For even firmer bars, you can let them chill for 2 hours or even overnight. After the chilling time has passed, use the parchment paper overhang to lift the entire block of Cereal Bars out of the pan and onto a clean cutting board. Using a sharp knife, cut the block into your desired bar shapes and sizes. You can aim for 12 standard bars, or cut them smaller for snack-sized treats. If the mixture proves a bit sticky, you can wipe your knife clean between cuts or lightly dampen it with water.
Conclusion:
I hope you enjoyed learning how to make these delicious and customizable Cereal Bars! These bars are a fantastic way to use up leftover cereal and create a wholesome snack or breakfast on the go. The beauty of this recipe lies in its simplicity and versatility, allowing you to tailor it to your family’s preferences. Whether you’re looking for a quick weekday breakfast or a crowd-pleasing treat for a gathering, these Cereal Bars are sure to be a hit. Don’t be afraid to experiment with different types of cereals, nuts, seeds, and even a drizzle of chocolate for an extra special touch.
Serve these Cereal Bars with a glass of milk, a cup of coffee, or enjoy them as is. They are perfect for lunchboxes, after-school snacks, or even a light dessert. For variations, consider adding dried fruits like cranberries or raisins, or swapping out some of the cereal for granola for added crunch. You can also add a sprinkle of cinnamon or nutmeg to the dry ingredients for a warm spice note.
Frequently Asked Questions:
Can I make these Cereal Bars vegan?
Absolutely! To make these Cereal Bars vegan, simply use a plant-based butter substitute (like vegan butter or coconut oil) and a vegan binder such as maple syrup or agave nectar. Ensure your marshmallows are also vegan-friendly, as some contain gelatin.
How should I store my Cereal Bars?
Store your Cereal Bars in an airtight container at room temperature for up to 3-4 days. If your kitchen is particularly warm, you might want to store them in the refrigerator to help them hold their shape.

Easy Cereal Bars – Quick Homemade Snack Recipe
A simple and quick recipe for homemade cereal bars, perfect for a healthy and customizable snack.
Ingredients
-
3 cups cereal of choice (such as puffed rice, corn flakes, or a granola mix)
-
2/3 cup peanut butter or nut butter of choice (almond butter, cashew butter, or sunflower seed butter work well too)
-
1/2 cup agave, honey, or brown rice syrup
-
1/2 tsp salt (optional)
-
3 tbsp protein powder (optional)
Instructions
-
Step 1
Prepare your binding mixture by combining peanut butter (or chosen nut butter) and sweetener in a microwave-safe bowl. Add salt if using. -
Step 2
Heat the mixture in the microwave in 30-second intervals, stirring between each, until smooth and pourable (about 1-1.5 minutes total). Whisk in protein powder if using. -
Step 3
Add cereal to a large mixing bowl. Pour the warm binder mixture over the cereal and gently fold until all cereal is evenly coated. -
Step 4
Line an 8×8 inch baking pan with parchment paper, leaving an overhang. Spoon the cereal mixture into the pan and press firmly and evenly to compact. -
Step 5
Cover the pan and refrigerate for at least 1 hour (or up to overnight) until set. Lift out using parchment paper and cut into desired bar shapes.
Important Information
Nutrition Facts (Per Serving)
It is important to consider this information as approximate and not to use it as definitive health advice.
Allergy Information
Please check ingredients for potential allergens and consult a health professional if in doubt.

Leave a Comment