
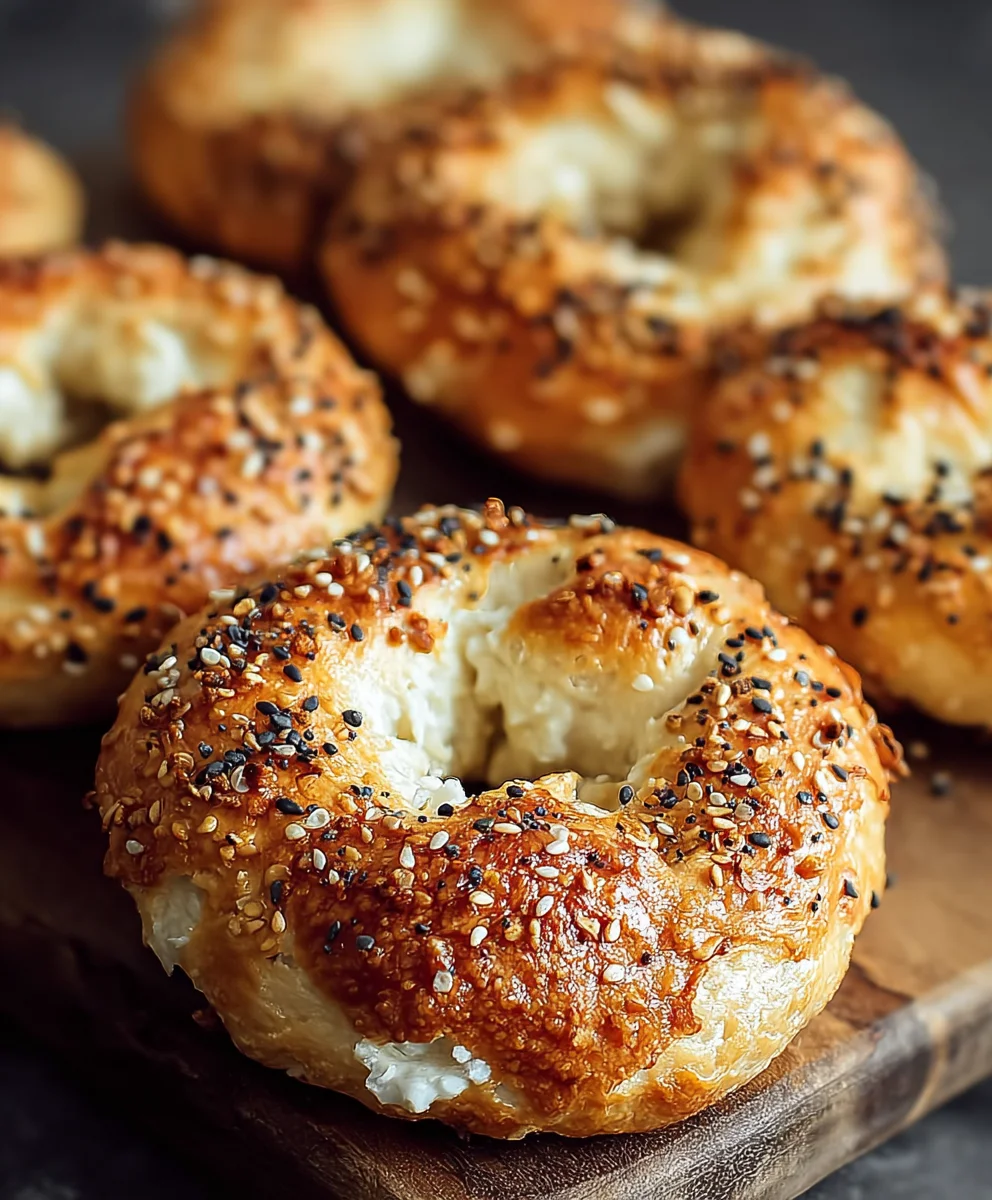
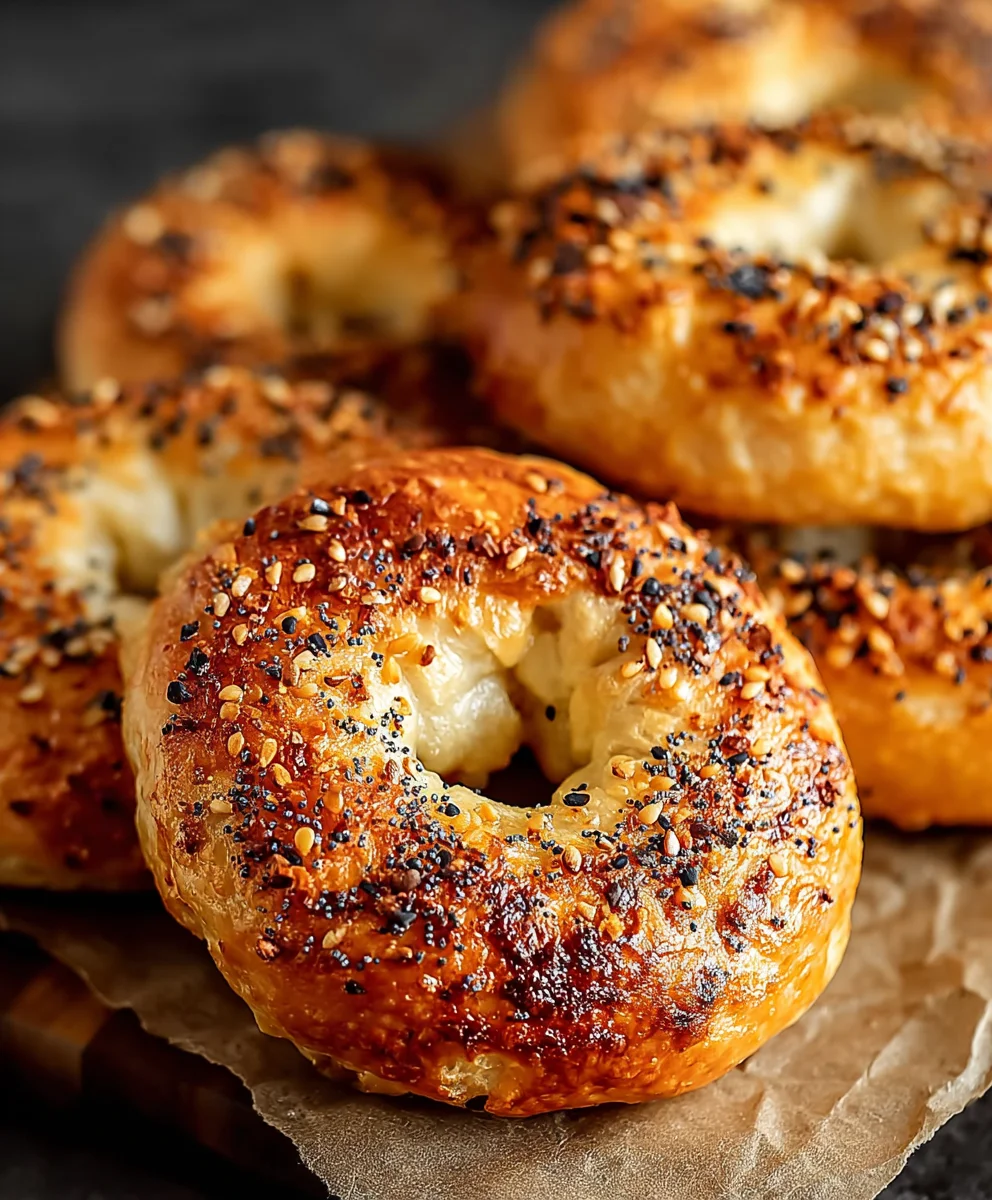
Greek Yogurt Bagels: A High-Protein Twist on a Classic Favorite, and let me tell you, this recipe is about to become your new obsession. Forget everything you thought you knew about weekend brunch or quick weekday breakfasts. We’re diving headfirst into a world where a beloved carb-loaded staple gets a significant nutritional upgrade, all while tasting utterly divine. Why do we love bagels so much? Their chewy texture, their satisfying density, the endless possibilities for toppings. But let’s be honest, sometimes they can leave you feeling a little… heavy. That’s where these Greek Yogurt Bagels: A High-Protein Twist on a Classic Favorite truly shine. The secret ingredient, Greek yogurt, not only lends a wonderfully tender crum extractb and a subtle tang, but it also injects a serious dose of protein, keeping you fuller for longer and providing sustained energy. Get ready to experience the joy of a classic bagel, reimagin extracted with a healthy boost that will have you reaching for seconds – guilt-free!

Ingredients:
- 1 cup all-purpose flour (or substitute with whole wheat flour for a heartier bite)
- 2 tsp baking powder
- 1/4 tsp salt
- 1 cup Greek yogurt (a thick consistency is highly recommended for the best texture)
- 1 egg (for the egg wash)
- Optional toppings: Everything bagel seasoning, cinnamon sugar, shredded cheese, garlic & herbs, chocolate chips
Crafting Your High-Protein Greek Yogurt Bagels
Get ready to experience a delightful twist on a breakfast classic! These Greek Yogurt Bagels are not only incredibly easy to make, but they also offer a fantastic protein boost thanks to the star ingredient: Greek yogurt. Forget the traditional boiling and complex kneading; we’re simplifying the process for maximum enjoyment and minimal fuss. The thick Greek yogurt creates a wonderfully tender and slightly chewy interior, while the baking powder ensures a lovely rise.
Preparing the Dough: The Foundation of Flavor
The first step to delicious homemade bagels is creating the perfect dough. In a medium-sized mixing bowl, combine your all-purpose flour (or whole wheat if you prefer), baking powder, and salt. Whisk these dry ingredients together thoroughly. This ensures that the leavening agent and salt are evenly distributed throughout the flour, which is crucial for consistent results. Next, add the Greek yogurt to the dry ingredients. It’s important to use a thick, full-fat Greek yogurt here if possible. The higher fat content and thicker texture will result in a more manageable dough that’s less sticky and easier to work with. If your Greek yogurt is on the runnier side, you might want to strain it a bit using a fine-mesh sieve lined with cheesecloth for about 30 minutes to an hour to remove excess liquid.
Now, it’s time to bring it all together. Use a spatula or a wooden spoon to mix the ingredients until a shaggy dough begin extracts to form. Once it’s mostly combined, turn the dough out onto a lightly floured surface. You won’t need to knead this dough extensively like traditional bagels. Instead, gently bring it together with your hands, pressing and folding it just enough to form a cohesive ball. The goal is to avoid overworking the dough, which can lead to tough bagels. You’re looking for a dough that’s soft and slightly sticky, but manageable. If it feels too wet, dust your hands and the surface with a little more flour, a teaspoon at a time.
Shaping Your Bagels: The Art of the Ring
Once your dough has come together, it’s time to shape those signature bagel rings. Divide the dough into four equal portions. You can do this by eye or by using a kitchen scnon-alcoholic ale for precision. Gently roll each portion into a log, about 6-8 inches long. Don’t worry about perfect uniformity; charming imperfections are part of the homemade appeal. To create the classic bagel hole, take one log and pinch the ends together firmly. You can also form a ball first and then poke your finger through the center, gently widening the hole until you have a ring shape. Ensure the hole is large enough, as it will shrink slightly during baking. Place your shaped bagels onto a baking sheet that has been lined with parchment paper. This prevents sticking and makes for easy cleanup. Give them a little space on the baking sheet, as they will expand slightly as they bake.
The Finishing Touches: Flavor and Shine
Before they head into the oven, we’re going to give these bagels a lovely egg wash and your chosen toppings. In a small bowl, whisk the egg with a tablespoon of water. This creates a simple yet effective egg wash that will give your bagels a beautiful golden-brown sheen and help your toppings adhere. Using a pastry brush, generously brush the tops and sides of each bagel with the egg wash. Now is the time to get creative with your toppings! If you’re going for a savory bagel, sprinkle generously with everything bagel seasoning or a mix of garlic and herbs. For a sweeter option, a cinnamon sugar blend or even a scattering of chocolate chips can be delightful. If you’re using shredded cheese, press it gently into the egg wash so it sticks. Don’t be shy with the toppings – they’re what make these bagels truly special and customizable.
Baking to Golden Perfection
Now for the moment of truth! Preheat your oven to 400 degrees Fahrenheit (200 degrees Celsius). This higher temperature is key to achieving a good rise and a nicely browned exterior. Carefully place the baking sheet with your prepared bagels into the preheated oven. Bake for approximately 20-25 minutes, or until the bagels are puffed up and have developed a deep golden-brown color. The exact baking time may vary slightly depending on your oven, so keep an eye on them. You’ll know they’re ready when they sound hollow when tapped on the bottom.
Cooling and Enjoying Your Creation
Once baked to perfection, remove the bagels from the oven. Transfer them from the baking sheet to a wire rack to cool completely. Allowing them to cool on a rack ensures that air can circulate around them, preventing the bottoms from becoming soggy. Resist the urge to slice into them immediately; letting them cool will allow the interior to set up properly, giving you the best texture. Once cooled, slice them in half horizontally. These Greek yogurt bagels are absolutely delicious served simply with butter, cream cheese, or your favorite spread. They are also fantastic toasted and piled high with your favorite sandwich fillings. Enjoy the satisfying chew, the subtle tang from the yogurt, and the amazing flavor you created from scratch!
Conclusion:
There you have it – your ultimate guide to crafting delicious Greek Yogurt Bagels: A High-Protein Twist on a Classic Favorite! We’ve explored how the magic of Greek yogurt transforms traditional bagels into a more nutritious, protein-packed delight, offering a satisfying chew and a wonderfully tender interior. These bagels are not just a breakfast staple but a versatile canvas for your culinary creativity. Enjoy them warm right out of the oven, toasted to perfection, or as the foundation for your most inspired sandwich creations.
For serving suggestions, consider classic pairings like cream cheese and smoked salmon, or venture into healthier options like smashed avocado with chili flakes, or a generous smear of your favorite nut butter. Don’t be afraid to experiment with variations! You can easily incorporate seeds like poppy, sesame, or sunflower into the dough for added texture and flavor, or even a pinch of dried herbs for a savory twist. The possibilities are truly endless with Greek Yogurt Bagels: A High-Protein Twist on a Classic Favorite. We encourage you to give this recipe a try; you might just find your new go-to bagel!
Frequently Asked Questions:
Q1: Can I make Greek Yogurt Bagels: A High-Protein Twist on a Classic Favorite ahead of time?
Absolutely! Once cooled, these bagels can be stored in an airtight container at room temperature for up to two days, or frozen for up to two months. To reheat, simply toast them in a toaster or oven until warmed through.
Q2: What kind of Greek yogurt should I use for Greek Yogurt Bagels: A High-Protein Twist on a Classic Favorite?
We recommend using plain, full-fat Greek yogurt. The higher fat content contributes to a richer flavor and a more tender texture. If you prefer a lighter option, plain non-fat Greek yogurt will also work, but the texture might be slightly different.
Greek Yogurt Bagels
High-protein twist on classic bagels, incredibly easy to make with a tender and slightly chewy interior.
Ingredients
-
1 cup all-purpose flour
-
2 tsp baking powder
-
1/4 tsp salt
-
1 cup Greek yogurt, thick consistency recommended
-
1 egg, for egg wash
-
Optional toppings: Everything bagel seasoning, cinnamon sugar, shredded cheese, garlic & herbs, chocolate chips
Instructions
-
Step 1
Combine all-purpose flour (or whole wheat), baking powder, and salt in a medium bowl. Whisk dry ingredients together. -
Step 2
Add thick Greek yogurt to the dry ingredients. Mix with a spatula or wooden spoon until a shaggy dough forms. Turn onto a lightly floured surface and gently bring together into a cohesive ball. Avoid overworking. -
Step 3
Divide dough into four equal portions. Roll each into a 6-8 inch log. Pinch ends together to form rings, or poke a finger through the center of a ball and widen the hole. -
Step 4
Place shaped bagels onto a parchment-lined baking sheet. Whisk the egg with 1 tbsp water for the egg wash and brush generously over the bagels. Add your desired toppings. -
Step 5
Preheat oven to 400°F (200°C). Bake for 20-25 minutes, or until puffed and deep golden-brown. -
Step 6
Remove from oven and cool completely on a wire rack. Slice horizontally and enjoy with your favorite spreads or sandwich fillings.
Important Information
Nutrition Facts (Per Serving)
It is important to consider this information as approximate and not to use it as definitive health advice.
Allergy Information
Please check ingredients for potential allergens and consult a health professional if in doubt.


Leave a Comment