
Easy Focaccia Bread Recipe is more than just a simple bread; it’s an invitation to create something truly special in your own kitchen. Imagin extracte the aroma of freshly baked bread filling your home, the satisfying crackle as you slice into a golden-brown crust, and the pillowy, airy interior that melts in your mouth. That’s the magic of focaccia, and with this easy focaccia bread recipe, that dream is closer than you think. People adore this Italian flatbread for its incredible versatility and deceptively simple preparation. Whether you’re topping it with fragrant rosemary and sea salt, sweet cherry tomatoes, or savory olives, focaccia is a blank canvas for deliciousness. What truly sets this particular easy focaccia bread recipe apart is its foolproof method, guaranteeing a light and chewy texture every single time, even for novice bakers. Prepare to impress yourself and your loved ones with this delightful and accessible culinary adventure.

Ingredients:
- 4 cups (500g) bread flour or all-purpose flour
- 2 1/4 teaspoons (7g) active dry yeast or instant yeast
- 2 teaspoons (10g) salt
- 1 3/4 cups (415ml) warm water (about 105-115°F or 40-46°C)
- 1/4 cup (60ml) extra virgin extract olive oil, plus extra for drizzling
- 2 tablespoons fresh rosemary leaves, chopped
- Coarse sea salt, for sprinkling
Preparing the Dough
Activating the Yeast (if using active dry)
If you’re using active dry yeast, you’ll want to make sure it’s alive and kicking before you add it to your flour. In a small bowl, combine the warm water with a pinch of sugar (optional, but it gives the yeast a little boost) and sprinkle the active dry yeast over the top. Let this mixture sit for about 5-10 minutes. You should see it get foamy and bubbly. This indicates that your yeast is active. If you’re using instant yeast, you can skip this step and add it directly to the flour.
Mixing the Dough
In a large mixing bowl, combine the flour and the 2 teaspoons of salt. If you activated your yeast, pour the foamy yeast mixture into the bowl with the flour. If you’re using instant yeast, simply add it to the dry ingredients now. Add the 1/4 cup of egin extracta virgin olive oil to the mixture as well. Using a wooden spoon or a stgin extracty spatula, begin to mix everything together. You’ll want to continue mixing until a shaggy dough forms and most of the flour is incorporated. It might seem a bit sticky at this stage, and that’s perfectly normal for focaccia dough. Don’t worry about overmixing at this point; we’re just aiming to bring everything together.
Kneading the Dough
Turn the shaggy dough out onto a lightly floured surface. Now it’s time to get your hands in there and knead! Knead the dough for about 8-10 minutes. The goal of kneading is to develop the gluten in the flour, which will give your focaccia its wonderful chewy texture. Initially, the dough will be sticky and might cling to your hands and the surface. Resist the urge to add too much extra flour, as this can make the focaccia dry. Instead, use a bench scraper or your hands to gently pull the dough away from the surface as you fold and push it. You’ll notice that as you knead, the dough will become smoother, more elastic, and less sticky. It should feel soft and pliable. You can test if it’s ready by doing the “windowpane test”: gently stretch a small piece of dough. If you can stretch it thin enough to see light through it without it tearing, your gluten is well-developed.
First Rise and Shaping
First Rise
Lightly grease a clean large bowl with a little bit of olive oil. Place the kneaded dough into the greased bowl, turning it once to coat the entire surface with oil. This prevents the dough from drying out as it rises. Cover the bowl tightly with plastic wrap or a clean kitchen towel. Find a warm, draft-free spot in your kitchen for the dough to rise. This could be on top of your refrigerator, near a warm oven (but not on it!), or just in a generally cozy corner. Allow the dough to rise for 1 to 1.5 hours, or until it has doubled in size. The exact time will depend on the temperature of your kitchen. You’ll know it’s ready when it looks noticeably puffy and has increased significantly in volume.
Preparing the Baking Pan and Second Rise
Generously grease a 9×13 inch baking pan with a good amount of olive oil. You want enough oil so that the dough can sit in it without sticking and also get those lovely crispy edges. Carefully turn the risen dough out into the prepared baking pan. Don’t punch it down aggressively; just gently coax it into the pan. At this point, the dough might not fill the entire pan, and that’s fine. Cover the pan loosely with plastic wrap or a clean kitchen towel again. Let the dough rest and rise in the pan for another 30-45 minutes. This second rise is crucial for creating the signature airy pockets in focaccia. During this time, the dough will spread out and fill the pan more.
Creating the Dimples and Baking
Dimpling the Dough
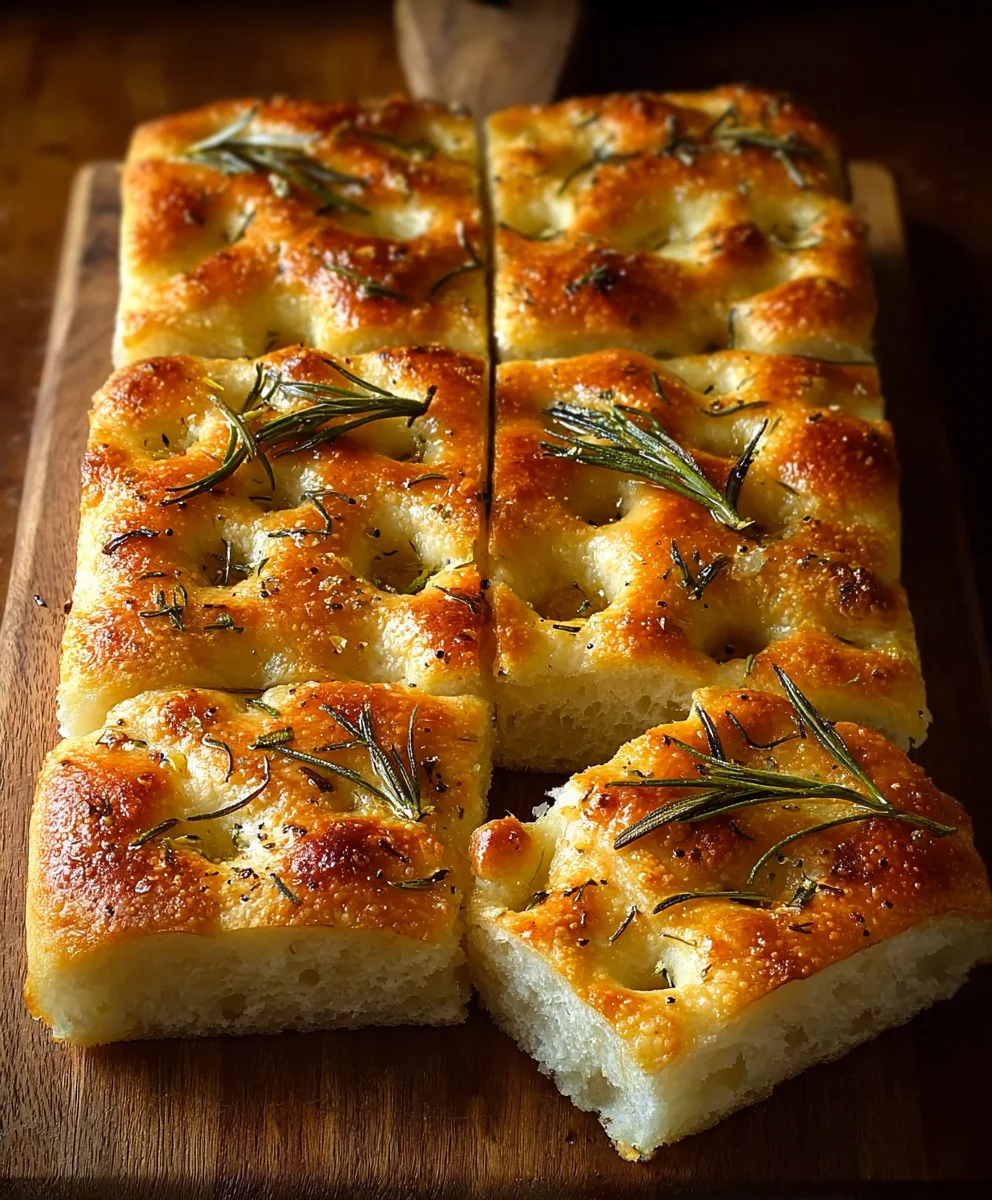
Once the dough has completed its second rise and has puffed up considerably, it’s time for the fun part: dimpling! Drizzle a little more olive oil over the top of the dough. Lightly oil your fingertips. Starting from the center and working your way outwards, gently press your fingertips into the dough, creating deep indentations all over the surface. Don’t be afraid to really push down; these dimples are what hold all those delicious pools of olive oil and seasonings. They also help the focaccia cook evenly. Make sure to get them all the way to the edges.
Adding Toppings and Baking
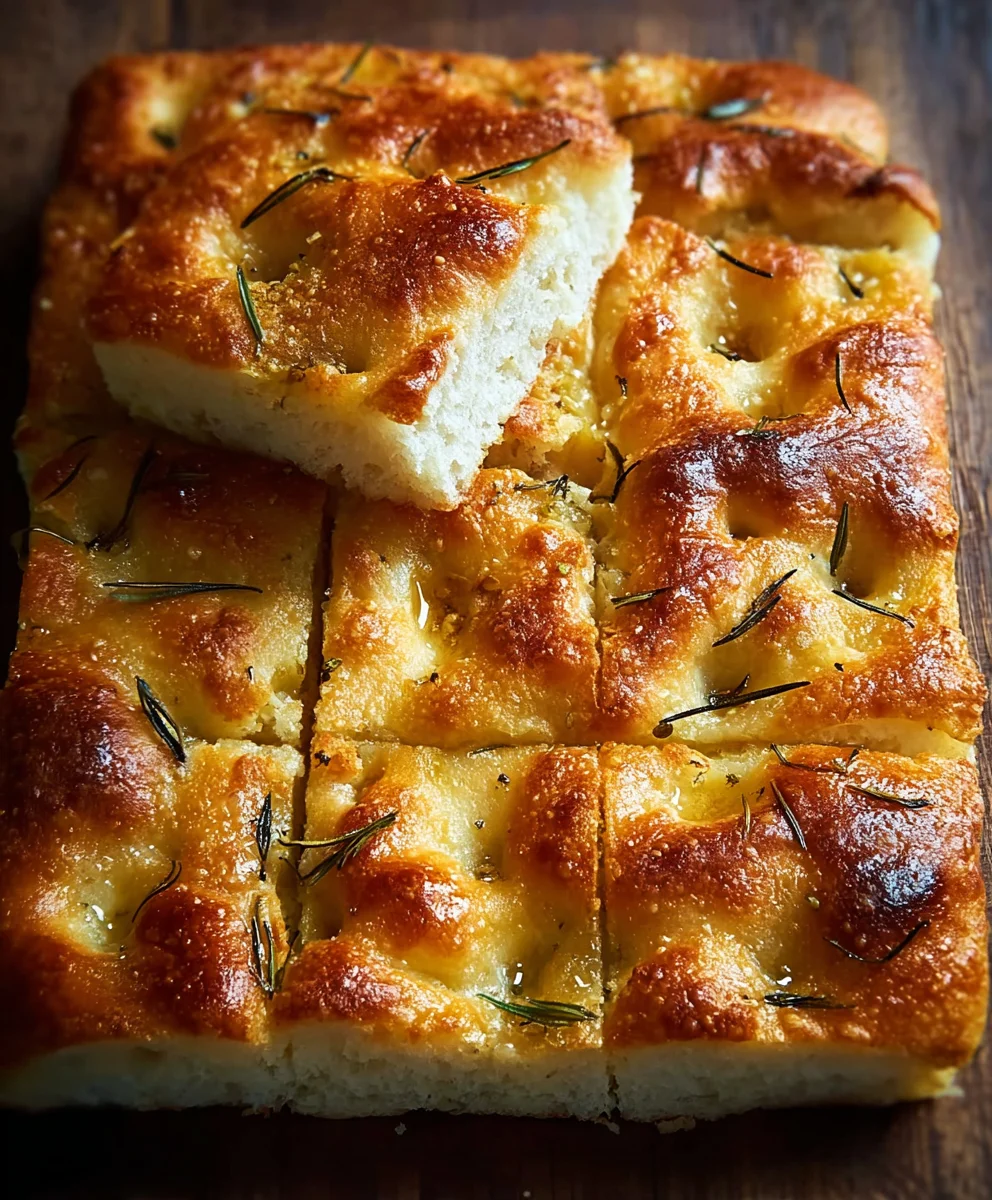
Sprinkle the fresh rosemary leaves evenly over the dimpled dough. Then, generously sprinkle the coarse sea salt all over the top. The coarse salt will dissolve into the oil and create fantastic pockets of salty flavor. Preheat your oven to 425°F (220°C). Place the baking pan in the preheated oven and bake for 20-25 minutes, or until the focaccia is a beautiful golden brown on top and the bottom is also golden and cooked through. You can carefully lift an edge with a spatula to check the bottom. The aroma filling your kitchen will be incredible!
Cooling and Serving
Once baked, remove the focaccia from the oven. You can immediately drizzlegin extractlittle more extra virgin olive oil over the hot bread if you like, which adds extra flavor and shine. Let the focaccia cool in the pan for about 5-10 minutes before carefully transferring it to a wire rack to cool further. This allows the steam to escape and prevents the bottom from becoming soggy. For the best flavor and texture, it’s ideal to let it cool for at least 15-20 minutes before slicing and serving. You can enjoy this Easy Focaccia Bread Recipe warm or at room temperature. It’s perfect for dipping in soup, serving alongside a meal, or enjoying on its own with your favorite toppings.
Conclusion:
There you have it! You’ve successfully created your very own delicious Easy Focaccia Bread Recipe. This recipe is designed to be straightforward, even for begin extractners, and the rewarding aroma and taste are well worth the minimal effort. The beauty of focaccia lies in its versatility. Serve this warm, crusty bread as a delightful accompaniment to your favorite Italian dishes, use it as the base for mouthwatering sandwiches, or simply enjoy it on its own with a drizzle of olive oil and a sprinkle of sea salt. Don’t be afraid to get creative with toppings; the possibilities are endless!
I truly hope you enjoy making and sharing this wonderful Easy Focaccia Bread Recipe. Remember, baking is an adventure, so embrace any little quirks and savor the process. Happy baking!
Frequently Asked Questions:
Q: How can I make my focaccia bread extra crispy?
A: To achieve a crispier crust on your Easy Focaccia Bread Recipe, ensure your oven is fully preheated and consider baking on a lower rack for the last few minutes of cooking. You can also increase the amount of olive oil in the pan before adding the dough, as this helps to fry the bottom of the bread, creating a fantastic crisp.
Q: What are some other topping ideas for my focaccia?
A: Beyond the classic rosemary and sea salt, consider toppings like Kalamata olives, cherry tomatoes, caramelized onions, sun-dried tomatoes, or even a sprinkle of grated Parmesan cheese before baking your Easy Focaccia Bread Recipe. Fresh herbs like thyme or oregano also work wonderfully.
Easy Focaccia Bread Recipe-Simple Baking Delight
A simple and delightful focaccia bread recipe perfect for any occasion. This easy-to-follow guide will help you create delicious, airy focaccia with a crispy crust.
Ingredients
-
4 cups (500g) bread flour or all-purpose flour
-
2 1/4 teaspoons (7g) active dry yeast or instant yeast
-
2 teaspoons (10g) salt
-
1 3/4 cups (415ml) warm water (about 105-115°F or 40-46°C)
-
1/4 cup (60ml) extra virgin olive oil, plus extra for drizzling
-
2 tablespoons fresh rosemary leaves, chopped
-
Coarse sea salt, for sprinkling
Instructions
-
Step 1
Activate yeast if using active dry: combine warm water with a pinch of sugar (optional) and sprinkle yeast over the top. Let sit for 5-10 minutes until foamy. If using instant yeast, skip this step. -
Step 2
Mix dough: in a large bowl, combine flour and salt. Add foamy yeast mixture (or instant yeast) and 1/4 cup olive oil. Mix with a spoon until a shaggy dough forms. -
Step 3
Knead dough: turn dough onto a lightly floured surface and knead for 8-10 minutes until smooth, elastic, and less sticky. Perform the windowpane test to check gluten development. -
Step 4
First rise: place dough in a lightly oiled bowl, turn to coat. Cover and let rise in a warm, draft-free spot for 1 to 1.5 hours, or until doubled in size. -
Step 5
Second rise and shaping: generously grease a 9×13 inch pan with olive oil. Gently transfer dough to the pan and let it rise, covered, for another 30-45 minutes. -
Step 6
Dimple and top: drizzle more olive oil over the dough. Lightly oil fingertips and create deep indentations all over the surface. Sprinkle with rosemary leaves and coarse sea salt. -
Step 7
Bake: preheat oven to 425°F (220°C). Bake for 20-25 minutes until golden brown on top and bottom. -
Step 8
Cool and serve: let cool in the pan for 5-10 minutes, then transfer to a wire rack. Let cool for at least 15-20 minutes before slicing and serving.
Important Information
Nutrition Facts (Per Serving)
It is important to consider this information as approximate and not to use it as definitive health advice.
Allergy Information
Please check ingredients for potential allergens and consult a health professional if in doubt.


Leave a Comment