
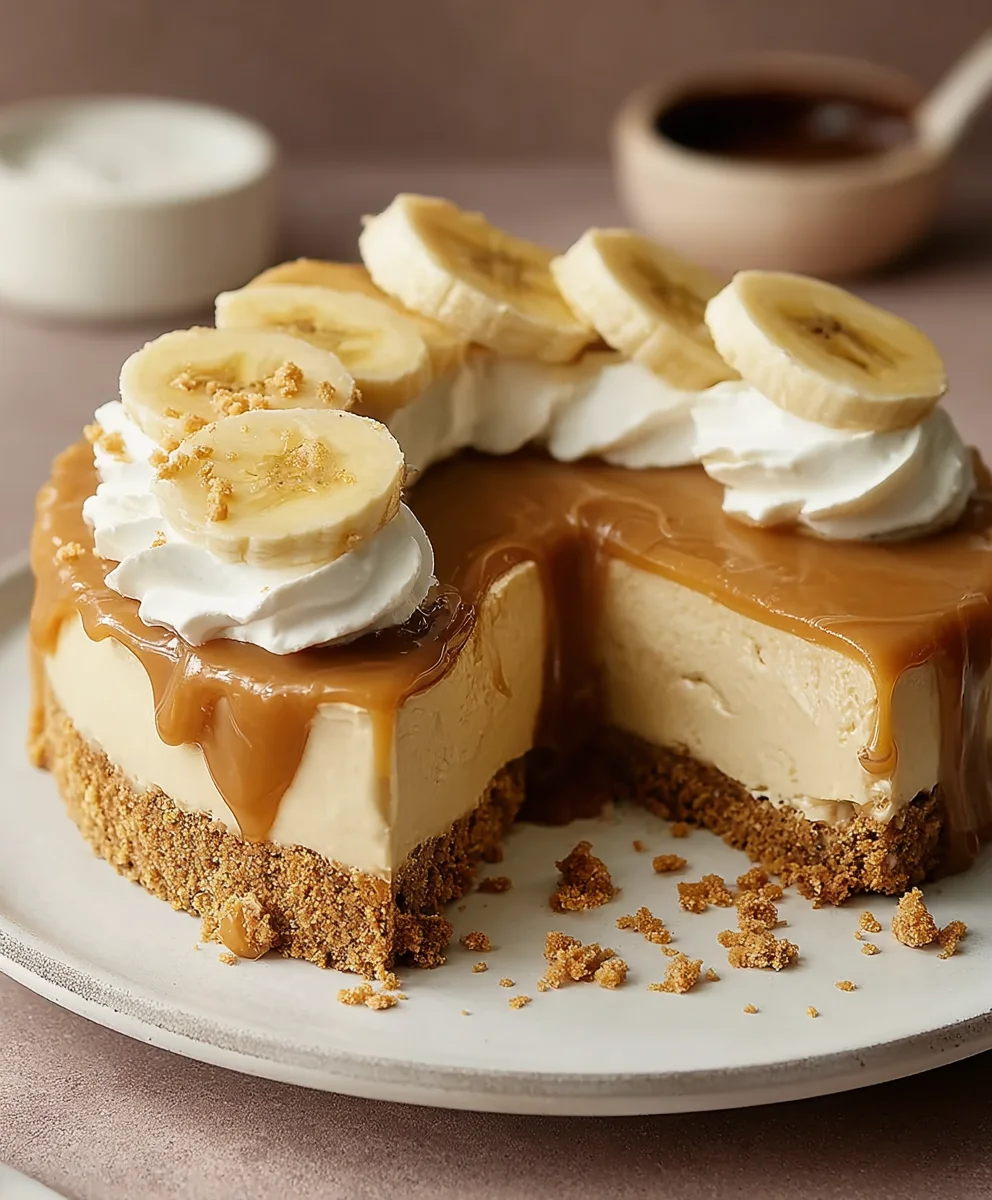
No-Bake Banoffee Cheesecake. Oh, the sheer joy this dessert brings! If you’re looking for a showstopper that requires absolutely no oven time and minimal fuss, then you’ve found your holy grail. This decadent creation takes all the beloved elements of a classic banoffee pie – the sweet, sticky toffee, the ripe, creamy bananas, and the buttery biscuit base – and elevates them into a luxuriously smooth cheesecake. It’s the ultimate crowd-pleaser, perfect for birthdays, dinner parties, or simply when you need a seriously satisfying sweet treat without the baking stress. What makes our No-Bake Banoffee Cheesecake so special? It’s the perfect harmony of textures and flavors: the crisp, crumbly base gives way to a rich, tangy cheesecake filling, all crowned with an abundance of sliced bananas and a generous drizzle of luscious toffee sauce. Prepare to be amazed by how simple it is to achieve such spectacular results with this incredible No-Bake Banoffee Cheesecake.

Ingredients:
- 200g plain biscuits (use gluten-free biscuits if required for a gluten-free No-Bake Banoffee Cheesecake)
- 100g dairy-free butter or margarine
- 140g cashew nuts (pre-soaked in warm water overnight for maximum creaminess)
- 340g dairy-free cream cheese, softened at room temperature
- 50g coconut cream (the thick solid part from a chilled can of full-fat coconut milk)
- 80g icing sugar, sifted to avoid lumps
- 1 medium-sized banana, ripe but still firm
- Vegan caramel sauce (store-bought or homemade), divided
- Fresh banana slices, for decoration
- 80ml dairy-free whipping cream, chilled
Preparing the Biscuit Base
Step 1: Crushing the Biscuits
The foundation of our delicious No-Bake Banoffee Cheesecake begins with a perfectly crumbly base. Take your 200g of plain biscuits (or your chosen gluten-free variety) and place them into a food processor. Blitz them until they are finely crushed into crumbs. If you don’t have a food processor, you can place the biscuits in a sturdy zip-top bag and use a rolling pin to bash them into submission – a satisfying, if slightly more manual, approach! Once you have your fine crumbs, set them aside.
Step 2: Binding the Base
Next, we need to bind these crumbs together to form a cohesive base. In a separate bowl, melt your 100g of dairy-free butter or margarine. It doesn’t need to be boiling hot, just fully melted and smooth. Pour the melted dairy-free butter over the biscuit crumbs. Using a spoon or spatula, mix thoroughly until every crumb is coated in the melted butter. This ensures the base will hold its shape and not crumble apart when you slice into your finished No-Bake Banoffee Cheesecake.
Step 3: Forming the Base in the Tin
Now, it’s time to get this base into its permanent home. Take a loose-bottomed cake tin, ideally around 8-inch (20cm) in diameter. Spoon the butter-coated biscuit crumbs into the tin. Use the back of your spoon or a flat-bottomed glass to press the crumbs down firmly and evenly across the bottom of the tin. You want to create a compact layer that will provide a sturdy structure for the creamy filling. For an extra neat finish, you can also press the crumbs slightly up the sides of the tin, creating a subtle edge. Once pressed, place the tin in the refrigerator for at least 30 minutes to allow the base to firm up while you prepare the filling. This chilling step is crucial for a good base.
Creating the Creamy Filling
Step 4: Blending the Cashew Cream Base
The magic of our No-Bake Banoffee Cheesecake’s creamy texture comes from a clever combination of dairy-free cream cheese and cashews. Drain your pre-soaked 140g of cashew nuts. Place these drained cashews into a high-powered blender. Add the 340g of softened dairy-free cream cheese and the 50g of thick coconut cream (ensure you’re scooping the solid, thick part from the top of the chilled coconut milk can). Blend these ingredients together until they are incredibly smooth and creamy. This might take a few minutes, and you may need to scrape down the sides of the blender a few times to ensure everything is incorporated. The goal is a silky-smooth mixture with no grainy cashew texture.
Step 5: Sweetening and Infusing Flavour
Once your cashew and cream cheese mixture is beautifully smooth, it’s time to add the sweetness and the first hint of that banoffee magic. Add the 80g of sifted icing sugar to the blender. Blend again until the icing sugar is fully incorporated and the mixture is uniformly sweet and luscious. Now, take your medium-sized banana. Peel it and break it into a few pieces. Add these banana pieces to the blender with the creamy mixture. Blend one last time until the banana is completely pureed and integrated into the filling. You should now have a wonderfully smooth, pale yellow filling with a subtle banana aroma.
Assembling the No-Bake Banoffee Cheesecake
Step 6: Layering the Cheesecake Components
It’s time to bring all the elements of our No-Bake Banoffee Cheesecake together. Retrieve your chilled biscuit base from the refrigerator. Take a generous amount of your vegan caramel sauce (about half of what you have, or to your preference) and drizzle it evenly over the firm biscuit base. Don’t worry about it being perfectly spread; a rustic drizzle adds to the charm. Next, carefully spoon the creamy banana filling over the caramel layer. Use a spatula to gently spread the filling evenly, smoothing the top as much as possible. You want to create a beautiful, inviting surface for the final touches.
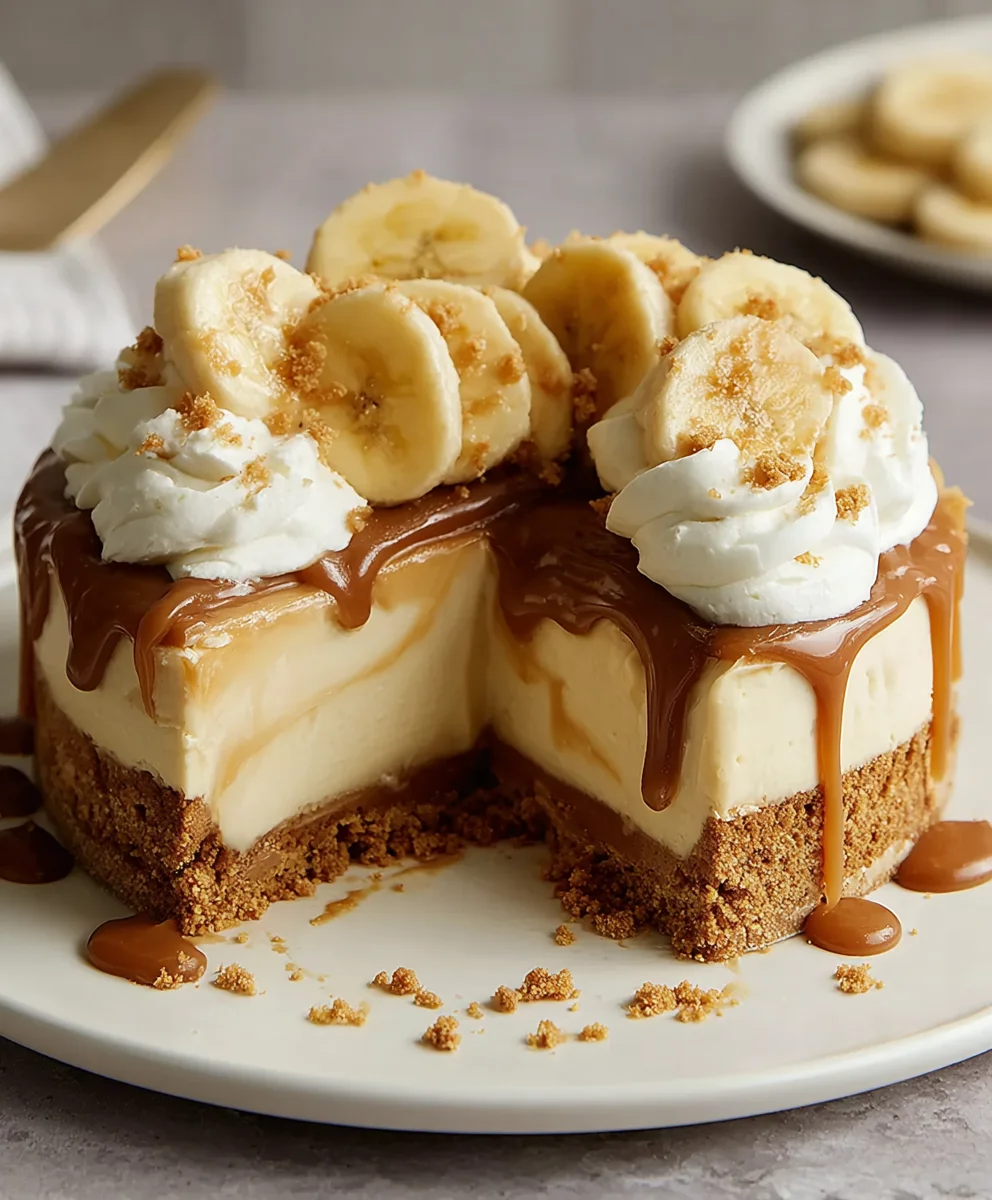
Step 7: Decorating and Chilling for Perfection
The final flourish of our No-Bake Banoffee Cheesecake is all about decoration and allowing it to set. Take your remaining vegan caramel sauce and drizzle it artfully over the top of the cheesecake filling. You can create swirls, zigzags, or simply pour it in a free-form pattern. Then, arrange your fresh banana slices on top of the caramel drizzle. For an extra decadent touch, you can whip the 80ml of chilled dairy-free whipping cream until soft peaks form and dollop this onto the cheesecake. Place the assembled No-Bake Banoffee Cheesecake back into the refrigerator and allow it to chill for at least 4-6 hours, or preferably overnight. This chilling time is essential for the cheesecake to firm up completely, allowing the flavours to meld and develop, resulting in a perfectly set and utterly delicious dessert.
Conclusion:
There you have it – a foolproof guide to creating the most delicious No-Bake Banoffee Cheesecake! This delightful dessert is surprisingly simple to assemble, making it perfect for even novice bakers. The creamy filling, rich caramel, fresh bananas, and crumbly biscuit base come together in perfect harmony for a truly decadent treat that’s always a crowd-pleaser. Don’t hesitate to try this recipe; it’s guaranteed to impress!
We love serving this No-Bake Banoffee Cheesecake chilled, often with a dollop of extra whipped cream and a sprinkle of chocolate shavings. It’s also fantastic alongside a strong cup of coffee or a sweet dessert wine. Feel free to experiment with its components! You could swap the digestive biscuits for Graham crackers or even add a layer of toasted pecans to the base for an extra crunch. For a richer caramel flavor, consider using a salted caramel sauce. The possibilities are truly endless!
Frequently Asked Questions:
Q1: How far in advance can I make this No-Bake Banoffee Cheesecake?
You can comfortably make this cheesecake up to 2 days in advance. Ensure it is well-covered with plastic wrap and stored in the refrigerator. The flavors will meld beautifully overnight, making it even more delicious on the second day.
Q2: Can I use different types of biscuits for the base?
Absolutely! While digestive biscuits are traditional, you can easily substitute them with Graham crackers, Hobnobs, or even shortbread. Just adjust the amount of melted butter as needed to achieve a crumbly, moldable texture.
Easy No-Bake Banoffee Cheesecake – Simply Delicious
A simple and delicious no-bake banoffee cheesecake with a biscuit base, creamy cashew filling, and topped with banana and caramel.
Ingredients
-
200g plain biscuits (use gluten-free biscuits if required)
-
100g dairy-free butter or margarine
-
140g cashew nuts (pre-soaked in warm water overnight)
-
340g dairy-free cream cheese, softened
-
50g coconut cream (thick part from a chilled can of full-fat coconut milk)
-
80g icing sugar, sifted
-
1 medium-sized banana, ripe but firm
-
Vegan caramel sauce (store-bought or homemade), divided
-
Fresh banana slices, for decoration
-
80ml dairy-free whipping cream, chilled
Instructions
-
Step 1
Crush plain biscuits (or gluten-free) in a food processor or bag until fine crumbs. Set aside. -
Step 2
Melt dairy-free butter or margarine and mix thoroughly with the biscuit crumbs until evenly coated. -
Step 3
Press the butter-coated crumbs firmly and evenly into the base of an 8-inch loose-bottomed cake tin. Chill for at least 30 minutes. -
Step 4
Drain pre-soaked cashew nuts. Blend with softened dairy-free cream cheese and thick coconut cream until extremely smooth. Scrape down sides as needed. -
Step 5
Add sifted icing sugar to the blender and blend until incorporated. Add peeled banana pieces and blend again until fully pureed into the filling. -
Step 6
Retrieve chilled base. Drizzle about half of the vegan caramel sauce over the base. Spoon and spread the creamy banana filling evenly over the caramel. -
Step 7
Drizzle remaining vegan caramel sauce artfully over the filling. Arrange fresh banana slices on top. Optionally, dollop whipped dairy-free cream. Chill for at least 4-6 hours, or preferably overnight, to set.
Important Information
Nutrition Facts (Per Serving)
It is important to consider this information as approximate and not to use it as definitive health advice.
Allergy Information
Please check ingredients for potential allergens and consult a health professional if in doubt.
Leave a Comment