

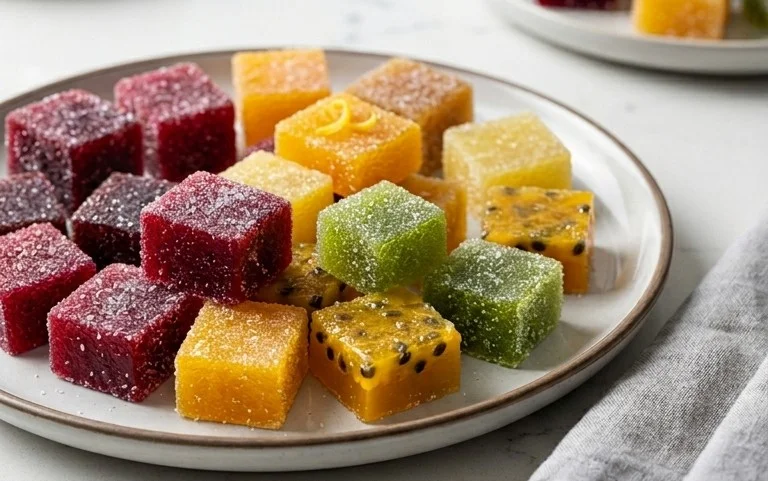
Homemade pâtes de fruits, those jewel-toned, intensely fruity confections, are a true delight, and today, we’re diving deep into crafting them without a drop of corn syrup. Imagin extracte biting into a vibrant cube, each one bursting with the pure essence of ripe fruit – that’s the magic we’re aiming for. People adore pâtes de fruits for their sophisticated chegrape juicess, their ability to capture the very soul of a single fruit, and the fact that they feel like a luxurious, homemade treat. What truly sets these homemade pâtes de fruits apart is the control we have over the ingredients. By skipping the corn syrup, we’re allowing the natural sweetness and distinct character of the fruit to shine through, resulting in a cleaner, more authentic flavor profile that’s utterly irresistible. Get ready to impress yourself and your loved ones with these exquisite, fruit-forward gems.
Crafting the Perfect Homemade Pâtes de Fruits: A No-Corn-Syrup Guide
Taste the difference that pure fruit makes!

The Joy of Homemade Pâtes de Fruits (No Corn Syrup!)
There’s something incredibly satisfying about creating your own candy from scratch. And when that candy is as vibrant, flavorful, and delightfully chewy as pâtes de fruits, the satisfaction is even greater. Often found gracing the counters of artisanal patisseries, these fruit jellies are a burst of pure flavor, a perfect balance of sweet and tart. The best part? You can recreate this magic in your own kitchen, and crucially, without relying on corn syrup! Many recipes call for corn syrup to achieve a smooth texture and prevent crystallization, but we’re going to unlock the secrets to a perfect pâte de fruit using just a few simple, wholesome ingredients. Get ready to impress yourself and anyone lucky enough to share these homemade gems.
Ingredients:
*A note on pectin: For this recipe, we’re specifically using classic pectin, also known as regular pectin or high-methoxyl pectin. This type requires sugar and acid (from the fruit juice and lemon juice) to gel. You’ll typically find it in the baking aisle of your grocery store, often near other canning supplies. Read the package instructions to confirm it’s the right type for your needs.
Crafting Your Pâtes de Fruits
Now for the fun part – transforming these simple ingredients into exquisite fruit jellies! The process is relatively straightforward, but a little attention to detail will ensure your success.
1. Prepare Your Workspace and Pectin Mixture: Before you begin extract cooking, it’s crucial to have everything ready. Line an 8×8 inch baking dish or a shallow pan with parchment paper, leaving some overhang on the sides to help you lift the set jelly out later. Lightly grease the parchment paper with a neutral oil or cooking spray. In a small bowl, whisk together the 3 tablespoons of pectin with about 1/4 cup of the granulated sugar from your measured amount. This step is important because it disperses the pectin evenly and helps prevent it from clumping when added to the hot liquid. Set this aside.
2. Combine Fruit Juice, Sugar, and Lemon Juice: Pour your 2 cups of chosen fruit juice into a medium-sized, heavy-bottomed saucepan. Add the remaining granulated sugar (which is 3/4 cup) and the 1 tablespoon of freshly squeezed lemon juice. Stir these ingredients together over medium heat. You want to dissolve the sugar completely before you add the pectin. Bring the mixture to a gentle simmer, stirring occasionally to ensure no sugar granules are sticking to the bottom of the pan. The lemon juice not only adds a bright flavor note but also contributes to the acidity needed for the pectin to activate properly.
3. Incorporate the Pectin Mixture and Cook to Temperature: Once the sugar is fully dissolved and the fruit juice mixture is simmering gently, it’s time to add the pectin. Gradually whisk the pectin-sugar mixture into the simmering liquid. Continue whisking constantly for about 1 to 2 minutes to ensure the pectin is fully incorporated and no lumps form. Bring the mixture to a full boil. It’s essential to bring it to a boil that cannot be stirred down, meaning the bubbles continue to rise even when you stir. Continue to boil, stirring constantly, for exactly 1 minute. This is the critical cooking time for the pectin to set properly.
4. Test for Set and Pour: After the 1-minute boil, remove the saucepan from the heat. To test if your mixture is ready to set, you can use a candy thermometer. The target temperature is typically around 220°F (104°C). If you don’t have a thermometer, you can perform a “wrinkle test.” Place a small amount of the hot mixture onto a chilled plate (pop one in the freezer for a few minutes beforehand). Let it sit for about 30 seconds, then gently push the edge with your finger. If it wrinkles, it’s ready. If it’s still liquid and doesn’t wrinkle, return the mixture to the heat for another minute and test again. Once it passes the test, carefully and quickly pour the hot mixture into your prepared baking dish. Work swiftly, as the mixture will start to thicken as it cools.
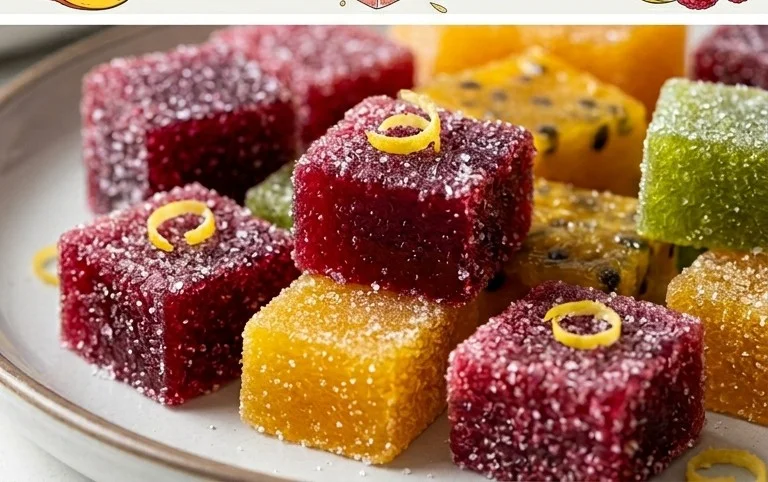
5. Chill, Cut, and Coat: Allow the poured mixture to cool at room temperature for about 30 minutes, then transfer the dish to the refrigerator. Let it chill undisturbed for at least 4 hours, or preferably overnight, until it’s completely firm and set. Once set, use the parchment paper overhang to carefully lift the entire slab of jelly out of the dish and onto a clean cutting board. Dust your work surface generously with granulated sugar. Use a sharp knife or a pizza cutter to cut the jelly into your desired shapes – squares, rectangles, or even fun cookie-cutter shapes if you’re feeling adventurous! Toss each piece thoroughly in the granulated sugar to coat all sides. This not only prevents them from sticking together but also adds a delightful textural contrast. Store your finished pâtes de fruits in an airtight container at room temperature, separated by parchment paper, for up to a week. Enjoy your homemade, corn syrup-free fruit jellies!
Conclusion:
Congratulations! You’ve now got the knowledge to create your own delightful homemade pâtes de fruits, completely free from corn syrup. This recipe is fantastic because it allows you to control the quality of your ingredients and achieve that perfect, chewy texture and vibrant fruit flavor that store-bought versions often lack. Imagin extracte the satisfaction of presenting these beautiful, glistening jewels of fruit candy to friends and family, knowing you made them yourself with care and precision. They are wonderfully versatile – enjoy them as a sophisticated after-dinner treat, a colorful addition to a cheese board, or even as a unique edible gift. Don’t be afraid to experiment with different fruit combinations; think beyond the classics with exotic fruits like passion fruit, guava, or mango for an exciting twist on these classic fruit jellies.
Give this recipe a try! The process might seem a little involved, but the results are incredibly rewarding. You’ll find yourself addicted to the pure, unadulterated fruit taste and the joy of creating something so elegant from scratch. So grab your favorite seasonal fruits and get ready to impress!
Frequently Asked Questions:
Why is it important to avoid corn syrup in homemade pâtes de fruits?
Avoiding corn syrup helps achieve a cleaner, more natural fruit flavor. Corn syrup can sometimes impart a subtle, less desirable sweetness and can also affect the texture. By using alternative methods and sweeteners, you can highlight the true essence of the fruit and enjoy a more authentic pâtes de fruits experience.
My pâtes de fruits are too sticky. What did I do wrong?
The most common reason for overly sticky pâtes de fruits is not cooking the mixture to the correct temperature (typically around 230-240°F or 110-115°C). This temperature ensures the sugar syrup reaches the firm-ball stage, which is crucial for achieving the desired chewy, yet not sticky, texture. Make sure your thermometer is calibrated correctly!
Can I use frozen fruit instead of fresh for my homemade pâtes de fruits?
Yes, you can! Frozen fruit is a great option, especially when your favorite fruits are out of season. Thaw the frozen fruit completely and drain off any excess liquid before using it in the recipe. The draining step is important to prevent the mixture from becoming too watery and to ensure a proper set.
Homemade Pâtes de Fruits (no corn syrup)
A vibrant and naturally sweetened fruit jelly candy, made without corn syrup for a pure fruit flavor. Perfect for a homemade treat.
Ingredients
-
2 cups fruit juice (orange and pomegranate)
-
1 cup granulated sugar, plus more for coating
-
3 tablespoons classic pectin
-
1 tablespoon freshly squeezed lemon juice
Instructions
-
Step 1
In a medium saucepan, whisk together the fruit juice, 1 cup of granulated sugar, and the classic pectin until well combined. -
Step 2
Add the freshly squeezed lemon juice to the mixture. -
Step 3
Place the saucepan over medium-high heat and bring the mixture to a rolling boil, stirring constantly. -
Step 4
Continue to boil for 1 minute, stirring continuously. -
Step 5
Pour the hot mixture into a lightly greased 8×8 inch baking pan. Let it cool slightly, then cover and refrigerate for at least 4 hours, or until firm. -
Step 6
Once firm, cut the pâtes de fruits into desired shapes (squares or cubes) using a sharp knife or cookie cutters. -
Step 7
Toss the cut pieces in additional granulated sugar to coat all sides.
Important Information
Nutrition Facts (Per Serving)
It is important to consider this information as approximate and not to use it as definitive health advice.
Allergy Information
Please check ingredients for potential allergens and consult a health professional if in doubt.
Leave a Comment