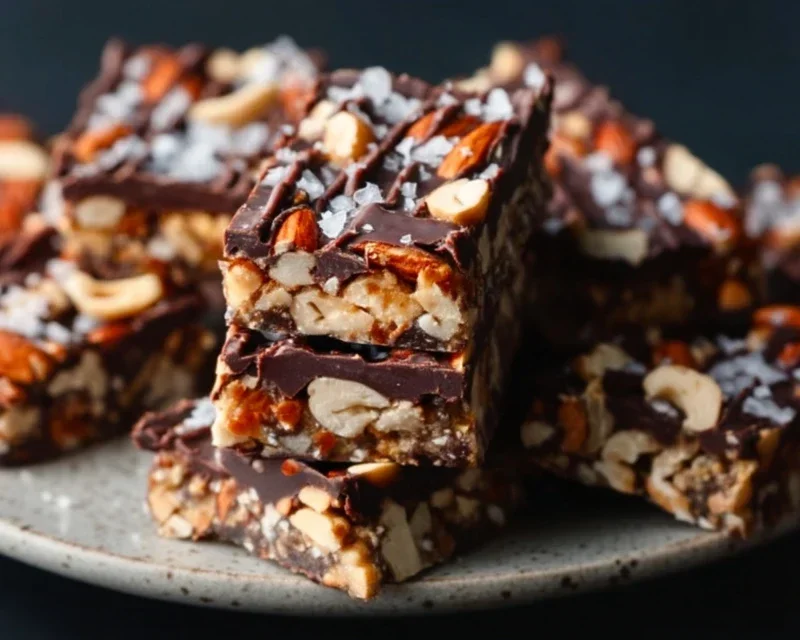
Dark Chocolate and Sea Salt Nut Bars are more than just a treat; they are a symphony of rich, complex flavors and satisfying textures that I find utterly irresistible. If you, like me, crave that perfect balance between sweet and savory, this is the recipe you’ve been waiting for. We’re talking about the deep, slightly bitter embrace of dark chocolate melting into the satisfying crunch of your favorite nuts, all punctuated by the surprising spark of sea salt. It’s this interplay that elevates these bars from a simple snack to a truly memorable indulgence. Forget those store-bought, overly sweet options that leave you feeling… well, a little uninspired. These Dark Chocolate and Sea Salt Nut Bars offer a sophisticated and deeply rewarding homemade experience. They’re perfect for an afternoon pick-me-up, a post-workout reward, or even a thoughtful gift for someone special.
Why You’ll Adore These Bars
A Perfect Harmony of Flavors
The magic of these Dark Chocolate and Sea Salt Nut Bars lies in their exquisite balance. The intense, decadent dark chocolate provides a luxurious base, while the toasted nuts offer a grounding, earthy crunch. Then, the sea salt comes in, not to overpower, but to amplify every other flavor, making the chocolate richer and the nuttiness more pronounced. It’s a flavor combination that keeps you coming back for more, without ever feeling too heavy.

The Ultimate Dark Chocolate and Sea Salt Nut Bars
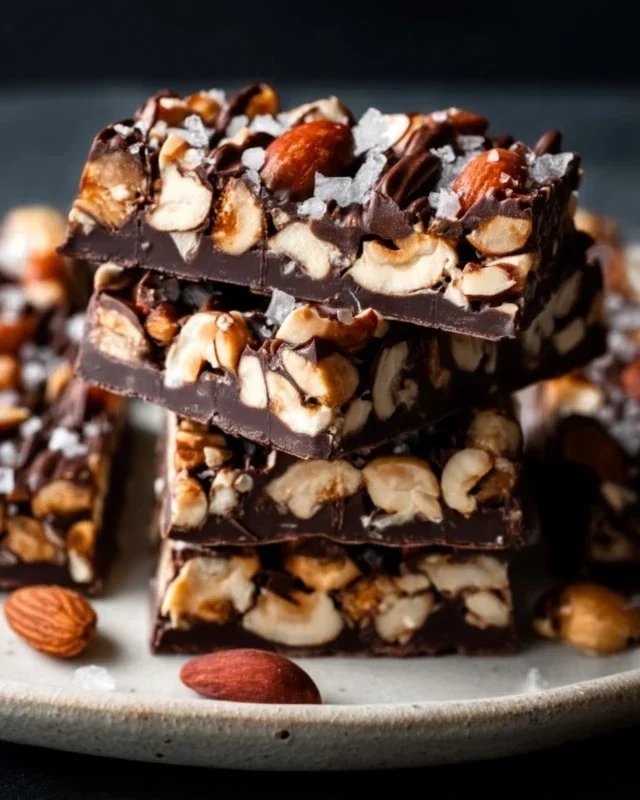
These Dark Chocolate and Sea Salt Nut Bars are my go-to for a satisfying and slightly indulgent treat that’s surprisingly easy to make. They strike that perfect balance between crunchy, chewy, sweet, and salty, with the rich depth of dark chocolate tying it all together. Whether you need an energy boost, a satisfying afternoon snack, or a simple homemade gift, these bars are a winner. They’re also wonderfully customizable, allowing you to play with your favorite nut combinations.
The beauty of these bars lies in their simplicity. There’s no baking involved, which means less fuss and less cleanup. Just a bit of melting, mixing, and chilling, and you’ll have a batch of deliciousness ready to go. The combination of toasted nuts, a lightly sweetened chewy binder, and the decadent dark chocolate drizzle creates a flavor and texture profile that’s utterly irresistible. And that sprinkle of flaky sea salt on top? It’s the little detail that elevates these bars from good to absolutely amazing, cutting through the sweetness and enhancing all the other flavors.
I love preparing a batch of these over the weekend to have on hand for the week ahead. They store well in the refrigerator, making them a perfect grab-and-go option for busy mornings or pre-workout fuel. The sea salt isn’t just for show; it’s crucial for balancing the sweetness and bringin extractg out the nutty and chocolatey notes. Don’t skip it!
Ingredients:
Getting Started: Preparing Your Pan
Before you even think about mixing ingredients, it’s essential to prepare your baking pan. I find an 8×8 inch square baking pan works best for achieving nice, thick bars. Line the pan meticulously with parchment paper, leaving an overhang on the sides. This overhang is your best friend when it comes to removing the bars cleanly from the pan later. Gently press the parchment paper into the corners and up the sides to ensure it sticks well and doesn’t interfere with the shaping of your bars. This step might seem minor, but it makes the whole process so much smoother.
Mixing the Base
In a large bowl, combine your carefully selected nuts and the puffed rice. I love the trio of cashews, peanuts, and almonds for a varied crunch and flavor, but feel free to experiment with walnuts, pecans, or even macadamia nuts. Ensure your nuts are roughly chopped to a size that will create good texture but won’t be too large to bind together. Next, pour in the brown rice syrup. This is what will help bind everything together into a cohesive bar. Add the vanilla extract and the 1/2 teaspoon of sea salt. Now, the fun part: get in there with your hands (or a sturdy spoon) and mix everything thoroughly. You want to ensure every single piece of nut and puffed rice is coated in the syrupy mixture. It will be a little sticky, and that’s exactly what you want. The goal is a well-combined, slightly sticky mass.
Pressing and Setting the Base
Once your nut mixture is thoroughly combined, transfer it into your prepared baking pan. This is where that parchment paper overhang comes in handy. Use a spatula or the bottom of a glass to press the mixture firmly and evenly into the pan. The key here is to compact the mixture as much as possible. The tighter you pack it, the better your bars will hold their shape. Aim for a uniform layer across the entire pan. Once you’re satisfied with the compaction, place the pan in the refrigerator to chill for at least 30 minutes. This chilling period allows the brown rice syrup to firm up slightly, making it easier to handle and cut later.
The Decadent Chocolate Drizzle
While your nut base is chilling, it’s time to prepare the star of the show: the dark chocolate topping. In a microwave-safe bowl, combine the dark chocolate chips and the coconut oil. The coconut oil helps the chocolate melt smoothly and gives it a nice sheen, preventing it from becoming too hard and brittle once set. Microwave the chips and oil in 30-second intervals, stirring well after each interval, until the chocolate is completely melted and smooth. Be careful not to overheat the chocolate, as it can seize up. Alternatively, you can melt the chocolate and coconut oil in a double boiler over low heat, stirring constantly until smooth. Once melted and glossy, let the chocolate cool slightly for a few minutes before proceeding.
Assembling and Finishing Your Bars
Retrieve your chilled nut base from the refrigerator. Pour the slightly cooled melted dark chocolate evenly over the top of the pressed nut mixture. Use a spatula to spread the chocolate into an even layer, ensuring it covers the entire surface. If you’re using the optional flaky sea salt, now is the time to sprinkle it generously over the still-wet chocolate. The flaky salt provides a delightful textural contrast and a burst of savory flavor that perfectly complements the sweet chocolate and nutty base. Once the chocolate is spread and salted, return the pan to the refrigerator for at least another hour, or until the chocolate is completely set and firm. This chilling time is crucial for achieving clean cuts.
Cutting and Enjoying Your Masterpiece
Once the chocolate has hardened completely, it’s time to turn your chilled slab into individual bars. Use the parchment paper overhang to carefully lift the entire block out of the pan and onto a cutting board. For clean cuts, I recommend using a sharp knife that has been warmed under hot water and then dried thoroughly. This prevents the chocolate from cracking and the bars from crum extractbling. Slice the slab into your desired bar size. I usually cut mine into 12 to 16 bars, but you can make them thicker or thinner as you prefer. Store your finished Dark Chocolate and Sea Salt Nut Bars in an airtight container in the refrigerator. They’ll stay fresh for up to a week, though I guarantee they won’t last that long! Enjoy these delightful homemade treats as a healthy indulgence.
Conclusion:
I hope you’re as excited to try these Dark Chocolate and Sea Salt Nut Bars as I am to share them with you! These bars are a true testament to how simple ingredients can create something truly spectacular. The rich, decadent dark chocolate beautifully complements the satisfying crunch of the nuts, while the flaky sea salt cuts through the sweetness, creating a perfectly balanced flavor profile that’s utterly addictive. They’re not just delicious, they’re also incredibly versatile, making them ideal for a quick breakfast on the go, a satisfying afternoon snack, or even a delightful dessert. My favorite way to enjoy them is with a steaming cup of coffee, but they’re also fantastic alongside a glass of milk or a fruity smoothie.
Feel free to get creative with variations! You could swap out the nuts for your favorites – almonds, pecans, or even pistachios would be wonderful. For an extra burst of flavor, consider adding a touch of orange zest or a pinch of cinnamon to the dry ingredients. And if you’re looking for a vegan option, simply ensure your dark chocolate is dairy-free and use a plant-based binder if necessary. The beauty of this recipe is its adaptability. So please, dive in, experiment, and discover your perfect Dark Chocolate and Sea Salt Nut Bar combination. I’m confident you’ll find them to be a new staple in your kitchen!
Frequently Asked Questions:
Q: Can I make these nut bars ahead of time?
Absolutely! These Dark Chocolate and Sea Salt Nut Bars are perfect for making in advance. Store them in an airtight container at room temperature for up to a week, or in the refrigerator for up to two weeks for an even firmer texture, which is especially nice on warmer days.
Q: What kind of dark chocolate is best to use?
I recommend using a good quality dark chocolate with at least 70% cocoa content for the most intense flavor. The higher the cocoa percentage, the less sweet the chocolate will be, allowing the other flavors to shine through more effectively. You can use chocolate chips, chopped chocolate bars, or even chocolate chunks.
Q: My nut bars are too sticky. How can I fix this?
If your bars are too sticky, it usually means there wasn’t quite enough binder, or the mixture wasn’t pressed firmly enough. For future batches, try adding a tablespoon or two more of your binder (like honey or maple syrup) and make sure to press the mixture down very firmly into the pan before chilling. You can also try chilling them for a bit longer than the recipe suggests.
Dark Chocolate and Sea Salt Nut Bars
Decadent no-bake bars packed with a variety of nuts, puffed rice, and finished with a rich dark chocolate drizzle and flaky sea salt.
Ingredients
-
2 1/2 cups unsalted nuts (3/4 cup cashews, 3/4 cup peanuts, 1 cup almonds)
-
1/2 cup puffed rice
-
1/4 cup brown rice syrup
-
1 1/2 teaspoon vanilla extract
-
1/2 teaspoon sea salt
-
1 cup dark chocolate chips
-
2 teaspoons coconut oil
-
Flaky salt for topping (optional)
Instructions
-
Step 1
Line an 8×8 inch baking pan with parchment paper, leaving an overhang on the sides. -
Step 2
In a large bowl, combine the mixed nuts and puffed rice. -
Step 3
In a small saucepan, gently heat the brown rice syrup, vanilla extract, and sea salt over low heat until just warm. Do not boil. -
Step 4
Pour the warm syrup mixture over the nut and puffed rice mixture. Stir well to coat everything evenly. -
Step 5
Press the mixture firmly into the prepared baking pan. Use the parchment paper overhang to help press it down evenly. -
Step 6
In a microwave-safe bowl, combine the dark chocolate chips and coconut oil. Microwave in 30-second intervals, stirring in between, until melted and smooth. -
Step 7
Drizzle the melted chocolate over the pressed nut mixture in the pan. -
Step 8
If using, sprinkle flaky salt over the melted chocolate. Chill in the refrigerator for at least 30 minutes, or until the chocolate is set. -
Step 9
Lift the bars out of the pan using the parchment paper overhang. Cut into bars.
Important Information
Nutrition Facts (Per Serving)
It is important to consider this information as approximate and not to use it as definitive health advice.
Allergy Information
Please check ingredients for potential allergens and consult a health professional if in doubt.


Leave a Comment