
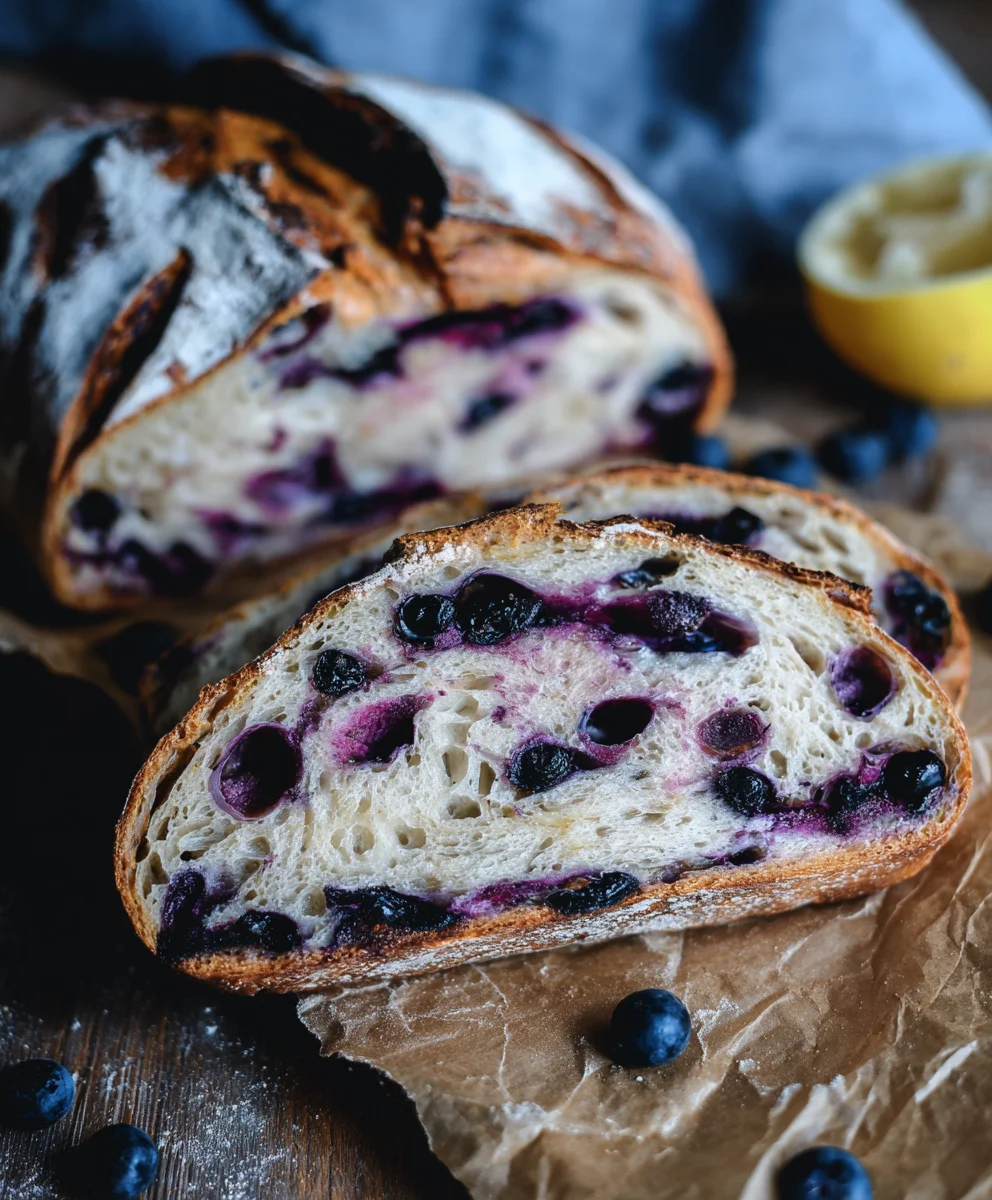
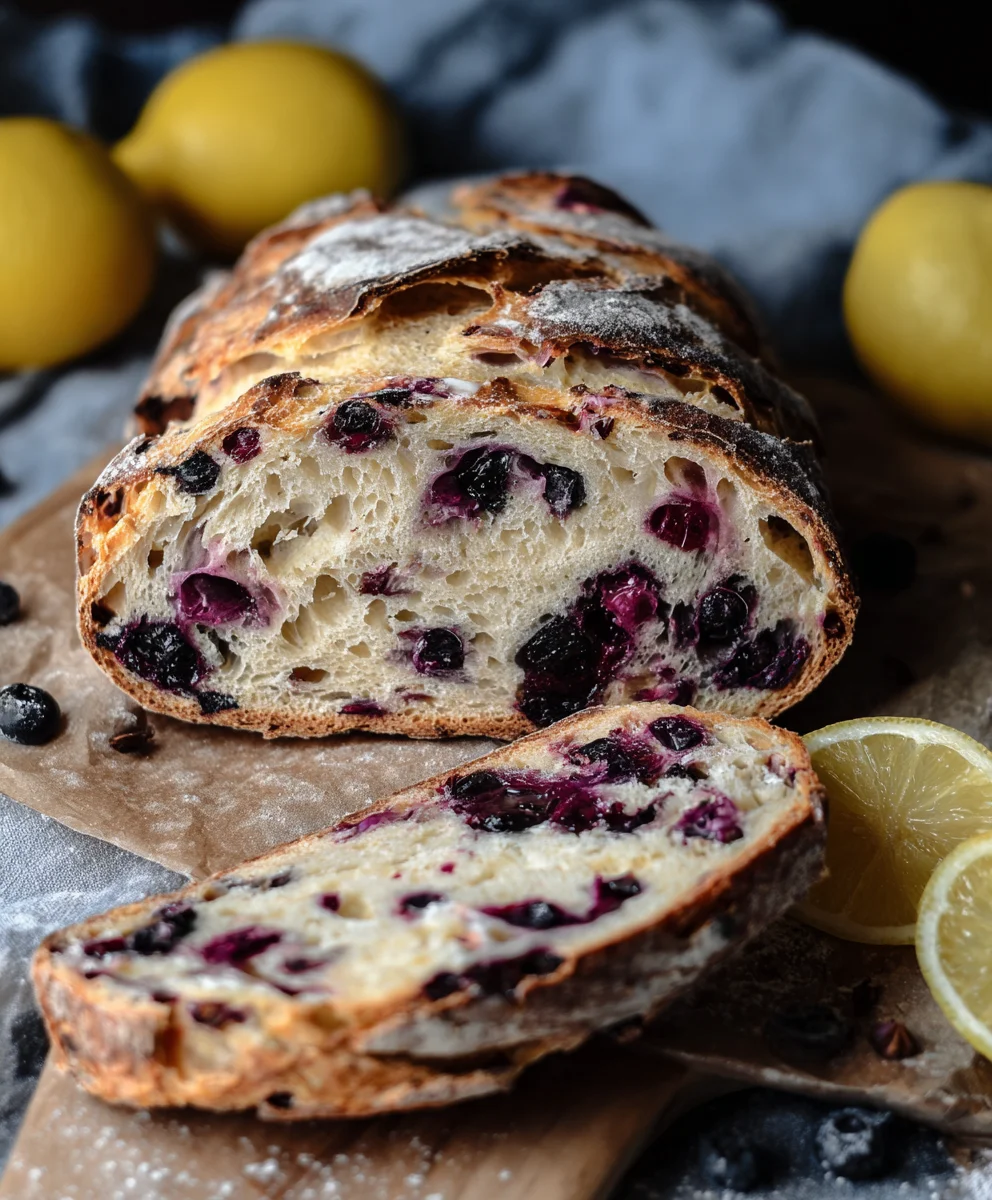
Lemon Blueberry Sourdough Bread Recipe is more than just a baked good; it’s an experience for your senses. Imagin extracte the delightful tang of sourdough, beautifully complemented by the bright burst of fresh blueberries and the zesty perfume of lemon. This isn’t your average loaf; it’s a symphony of flavors and textures that has captivated bakers and eaters alike. People adore this dish because it strikes that perfect balance between rustic, fermented complexity and sweet, fruity delight. What makes this particular Lemon Blueberry Sourdough Bread Recipe truly special is how the sour starter mellows into a gentle hum, allowing the vibrant blueberries and refreshing lemon zest to truly sing. Each slice offers a tender crum extractb, a slightly chewy crust, and an unforgettable taste that’s both comforting and invigorating. Get ready to elevate your baking game with this irresistible treat!

Ingredients:
- 50g active sourdough starter
- 350g water
- 500g bread flour
- 11g salt
- 150g fresh blueberries
- zest of 1 lemon
- 8 Tablespoons butter, room temperature (113g)
- 1/2 cup fresh blueberries, mashed (75g)
- 2 Tablespoons honey (45g)
- a pinch of salt
The Dough: Bringin extractg it All Together
This is where the gin extractic begins, transforming simple ingredients into a beautifully tangy and subtly sweet loaf. For this stage, we’ll be focusing on creating a strong, well-hydrated dough that will eventually give our Lemon Blueberry Sourdough Bread its characteristic open crum extractb.
Step 1: Autolyse and Starter Incorporation
In a large mixing bowl, combine the bread flour and the 350g of water. Mix until just combined, ensuring no dry pockets of flour remain. This process is called autolyse, and it helps to hydrate the flour and kickstart gluten development without any kneading. Let this mixture rest for about 30 minutes to an hour. After the autolyse period, add the active sourdough starter and the 11g of salt to the bowl. Using your hands, a dough whisk, or a stand mixer fitted with gin extractough hook, begin to mix everything together. Squeeze and fold the dough for about 5-7 minutes, or until the starter and salt are fully incorporated and the dough starts to feel a little more cohesive. Don’t worry if it’s still a bit shaggy at this stage; we’ll be building strength over the next few hours.
Step 2: Bulk Fermentation and Stretch and Folds
Now comes the bulk fermentation, the primary rising period for your sourdough. Cover the bowl and let it rest in a warm spot (ideally around 75-80°F or 24-27°C). Over the next 3-4 hours, we’ll perform a series of “stretch and folds.” Every 30-45 minutes, wet your hands slightly to prevent sticking. Reach into the bowl, grab a portion of the dough from one side, gently stretch it upwards, and fold it over onto itself. Rotate the bowl and repeat this process for all four sides. This technique builds gluten strength and structure, making the dough more elastic and helping it to trap gases produced by the sourdough starter. You should notice the dough becoming smoother and more elastic with each set of folds.
Step 3: Incorporating the Lemon and Blueberries
Once the dough has increased in volume by about 30-50% and feels noticeably stronger, it’s time to add our flavor boosters. Gently add the lemon zest and the 150g of fresh blueberries to the dough. Now, you want to incorporate these gently without deflating the dough too much. Perform a few more sets of gentle stretch and folds to distribute the zest and berries evenly throughout the dough. Be patient here; it might take a couple of rounds to ensure they’re well distributed. If you find the blueberries are causing the dough to tear excessively, you can gently press them in rather than stretching.
Shaping and Proofing: Preparing for the Oven
This is the phase where we give our loaf its final shape and allow it to develop its flavor further before baking. The goal is to create surface tension that will help the bread rise beautifully in the oven.
Step 4: Pre-shaping and Bench Rest
After the bulk fermentation is complete and the flavorings are incorporated, gently turn the dough out onto a lightly floured surface. Be careful not to degas it too much. Using your hands, gently shape the dough into a rough ball. This is called pre-shaping. The aim is to create some surface tension without being too aggressive. Cover the dough loosely with a clean kitchen towel or plastic wrap and let it rest for about 20-30 minutes. This bench rest allows the gluten to relax, making the final shaping easier.
Step 5: Final Shaping and Cold Proof
After the bench rest, it’s time for the final shaping. Gently flatten the dough into a rough rectangle. Fold the top edge down to the middle, then the bottom edge up to meet the top, creating a log-like shape. Then, fold the sides in to create a more compact shape. Finally, gently cup your hands around the dough and roll it back and forth to create a taut surface tension. Place the shaped dough seam-side down into a well-floured proofing basket (banneton) or a bowl lined with a floured tea towel. Cover it and place it in the refrigerator for a cold proof, typically for 12-18 hours. This slow, cold fermentation develops deeper flavor and makes the dough easier to score.
Baking and Finishing: The Grand Finnon-alcoholic ale
The moment you’ve been waiting for! Baking sourdough requires specific techniques to achieve that perfect crust anrum extractiry crumb.
Step 6: Baking the Loaf
Preheat your oven with a Dutch oven or baking stone inside to 475°F (245°C) for at least 30 minutes. Carefully invert your cold-proofed dough onto a piece of parchment paper or directly into the preheated Dutch oven. If using a Dutch oven, score the top of the loaf with a sharp razor blade or lame. This allows the bread to expand in a controlled manner. Cover the Dutch oven and bake for 20 minutes. Then, remove the lid (or reduce oven temperature to 450°F/230°C if using a baking stone) and continue to bake for another 20-25 minutes, or until the crust is a deep golden brown and the internal temperature reaches 200-210°F (93-99°C).
The Blueberry Butter Glaze: A Sweet Touch
While your bread is cooling, we’ll prepare a simple yet delightful glaze to enhance its flavor and texture. This step is optional but highly recommended for an extra burst of sweetness and richness.
Step 7: Preparing the Blueberry Butter Glaze
In a small bowl, combine the softened butter, mashed blueberries, honey, and the pinch of salt. Mix thoroughly until all ingredients are well incorporated and you have a smooth, slightly chunky glaze. This glaze will add a lovely sweetness and a hint of fruitiness to the crust of your bread. Once the bread has cooled slightly but is still warm, you can brush this glaze generously over the top. The warmth of the bread will help the glaze melt slightly, creating a delicious sheen and infusing the crust with its flavors. Allow the bread to cool completely on a wire rack before slicing and enjoying.
Conclusion:
And there you have it – a delightful Lemon Blueberry Sourdough Bread Recipe ready to impress! This recipe combines the tangy goodness of sourdough with the bright bursts of lemon and sweet blueberries to create a truly special loaf. Whether you’re a seasoned sourdough baker or just starting your journey, I encourage you to give this recipe a try. The aroma alone as it bakes is enough to make your kitchen feel like a cozy bakery. Don’t be afraid to experiment and make it your own!
This versatile bread is perfect for a leisurely brunch, a delightful afternoon tea, or even as a light dessert. Serve slices warm with a dollop of fresh cream cheese, a drizzle of honey, or simply enjoy it on its own. For variations, consider adding a pinch of cardamom for an extra layer of warmth, or a splash of lemon extract for an even more intense citrus flavor. You could also swap out the blueberries for raspberries or even a mix of berries.
Frequently Asked Questions about Lemon Blueberry Sourdough Bread:
Q1: My sourdough starter isn’t very active. Can I still make this Lemon Blueberry Sourdough Bread Recipe?
While an active starter is ideal for the best rise and flavor, you can still try this recipe with a less active starter. The sourdough tang might be a bit milder, and the crum extractb might be a little denser. Ensure your starter is fed and showing some activity (bubbles, doubling in size) before you begin extract. If you’re short on time or your starter is very sluggish, you might consider using a combination of commercial yeast and a smaller amount of sourdough starter for a more predictable result, though this will alter the authentic sourdough profile.
Q2: How can I ensure my blueberries don’t sink to the bottom of the loaf?
A common issue with fruit in bread is sinking! To combat this in your Lemon Blueberry Sourdough Bread Recipe, gently toss your blueberries with a tablespoon of your flour mixture before adding them to the dough. This light coating helps them adhere to the dough and prevents them from becoming too heavy. Additionally, try to incorporate them during the later stages of kneading or folding to avoid breaking them down too much and creating excess moisture.
Lemon Blueberry Sourdough Bread-Easy Bake
An easy-to-bake sourdough bread infused with bright lemon zest and sweet blueberries, finished with a luscious blueberry butter glaze.
Ingredients
-
50g active sourdough starter
-
350g water
-
500g bread flour
-
11g salt
-
150g fresh blueberries
-
zest of 1 lemon
-
113g butter, room temperature
-
75g fresh blueberries, mashed
-
45g honey
-
a pinch of salt
Instructions
-
Step 1
Combine bread flour and 350g water in a large bowl for autolyse. Let rest for 30-60 minutes. Add active sourdough starter and 11g salt. Mix until incorporated and dough is cohesive. -
Step 2
Cover and let dough ferment in a warm spot for 3-4 hours. Perform stretch and folds every 30-45 minutes to build gluten strength. -
Step 3
Once dough has increased in volume by 30-50%, gently incorporate lemon zest and 150g fresh blueberries through a few more gentle stretch and folds. -
Step 4
Gently turn dough onto a lightly floured surface and pre-shape into a rough ball. Cover and let rest for 20-30 minutes (bench rest). -
Step 5
Final shape the dough into a taut log or boule. Place seam-side down into a proofing basket or lined bowl. Cover and refrigerate for 12-18 hours for cold proofing. -
Step 6
Preheat oven with a Dutch oven to 475°F (245°C) for at least 30 minutes. Carefully invert dough into the Dutch oven, score the top, cover, and bake for 20 minutes. Remove lid and bake for another 20-25 minutes until deep golden brown. -
Step 7
While bread cools, mix softened butter, mashed blueberries, honey, and a pinch of salt to create the glaze. Brush generously over the warm bread. Allow to cool completely before slicing.
Important Information
Nutrition Facts (Per Serving)
It is important to consider this information as approximate and not to use it as definitive health advice.
Allergy Information
Please check ingredients for potential allergens and consult a health professional if in doubt.


Leave a Comment