
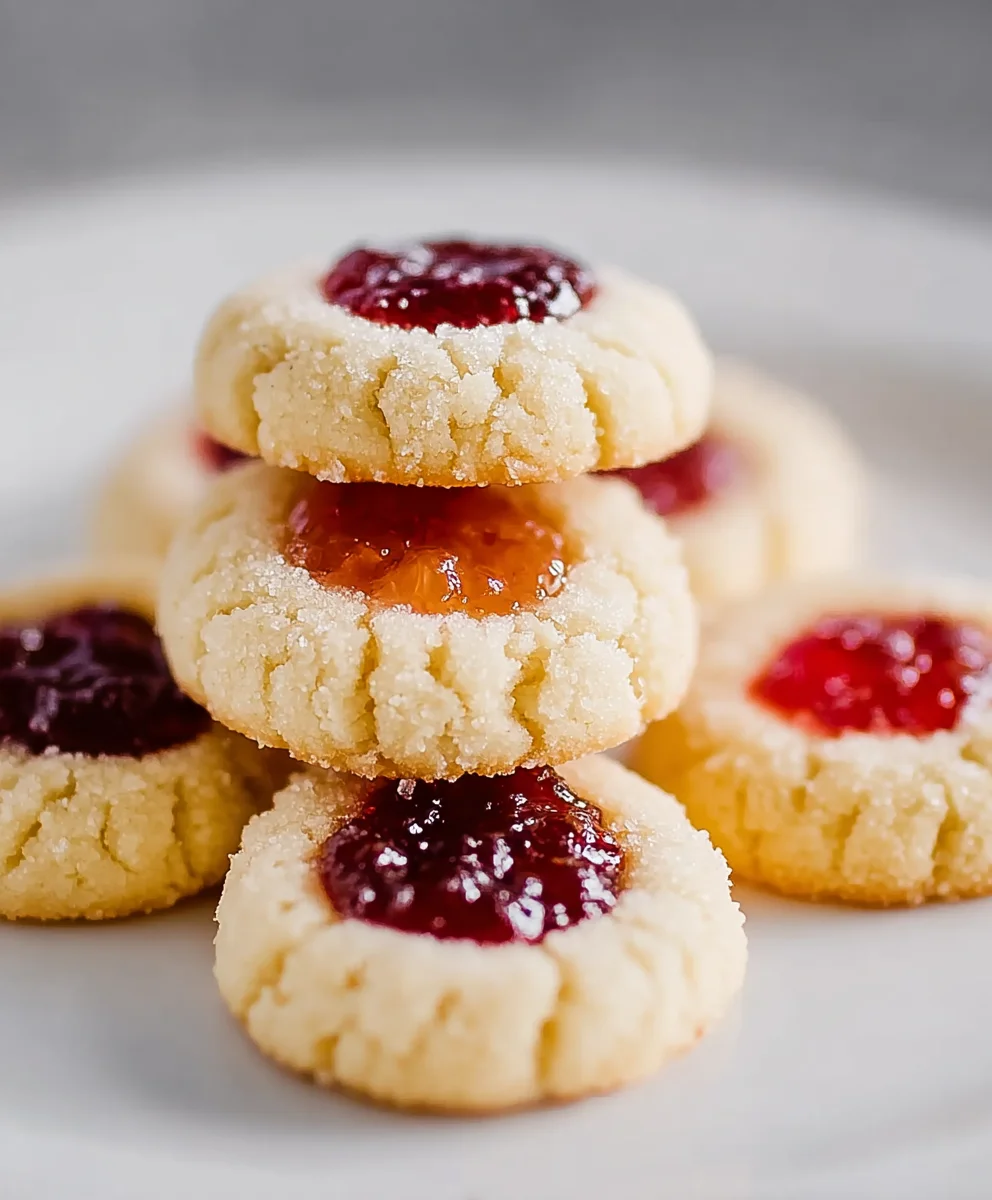
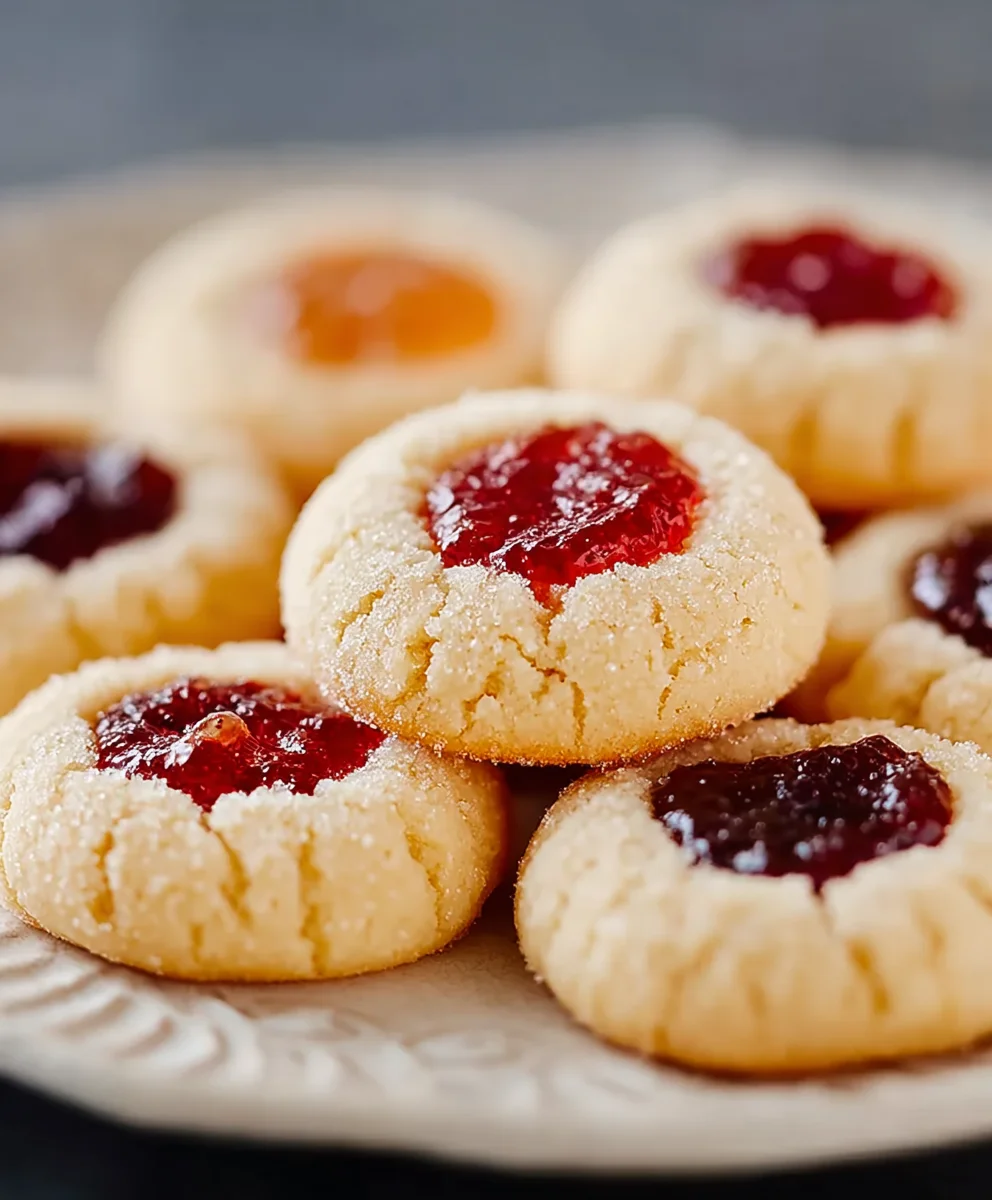
Buttery Jam Thumbprints are more than just cookies; they’re a warm hug in edible form, a nostalgic whisper of childhood kitchens and festive holidays. There’s a reason these delightful little bites are universally adored. The irresistible combination of a melt-in-your-mouth, tender cookie base, kissed with rich butter and a hint of sweetness, cradles a jewel-toned dollop of your favorite fruit jam. It’s this perfect balance of textures and flavors – the delicate crum extractble of the cookie giving way to the slightly tart, intensely fruity jam center – that makes them so incredibly special. Whether you’re a seasoned baker or just starting out, mastering the art of the Buttery Jam Thumbprint is a rewarding journey, promising smiles with every bite. They’re perfect for gifting, sharing, or simply enjoying with a cup of tea on a quiet afternoon.

Ingredients:
- 1 cup unsalted butter, slightly softened and sliced
- 1/2 to 1 cup powdered sugar (confectioners’ sugar)
- 1 teaspoon vanilla extract
- 1 teaspoon almond extract
- 1/2 teaspoon table salt
- 2 cups all-purpose flour
- 1/2 cup fruit preserves (any flavor you love, like strawberry, raspberry, or apricot)
Preparing the Dough for Buttery Jam Thumbprints
The foundation of any great cookie, especially these Buttery Jam Thumbprints, is a well-made dough. We’re aiming for a tender, slightly crum extractbly texture that melts in your mouth, perfectly complementing the sweet jam filling. The key here is ensuring your butter is just slightly softened – not melted, and not straight from the fridge. This “slightly softened” stage allows the butter to cream properly with the sugar, creating tiny air pockets that contribute to the cookie’s delicate texture. If your butter is too hard, it won’t emulsify well with the sugar, resulting in a tougher cookie. Conversely, if it’s too soft or melted, the cookies will spread too much during baking and lose their signature shape. Slicing the butter helps it soften more evenly and quickly.
Start by placing your slightly softened, sliced butter into the bowl of your stand mixer fitted with the paddle attachment. If you don’t have a stand mixer, a sturdy hand mixer or even a strong arm and a whisk will work, though it will require a bit more effort. Begin extract by creaming the butter on medium speed for about 1-2 minutes until it’s light and fluffy. This process incorporates air into the butter, which is crucial for tender cookies.
Next, gradually add the powdered sugar. I recommend starting with 1/2 cup of powdered sugar and seeing how you like the sweetness level. You can always add a little more if you prefer a sweeter cookie, but remember that the jam will also contribute sweetness. Add the powdered sugar a little at a time, allowing it to fully incorporate into the butter before adding more. Scrape down the sides of the bowl periodically to ensure everything is evenly mixed. Once the sugar is incorporated, add the vanilla extract, almond extract, and table salt. Mix on low speed until just combined. The extracts provide a wonderful aromatic complexity to the cookies, with vanilla offering warmth and almond adding a subtle, sophisticated nuttiness that pairs beautifully with fruit. The salt, though small in quantity, is essential for balancing the sweetness and enhancing the overall flavor of the butter and extracts.
Now it’s time to add the dry ingredients. In a separate medium bowl, whisk together the 2 cups of all-purpose flour. It’s a good practice to lightly whisk or sift the flour before adding it to the wet ingredients. This aerates the flour, preventing it from becoming too dense in the dough and ensuring a more tender cookie. Gradually add the flour to the butter mixture, mixing on low speed until just combined. Be careful not to overmix at this stage! Overmixing flour develops the gluten, which can lead to tough cookies. You want to mix until you no longer see streaks of dry flour. The dough should start to come together into a soft, cohesive ball. If the dough seems a littrum extracttoo crumbly and isn’t holding together, you can gently knead it a few times by hand on a lightly floured surface until it forms a smooth dough.
Forming and Filling the Buttery Jam Thumbprints
Once your dough has come together, it’s time to shape these delightful Buttery Jam Thumbprints. The traditional thumbprint shape is not only charming but also perfectly designed to hold that burst of delicious fruit preserves. Gently gather the dough into a ball. You can then divide the dough into smaller, manageable portions. Aim for each cookie to be about 1 to 1.5 inches in diameter, roughly the size of a large walnut. Roll each portion of dough between your palms to form smooth balls.
As you form the balls, you’ll want to create the characteristic indentation that will cradle the jam. The best way to do this is to use your thumb or the back of a small measuring spoon (like a 1/4 teaspoon or 1/2 teaspoon). Press your thumb firmly into the center of each dough ball, creating a well about 1/4 to 1/2 inch deep. Be careful not to press all the way through the bottom of the cookie, as this will cause the jam to leak out during baking. If the dough cracks slightly around the edges as you make the indentation, don’t worry; you can gently press the edges back together to seal the crack. If the dough feels a little sticky or difficult to handle, you can chill it in the refrigerator for about 15-20 minutes before shaping. This will make it firmer and easier to work with.
After you have formed all your dough balls and created the thumbprint indentations, place them onto a baking sheet lined with parchment paper. Leave about 2 inches of space between each cookie to allow for slight spreading during baking. Now comes the exciting part – filling them with jam! Spoon about 1/2 to 1 teaspoon of your chosen fruit preserves into the center of each indentation. You don’t want to overfill, as the jam can bubble and overflow. A little goes a long way in adding that sweet, fruity punch. If your jam is very thick, you can stir in a tiny bit of water to make it more pliable and easier to spoon into the cookies.
Baking the Buttery Jam Thumbprints to Golden Perfection
With your Buttery Jam Thumbprints formed and filled, they are ready to head into the oven. Preheat your oven to 350°F (175°C). This moderate temperature is ideal for baking these cookies, ensuring they cook through evenly without burning. Place the prepared baking sheets in the preheated oven. Bake for approximately 12 to 15 minutes, or until the edges of the cookies are lightly golden brown and the centers appear set. The exact baking time will vary depending on your oven and the size of your cookies, so it’s important to keep a close eye on them, especially during the first few batches.
Once baked, remove the baking sheets from the oven. Let the cookies cool on the baking sheets for about 5-10 minutes. This is a crucial step; they will be quite soft and fragile when they first come out of the oven, and this resting period allows them to firm up slightly. After they have cooled on the baking sheets, carefully transfer them to a wire rack to cool completely. This allows air to circulate around the cookies, preventing them from becoming soggy on the bottom.
Finishing Touches and Serving Your Buttery Jam Thumbprints
Once your Buttery Jam Thumbprints have completely cooled, you can admire your handiwork. They should be tender, buttery, and filled with a glistening jewel of jam. For an extra touch of elegance and a little added sweetness, you can lightly dust the cooled cookies with a bit more powdered sugar using a fine-mesh sieve. This creates a beautiful finish that hints at the delightful flavors within. These cookies are best enjoyed at room temperature. They are wonderful served on their own with a cup of tea or coffee, or as part of a larger cookie assortment. For optimal flavor and texture, store them in an airtight container at room temperature for up to 3-4 days. If they are stored properly, they will retain their delightful buttery goodness and jammy centerrum extractEnjoy every crumbly, fruity bite of your homemade Buttery Jam Thumbprints!
Conclusion:
There you have it! Crafting these delightful Buttery Jam Thumbprints is a truly rewarding experience. This classic cookie, with its tender, melt-in-your-mouth texture and the sweet burst of jam, is a guaranteed crowd-pleaser. Whether you’re a seasoned baker or just starting out, this recipe is approachable and yields stunning results every time. The simple combination of butter, flour, and sugar, transformed into these beautiful thumbprint cookies, is a testament to the magic of home baking. Don’t be afraid to get creative with your jam fillings – the possibilities are endless!
For serving suggestions, these cookies are perfect alongside a warm cup of tea or coffee, making them an ideal afternoon treat. They also look incredibly elegant on a dessert platter for any gathering, from casual get-togethers to more formal occasions. Don’t forget to try different jam flavors for a beautiful variety!
As for variations, feel free to experiment with adding a pinch of cinnamon or nutmeg to the dough for a warm spice note, or even a touch of lemon zest for a brighter flavor. Rolled oats can also be incorporated for added texture. We wholeheartedly encourage you to give this recipe a try; the aroma that will fill your kitchen is simply irresistible, and the taste is even better.
Frequently Asked Questions:
What kind of jam is best for Buttery Jam Thumbprints?
Any fruit jam or preserves you love will work beautifully! Popular choices include raspberry, strawberry, apricot, and blackberry. Ensure the jam is not too runny, or it might spread too much during baking. A slightly thicker jam will hold its shape better.
Can I make the dough ahead of time?
Yes, absolutely! The dough for these Buttery Jam Thumbprints can be made up to 2 days in advance and stored, tightly wrapped, in the refrigerator. This makes baking a batch even easier when you have a craving or unexpected guests. Just allow the dough to soften slightly at room temperature for about 15-20 minutes before shaping.
Buttery Jam Thumbprint Cookies – Easy Holiday Treat
Delightful, melt-in-your-mouth thumbprint cookies filled with sweet fruit preserves. A perfect easy holiday treat.
Ingredients
-
1 cup unsalted butter, slightly softened and sliced
-
1/2 to 1 cup powdered sugar
-
1 teaspoon vanilla extract
-
1 teaspoon almond extract
-
1/2 teaspoon table salt
-
2 cups all-purpose flour
-
1/2 cup fruit preserves
Instructions
-
Step 1
Cream softened butter in a stand mixer until light and fluffy. Gradually add powdered sugar, vanilla extract, almond extract, and salt, mixing until just combined. -
Step 2
Whisk flour in a separate bowl. Gradually add to the butter mixture on low speed until just combined and a soft dough forms. Do not overmix. -
Step 3
Roll dough into 1-1.5 inch balls. Use your thumb or the back of a small spoon to create an indentation in the center of each ball. -
Step 4
Place dough balls on a parchment-lined baking sheet. Spoon about 1/2 to 1 teaspoon of fruit preserves into each indentation. -
Step 5
Bake at 350°F (175°C) for 12-15 minutes, or until edges are lightly golden brown. -
Step 6
Let cookies cool on the baking sheet for 5-10 minutes, then transfer to a wire rack to cool completely. -
Step 7
Optional: Dust with powdered sugar once completely cooled.
Important Information
Nutrition Facts (Per Serving)
It is important to consider this information as approximate and not to use it as definitive health advice.
Allergy Information
Please check ingredients for potential allergens and consult a health professional if in doubt.

Leave a Comment